From the Workshop

April 30, 2014

window to my workshop 77

Filed under: A27 Bullnose,Window to my workshop — Tags: , , , — admin @ 10:53 am

Back working on the Bullnose after so much downtime with the grinding machine maintenance:


A27 Bullnose Holtey 1
 
 
A27 Bullnose Holtey 2
 
 
Pictures 1 – 4
This is the cast iron infill for the Bullnose. As you can see this is a complex shape so I will let the pictures speak for themselves. As with most things I design and make I go places that have never been visited, making these planes very unique.
 
 
A27 Bullnose Holtey 3
 
 
A27 Bullnose Holtey 4


A27 Bullnose Holtey 6
 

This shows the pin side of the dovetails being milled.
 

A27 Bullnose Holtey 5


Rebating the tops of the dovetail area, which provides a light stop and gives the dovetails a better form. Again this system is unique to my planes.

August 7, 2012

Calendar – Art Goes To Work

Filed under: Specials — Tags: — admin @ 2:18 pm

If you are looking for a nice tool calendar for next year have a look at this one: http://www.toolengraver.com/881-2/

Profits go to Woodnet Forum Christmas Fund.

April 26, 2012

Window to my Workshop 63

Filed under: No 982 Smoothing plane,Window to my workshop — Tags: , , , , — admin @ 12:16 pm


These are the front bun chairs and once the blanks have been cut and trimmed up true to uniformed size the central fixing hole is drilled whilst still in the lathe. They are then tapped with an 8 x 1.25mm thread; this is for the bun screw.

The 3 x 6mm fixings are drilled on a manual milling machine using an indexing head as shown.


With the three index holes now drilled I only need a tool change to tap these three holes whilst still in the chuck.


Now that all my fixing holes are complete it is back to the lathe to form a small spigot where the bun in engaged.


The last job on the chairs now is to finish the bottoms to the 15 deg offset to the front buns. A small fixture has been made for this purpose. The chairs are mounted with the three bolts.


The chair is held in its fixture and secured on the saw for cutting


Whilst the chair is still attached to the fixture it is clamped onto the tilting milling vice for surfacing to the desired dimension.


December 24, 2011

Window to my workshop 59

Mistakes – what is a mistake?
There are those that will always deny making mistakes and there are those that can keep smiling when they have made one as they have thought of someone to blame it on. So many projects can go off course along their journey, or find that the goalposts have been moved. Those with the creative thinking processes, for good or bad, can always find a solution; then only count its merits.
In the case of the No 10 plane, and its simplicity, there seemed nowhere to go wrong, but to be 100% sound in my mind I need to alter some of its dimensions. Having slept on it I have decided it is folly to rescue anything I am not completely happy with. This doesn’t sound much – just need to remake the sides and procure some new infill material. I have come too far now to take any risks. Reputations can’t be compromised. Luckily I haven’t had to use the reject bin too much over the years – it is due to put on weight.
Apologies to those waiting for their planes but as you can see from the blog below there is still steady progress.
—————–
In the making of my planes I rely quite a lot on a manual mill. So far throughout the making of these planes the machine has been in constant use.


There is a lot to be said for a good quality manual mill with a DRO. The skill is in setting up and operating these machines and along with essential hand working I am able to achieve standards that are impossible to achieve with hand work alone. In my cabinet making and joinery days there was always a division between machinists and hand workers. Why? I have always wanted to be involved in every aspect of the project from initial thought to the finished item. This is why I never outsource any of my work.


For some reason I have never looked forward to doing this stage of the work in stainless steel in spite of all the experience I gained with the No 98. With a good plan of attack stainless steel will lend itself to quite a lot of cutting and manipulation. There are some that shake at the knees at the mention of stainless steel. This picture shows the first stage of roughing out for the dovetails and in the following picture it shows the milling in the final stage with a forming tool. Note that the bottoms having the compound dovetail so they are made in mirrored pairs to simplify things.


Dovetails finished with all the mess cleaned away.
 
 
(more…)

August 2, 2011

Window to my workshop 52

A6 Part 2

*************
 

All of the woodworking has its edges squared up on the milling machine as I have a bit more confidence in this machine than I do a planer.


A pair of infill sides being drilled for riveting spacers. At this stage all edges are trued up


This is the infill side with the spacers pressed through the handle testing for fit. The two sides have yet to be separated.

(more…)

July 31, 2011

Window to my workshop 51

The last batch of A6 planes part 1

After receiving a commission for an A6 smoother I decided to make a batch of six. The A6 is probably the most time consuming of the infill planes (well perhaps the A7 is worse!). When using the designation A6 one should realise that my A6 is not to be compared with the Norris or any other plane of this type – it is made to a higher precision and has some innovations not seen in the original. This standard is beyond the scope of those without a tool room; I am not aware of any comparison. I work from a reasonably equipped tool room; not a production line. All work is done in house with the exception of heat treatment for the blades.

Although this model has been blogged before I am running it through again as this A6 is just that little bit more special. I always try to make the current plane better than the preceding one. Also these will be the very last Holtey A6 planes. For all my innovations and upgrades my work is veiled by the Norris history and I feel it is time to move on.

************************

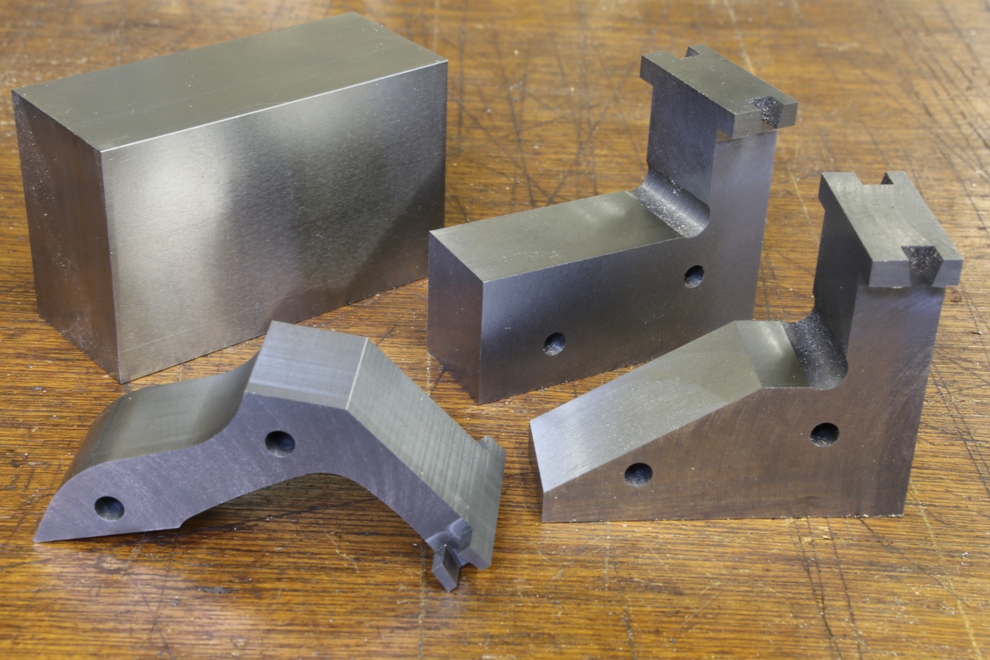
The first part of starting the plane is to get the timber chosen and prepared so giving the wood some time to settle whilst making a start on the metal work.
 

Here is a stunning piece of Cocobolo (Dalbergia Retusa) which was cut from a very nice log that I acquired from Timber Line a couple of years ago – thanks to a friend who spotted it on a visit there. This is the basic roughing out for the infill components.


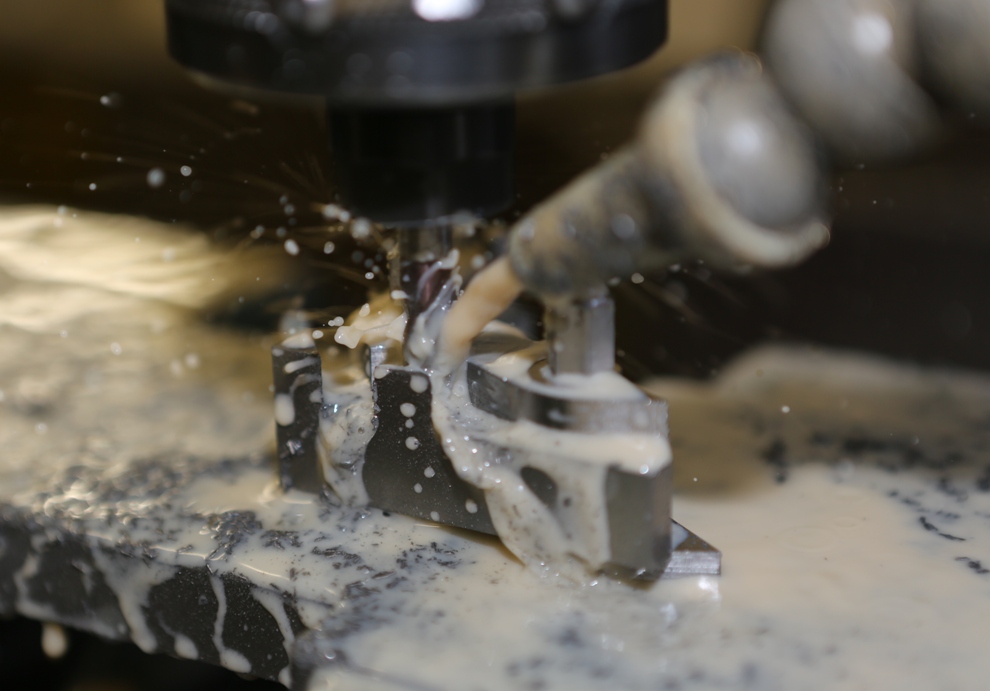
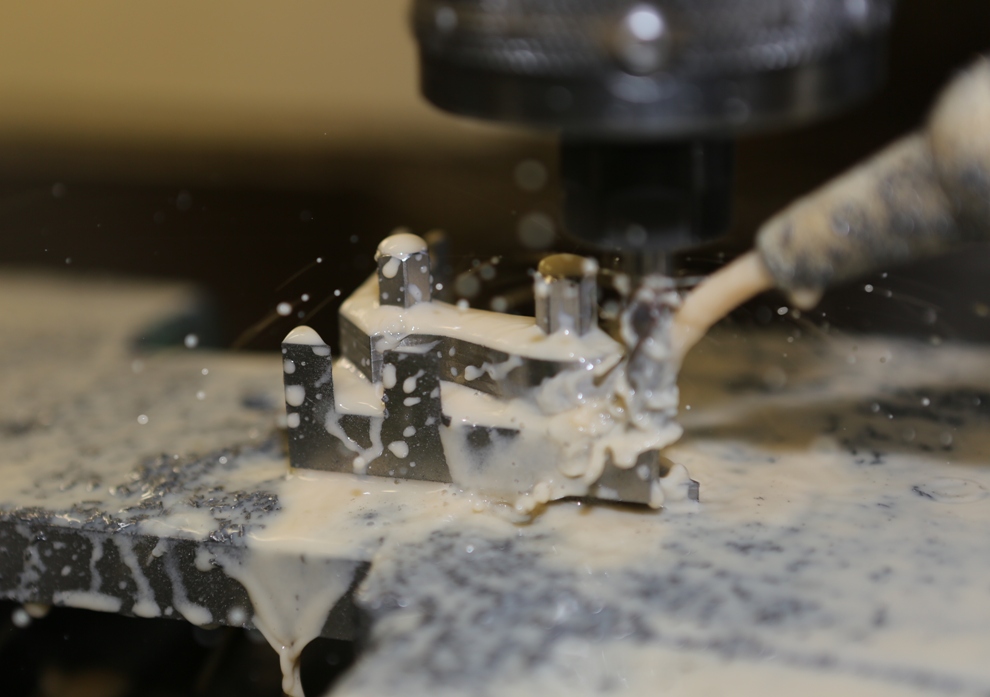
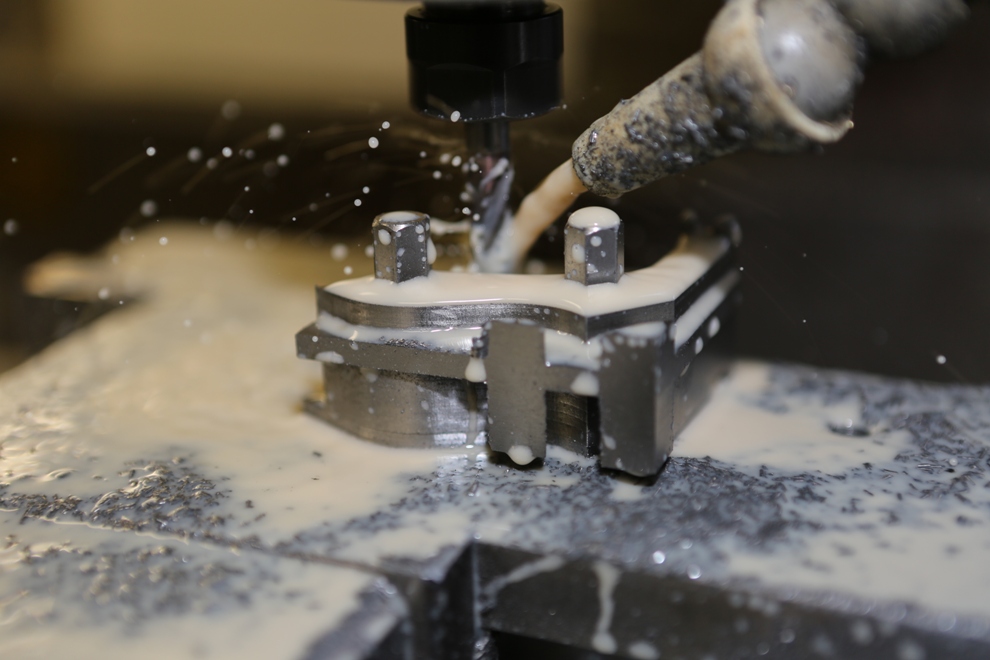
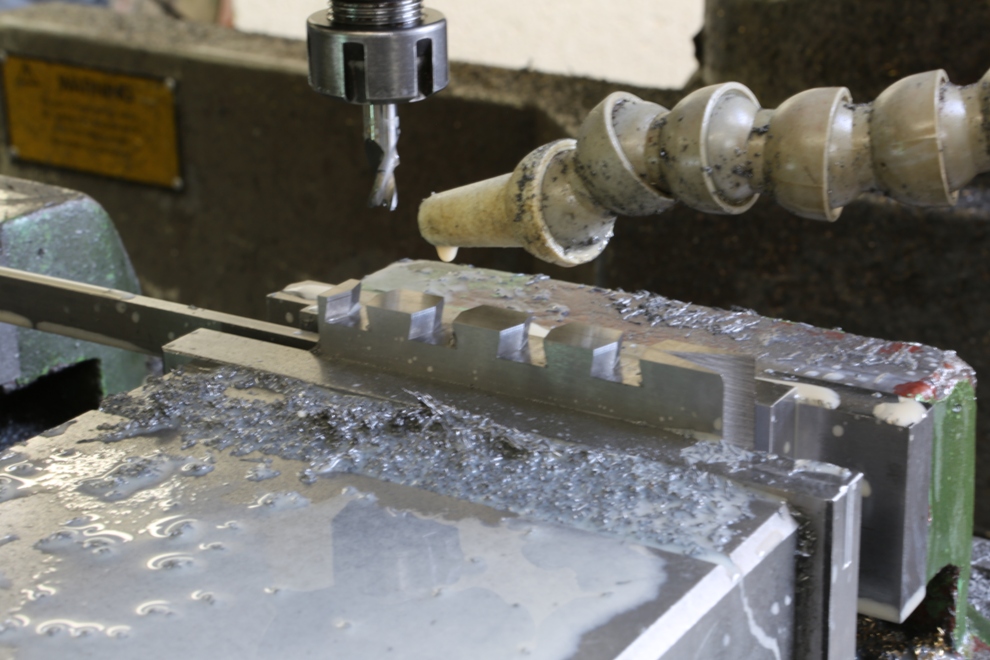
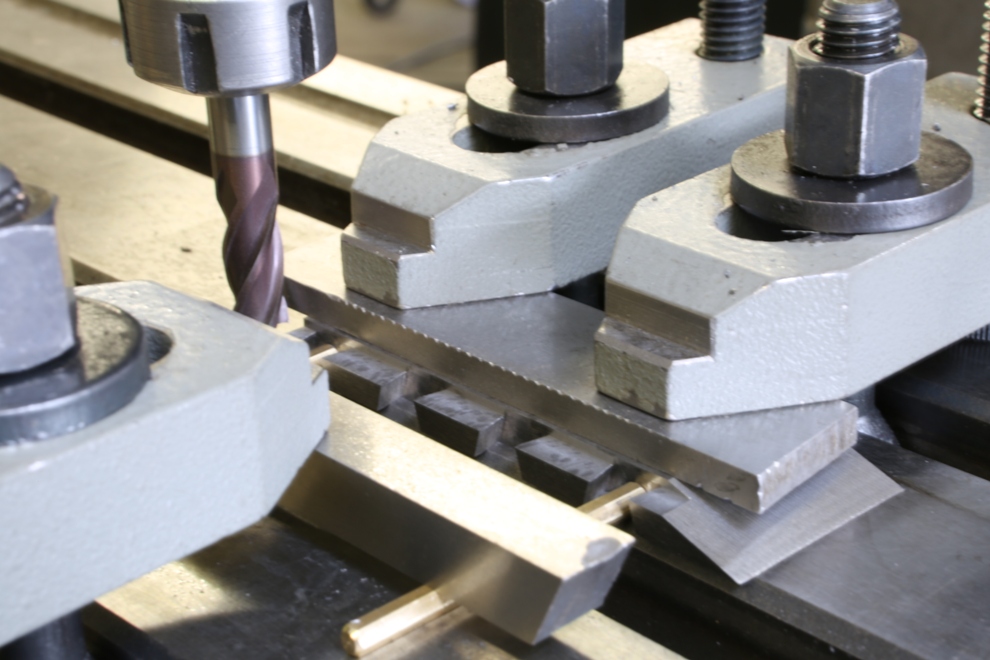
With the wood put aside to rest, a good starting point is the blades as they need to be sent away for the heat treatment. This shows the milling of the faceted end and slot.
(more…)

February 13, 2011

Window to my workshop 50

Some pictures of the completed No 982 panel planes (14 1/2″).  I made a limited edition of 8 of these planes, a few were made with the brass cones. 


(more…)

December 26, 2010

Window to my workshop 48


Now that the No 982 lever caps are 99% complete I shall move on.


The beginning.  Cutting up bottoms and sides from hot rolled black mild steel.  This is a very malleable material with no stresses.
(more…)

November 21, 2010

Window to my workshop 47

After the completion of the No 982 smoothing planes it was not long before I was pressed into making a larger version in the form of a panel plane.  Because of the enormity of work on this plane I have decided to make only 8 for this batch. 

 For the benefit of those who have bought this plane I would like to blog the making.  Hopefully it will show up some areas I did not cover on the smoothing plane blog.

 You will notice that I do change my techniques from time to time.

 I will start this blog by documenting the work on the lever cap.  I would like to emphasise the work that goes into this one component.  Though I have used castings in the past for my lever caps I feel more in control by making them from a solid bar and I produce a far better product.  I  now understand why some of the Rolls Royce cameras bodies are made from solid billets.

Starting with a bar of naval brass I go round and machine all the sides true, just like you would with a piece of wood.

If this was a piece of wood the next stage would be to machine a form i.e. either with a spindle or a router.  In the case of metals I have to concentrate more on work holding so this picture shows me setting up three vices in a line.  The bars I am working are 18 inches long and cut 8 lever caps each.
(more…)

October 18, 2010

Window to my workshop 46

As I am currently working on a small batch of No 982 14 1/2″ panel planes I thought I would show this picture of all the component parts of the smoother.   Most of the parts are going to be the same.

This picture excludes taper pins, handle, lever cap, screw and adjuster.

There will be more pictures as I work through the project.

« Newer PostsOlder Posts »

Powered by WordPress