Work in progress on the new No 983 stainless steel block plane

Integral pins are back! These pins are cut 0.22″ long, cut full depth in one go with a 6mm roughing cutter. Then go round the houses again with a 6mm finishing cutter. Some people don’t believe that I can cut these pins full depth in one go in s/s (or any other material). It is just a matter of getting things right.
The last job is to put a tiny lead chamfer which not only makes an easier entry but it helps to prevent the edges from splitting during the peining process.
June 14, 2013
Window to my workshop 67 – No 983
September 5, 2012
New Project – A31 Thumb plane

Selected wood for my next project – A31 thumb plane (probably the last batch)

Best part of the metal work well on the way
November 8, 2011
A Perspective in Exotic Woods
I have obtained some very exotic woods over the past few years but undoubtedly at ‘the top of the tree’ would be Zitan (pterocarpus santalinus), a much coveted wood by the Chinese. There is some more information on my website .
It has always been my intention to fill some of my small low angle planes with this very rare and valuable wood. I think this wood is unknown to most Westerners. I really want to use this in some very special editions. Normally the cost of materials is a small percentage of the price of a plane compared to the labour cost but these planes will have to be at a premium. In the scale of things it would be justifiable to use this extravagant material.
These planes will be rare as I only have a small amount of this wood and I have more chance of winning the lottery than obtaining more (even allowing for the fact I don’t buy lottery tickets!).


These are two very good examples of the oriflame colouring that Zitan is known for. Once exposed to the light and atmosphere it will go dark and in some cases black.
November 1, 2011
Window to my workshop 58
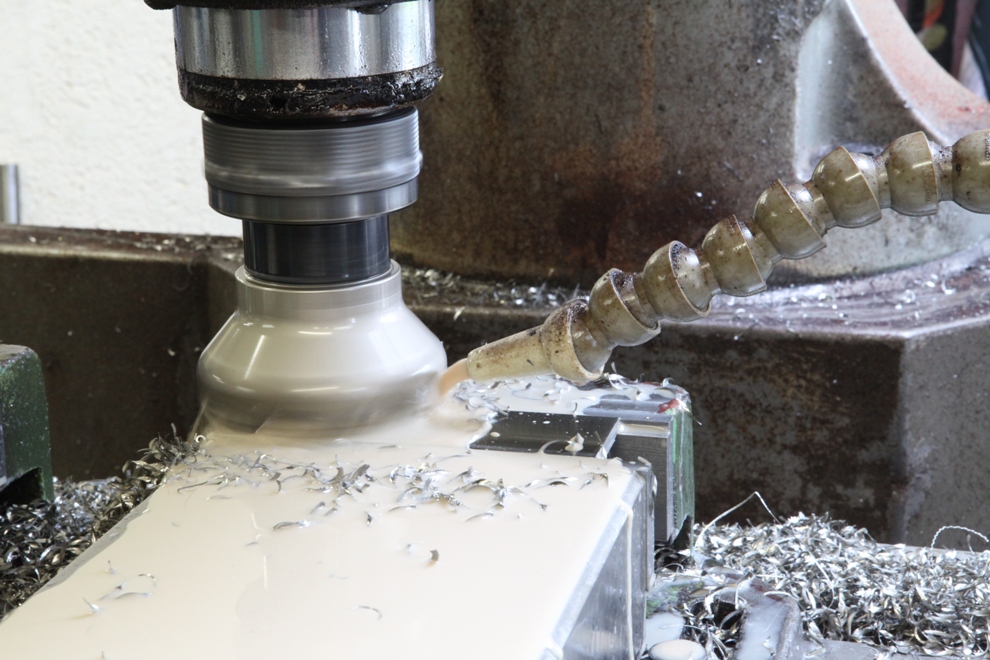
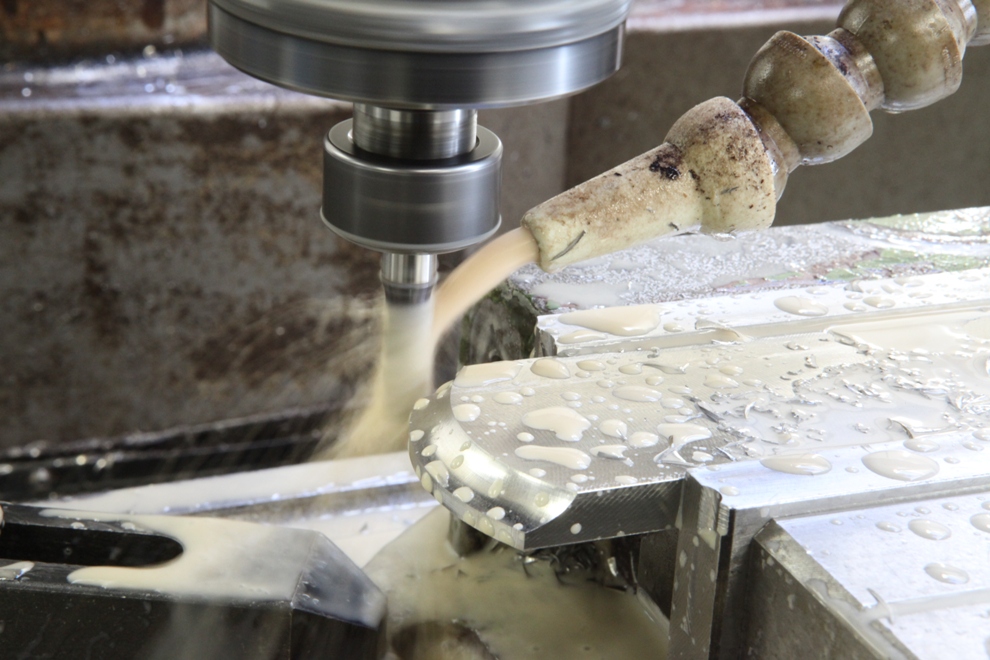
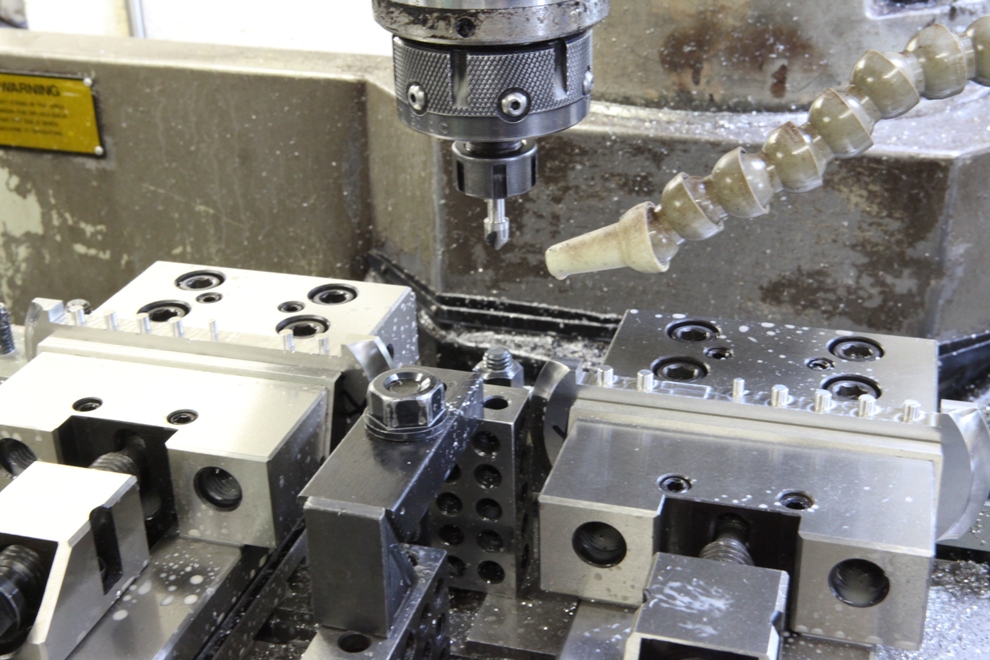
The work has started on the stainless steel bottoms of these No 10 smoother/mitres. This will probably be the only batch of infill planes I will make using stainless steel. This particular batch is 304 which was cropped from a sheet. The problem with this is the bruised edges have work hardened to the point that nothing will break through the hard skin which has been generated from the use of a break press. Never the less I am committed to progress now.
I do plan to use stainless steel on my non-infill planes in future for the obvious advantages. However with infill planes some of the metal has to be worked dry after the infill is fitted as I cannot use coolant. I am not happy working stainless without the use of coolant. Stainless steel is a complex alloy, any cutting needs to be done with the correct surface speed and it also benefits from some cooling and lubrication.
A little anecdote:
Many years ago I spent a short amount of time gliding. The club that I was flying with were using some fairly old gliders that had a wooden skid which was more suitable for landing on grass. Most of the landings at this airfield were done on concrete. This meant that they were fixing steel strips to the undersides of the skids to take up some of the wear. Unfortunately these didn’t wear too well and it was constant work fitting new strips. Upon my suggestion we replaced these strips with a stainless steel plate, preformed to the curvature of the skid, expecting to achieve a longer life. This was certainly fulfilled.
Unfortunately there was a slight side effect. Because of the problems from abrasions on landing and a high surface speed it created a considerable amount of hardening. Causing the stainless to repel anything when there is a high surface speed.
Those who have ever flown this type of glider knows that it was useful to press down on the front of the gilder using the skid as a brake, as the brakes never worked well but to use the skid as a brake is bad form and bad for the skid. With the stainless steel on the skid the effect was like landing on ice! The club’s no 1 instructor, who was forever moaning about using the skids as brakes, overshot on his first landing with the new skids and got into an argument with some barb wire and a hedge. The club rapidly decided to do something about their poor brakes.

Face milling the bottom blank.

Showing the extremely rigid clamping fixture to ensure repeatability and regular thickness of this plane bottom. This is a lot more complicated than surface grinding.
(more…)
October 19, 2011
Window to my workshop 56

Some of the woods that I intend to use in the No 10. Although it doesn’t look at its best at this stage I am putting the picture up to satisfy an enquiry. There is ebony, box and rosewood.

This wood is very, very special. It is Pterocarpus santalinus. As it comes at a premium it will only be appreciated by those who are familiar with this wood.

I think I have been here before, though in a different application.
(more…)
October 17, 2011
Window to my workshop 55
No 10 smoother/mitre
A very patient customer asked me to make a small mitre plane. He wanted a 11/4” wide blade to be bedded at 25 deg and bevel up with a short body. No adjuster was required.
I would classify this plane as a smoother/mitre. The small mitre plane has always seemed to be surprisingly scarce for its usefulness. Having got my simple sketch approved the first batch is now well on the way (the sketch can be seen on the website here http://www.holteyplanes.com/).
It is a combined stainless steel bottom with naval brass dovetailed sides and brass lever cap and thumb screw. The blade is in my A2 original specification and has a top sneck. The length of the plane is 43/4“.
Despite its apparent austerity there will be no lacking in specification and quality. The designation will be No.10. Delivery will be end of November 2011.


What better place to start than the blades. Here are the A2 blanks being drilled and shaped. These are now away being heat treated (the only work to be done out of house).


Brass sides have been cut from sheet and trued up into rectangular blanks.
(more…)
September 7, 2011
Window to my workshop 54
The final part of the A6 construction.

Drilling and countersinking frogs for the rivets.

The bottom has been slotted out for mouth and drilling for the corresponding frog rivets.
(more…)
August 9, 2011
Window to my workshop 53
Adjuster components for A6

This item is most commonly known as the banjo and it is the most work intensive component in the whole plane. This picture shows that it comes out of a round bar.


There is a lot of preparation but this is not a step by step instruction manual, it is just a few snapshots. In these pictures, after lots of preparation I start to ball generate the round part of this component.
(more…)
August 2, 2011
Window to my workshop 52
A6 Part 2
*************

All of the woodworking has its edges squared up on the milling machine as I have a bit more confidence in this machine than I do a planer.

A pair of infill sides being drilled for riveting spacers. At this stage all edges are trued up

This is the infill side with the spacers pressed through the handle testing for fit. The two sides have yet to be separated.
July 31, 2011
Window to my workshop 51
The last batch of A6 planes part 1
After receiving a commission for an A6 smoother I decided to make a batch of six. The A6 is probably the most time consuming of the infill planes (well perhaps the A7 is worse!). When using the designation A6 one should realise that my A6 is not to be compared with the Norris or any other plane of this type – it is made to a higher precision and has some innovations not seen in the original. This standard is beyond the scope of those without a tool room; I am not aware of any comparison. I work from a reasonably equipped tool room; not a production line. All work is done in house with the exception of heat treatment for the blades.
Although this model has been blogged before I am running it through again as this A6 is just that little bit more special. I always try to make the current plane better than the preceding one. Also these will be the very last Holtey A6 planes. For all my innovations and upgrades my work is veiled by the Norris history and I feel it is time to move on.
************************
The first part of starting the plane is to get the timber chosen and prepared so giving the wood some time to settle whilst making a start on the metal work.

Here is a stunning piece of Cocobolo (Dalbergia Retusa) which was cut from a very nice log that I acquired from Timber Line a couple of years ago – thanks to a friend who spotted it on a visit there. This is the basic roughing out for the infill components.


With the wood put aside to rest, a good starting point is the blades as they need to be sent away for the heat treatment. This shows the milling of the faceted end and slot.
(more…)