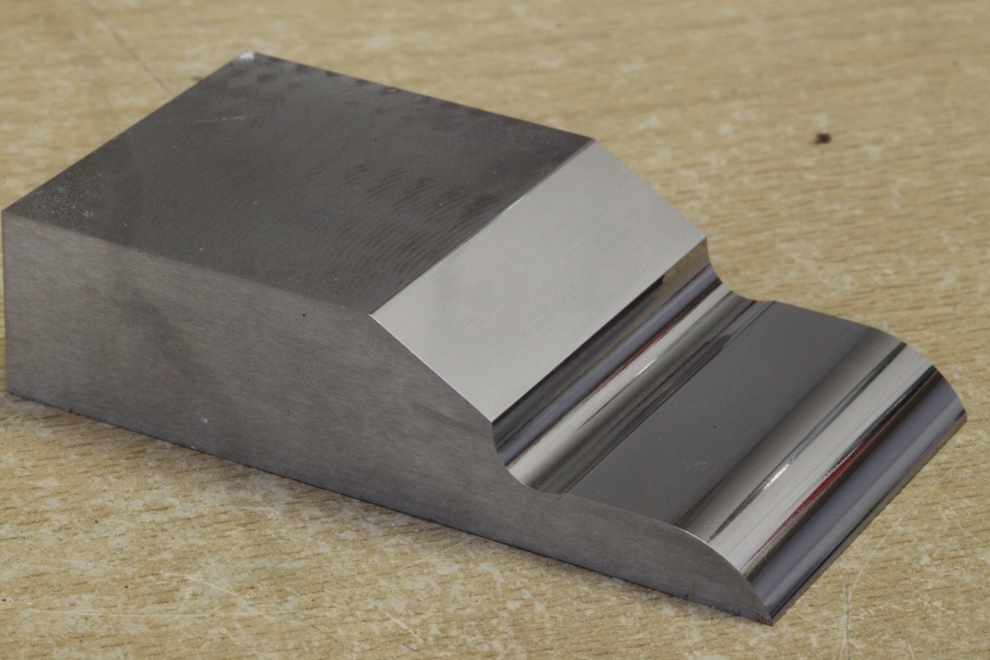
Final tweaking and polishing before assembly
Once assembled there is no access
Final tweaking and polishing before assembly
Once assembled there is no access
During the working of this A28 plane I have been neglecting this blog but now I am ready to update which I will do over the next few weeks.

All the sections I use are cut out of stock material and brought down to size, by sawing and milling.
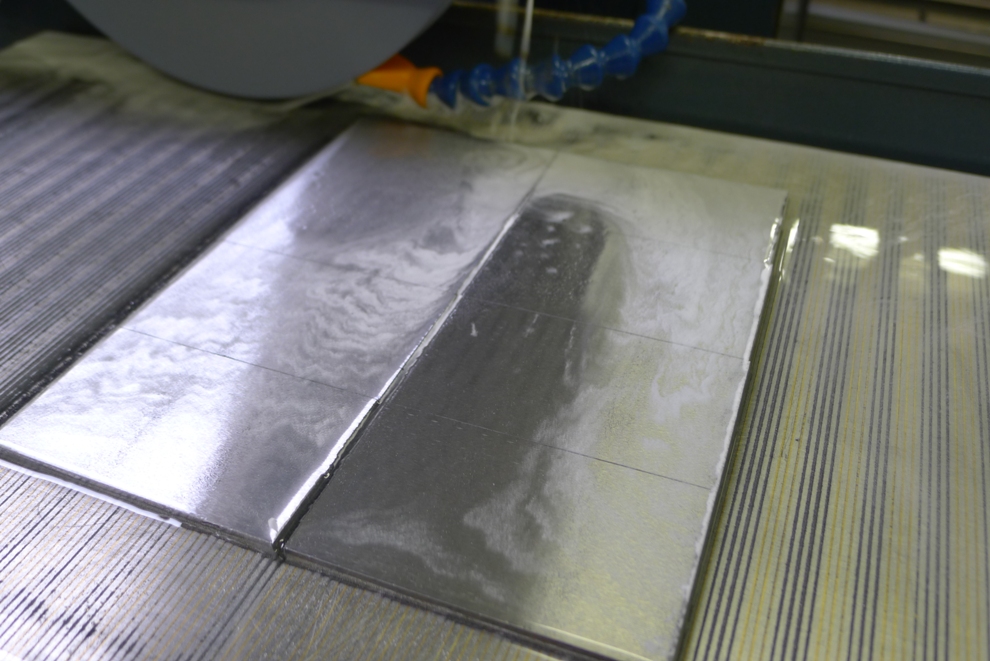
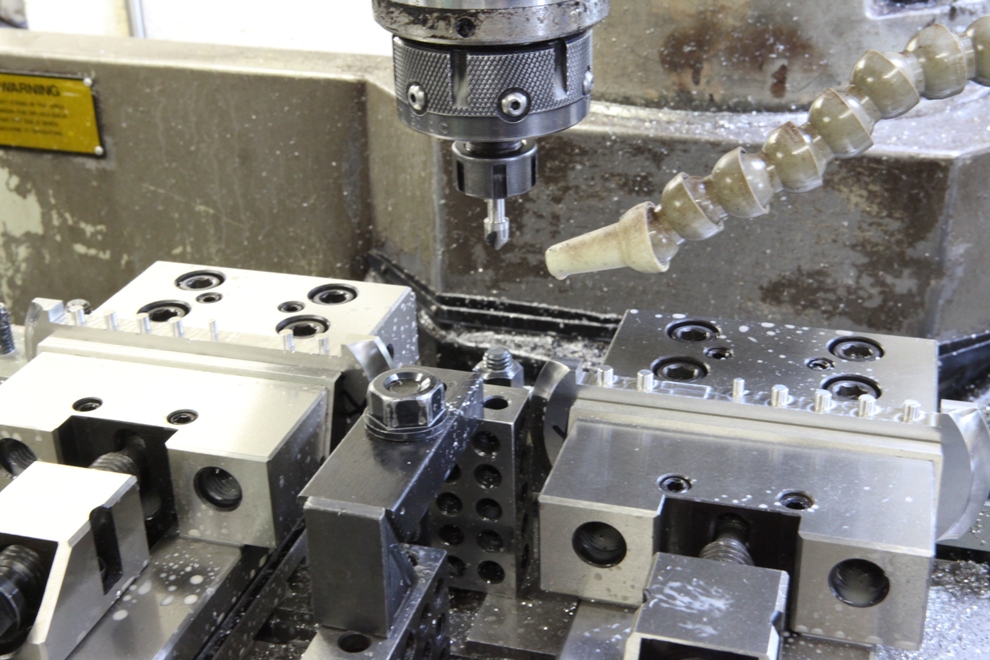
As most of my working and setting out depends on a high degree of precision (which has never existed before) surface grinding in the early stages allows me to achieve my goals.
This picture shows the edges being ground. This is also important to have a true pinch dimension. I need this for the dovetailing.
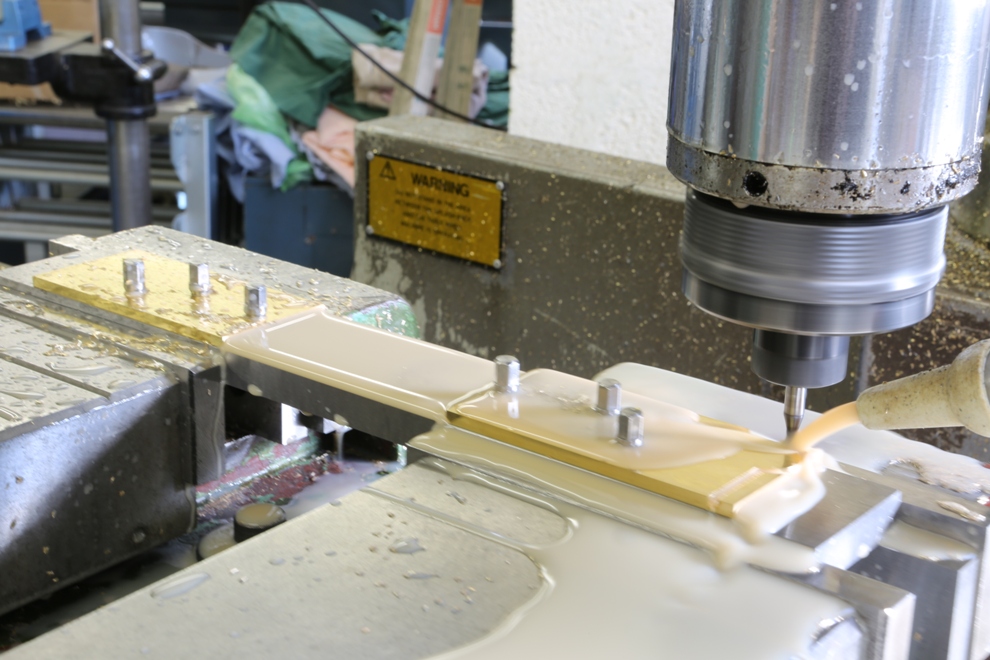
Jigs and work holding fixtures are also all made to precision. After much preparation work to the brass, similar to the steel work as described. Then rivet positions are drilled and I am able to screw these sides with purpose made bolts to the fixture for profiling and chamfering.
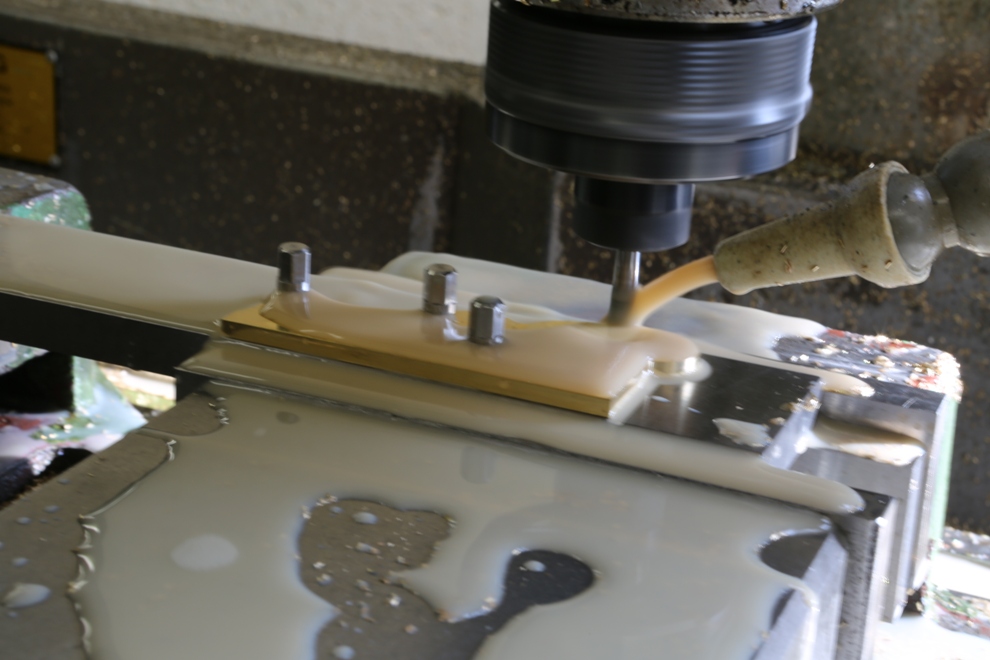
After routing out the profile then the chamfering is completed whilst the sides are still jigged.

Just overall set up pictures.
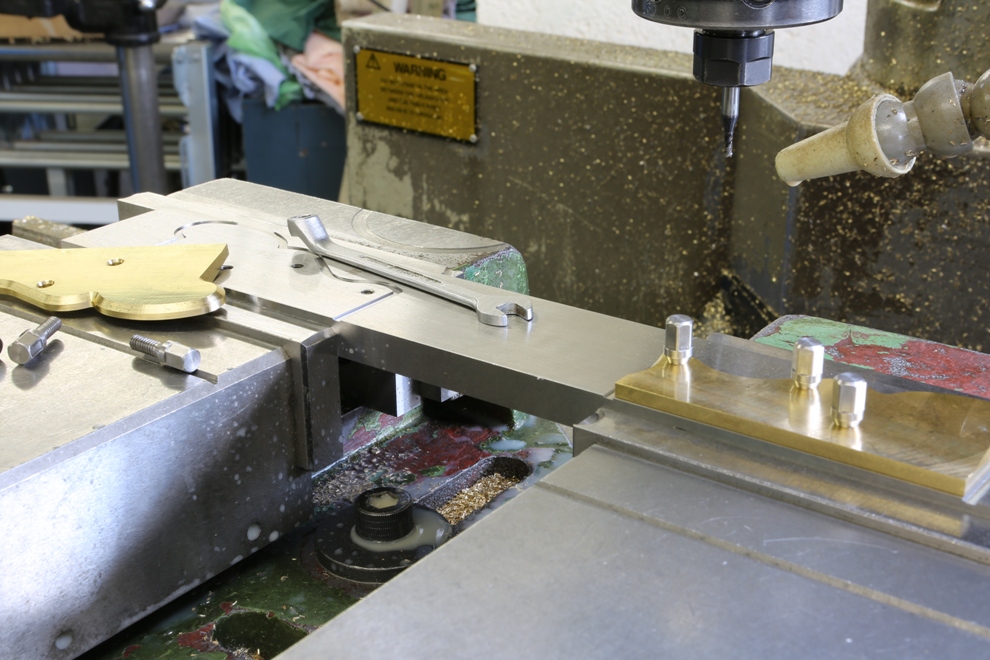
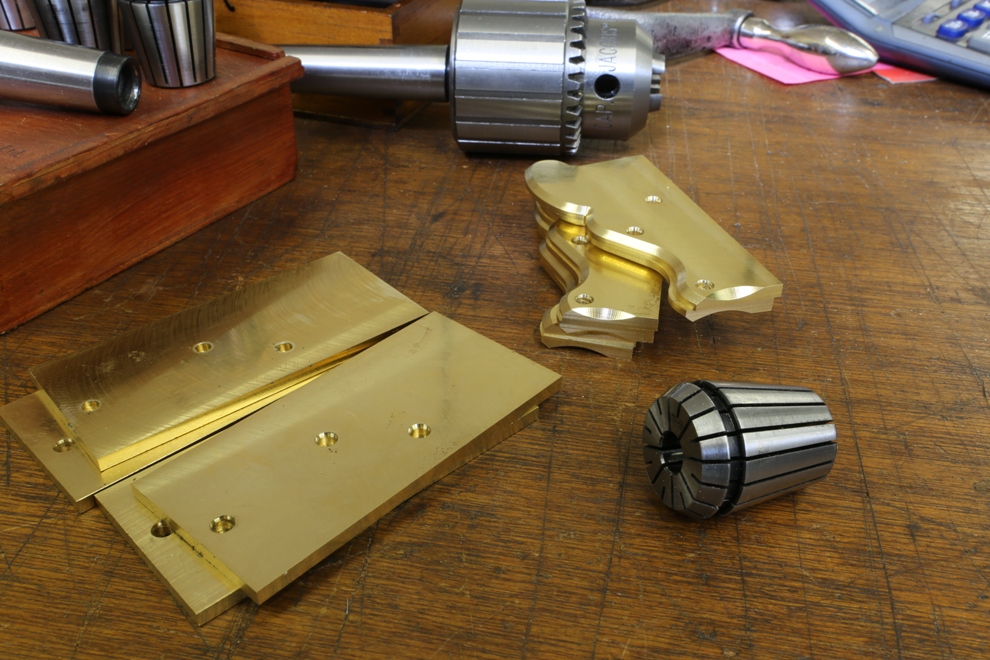
Here are the some sides already milled and some pre-prepared waiting for profiling.
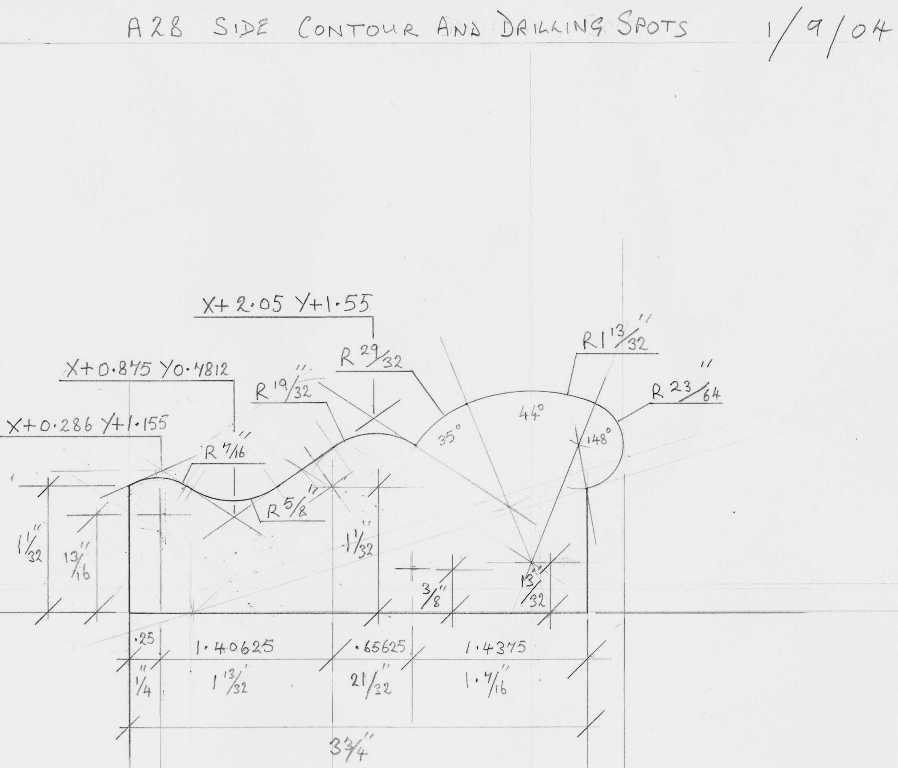
This Chariot is the last item in the series of low angle planes I have been making recently. I have only made a few of these planes and that was a long time ago in my early days of plane making. Then my side profiles were cut by hand and I made up a template which I would scribe round. Now that I CNC these the machine can’t see my template so I have had to re-draw it showing co-ordinates to write a programme from.
This line drawing by today’s standards might look a bit primitive but I have never had the leisure to learn to use a CAD. With a drawing showing contours I can write this in to my control unit. Drawing contours is more instinct than anything and I just know when it is right however long it takes (I would be ashamed to tell you how long these ones took).
One of the problems of making precision planes is needing your own tool room. This means that on occasions maintenance is necessary.
A simple task like cleaning my coolant tank got so complicated that two weeks went passed before I could get the grinding machine back in service again.
My schedule is now running late and I am looking forward to getting back to working on planes again.
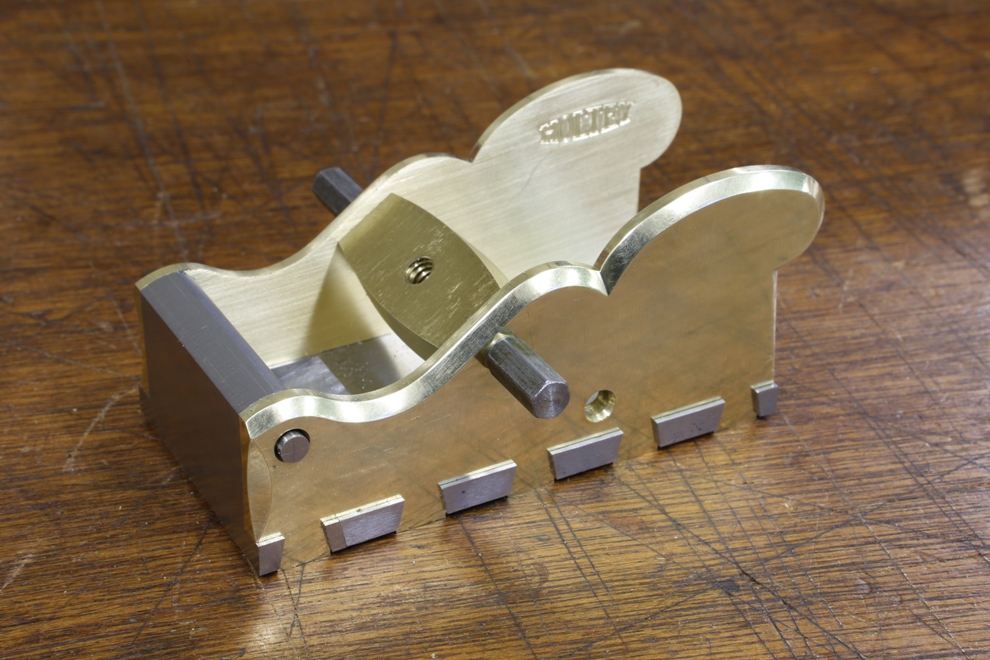
As this lever cap has taken a very long time to make I thought this picture, of it not even half way completed, tells some of the story. The milling, grinding and polishing has to done in sequence to achieve the finish I require. It will be a complex shape when completed.
Work in progress on the new No 983 stainless steel block plane

Integral pins are back! These pins are cut 0.22″ long, cut full depth in one go with a 6mm roughing cutter. Then go round the houses again with a 6mm finishing cutter. Some people don’t believe that I can cut these pins full depth in one go in s/s (or any other material). It is just a matter of getting things right.
The last job is to put a tiny lead chamfer which not only makes an easier entry but it helps to prevent the edges from splitting during the peining process.
Continuation of the last batch of No 982 planes

There are two reasons that I use the surface grinder a lot; the main one is for the precision and also for the nice textured finish. This usually means that I visit the surface grinder several times during the working of the plane as no matter how careful I handle the work pieces they seem to break out in a ‘workshop’ rash very quickly.
This picture here is the sides being ground true after the drilling and tapping. This also leaves the bottoms a true uniformed width and square.

Of course the time comes when the toe of the plane needs to be separated from the rear end. I can lose a lot of sleep here as mistakes are so easy. Any mistakes here will cost me dearly.

With the front and back ends of the bottom now separated each part is then milled to size and angle.


All my marks are stamped with my fly press which I couldn’t exist without. The No 982 plane is stamped with an edition and its number, the plane type is stamped on the front end of the bottom (just behind the bun). The HOLTEY logo is stamped on the inside of the right hand side of the plane.

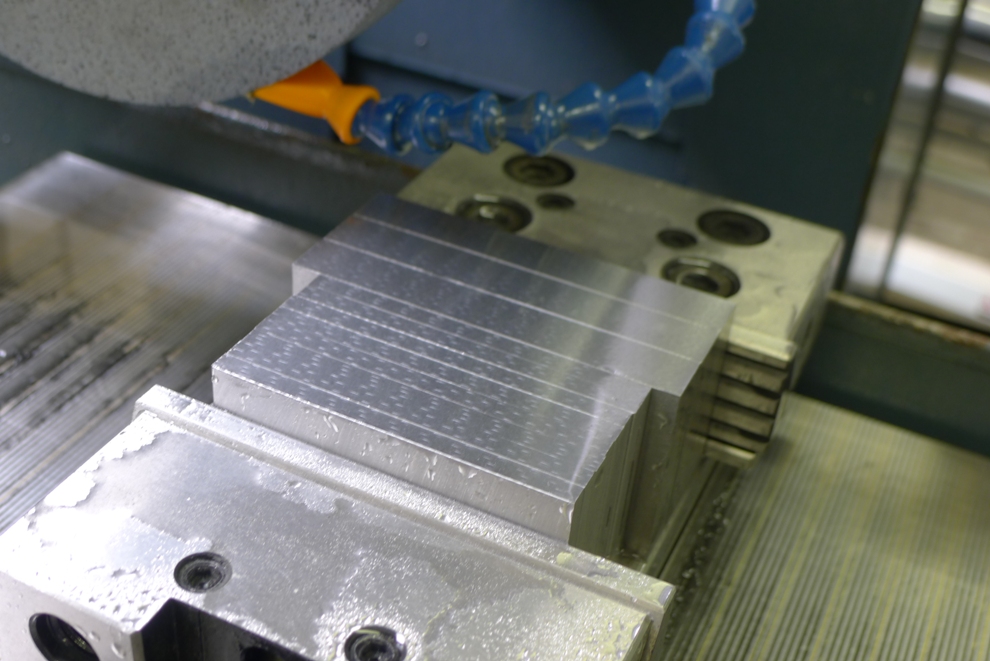
The 55 deg milled bed is surface ground maintaining the angle to precision. This picture may be a little blurred but I wanted to catch the sparks.

Now the front end. I use two angles here. The one being ground here is the critical one because this is going to be the mouth of the plane. This is in a similar tradition to some of the wooden planes and is much easier to regulate a small aperture as desired by some.

This angle here helps to provide a better means of escape for the shavings and access for cleaning. The grinding here is mainly cosmetic.
Continuation from Blog 61

Now I have two flat sides the edges can be milled bringing them to width, leaving a couple of thou for surface grinding. This means that the edges will be perfectly square and will form an invisible joint. It is important that when the plane body is assembled everything is flat and square – unlike dovetailing which incurs a lot of stress from peining.

The rounding on the ends, a task easily carried out on the CNC mill.

This is the drilling for the 3 x 6mm purpose made bolts to fix the rear handle chair. I need to make some more of the bolts so will document them later on.

These three holes for the rear handle are then reamed (which I think is the correct word and not countersunk). This is done with a 40 deg tapered mill which will match the heads on the bolts. With this angle you get a good retention and pressure for some deformation, resulting in that invisible joint.


These are the fixing holes for the front bun using the same drilling and reaming operation as previously described. This time these holes are drilled at a 15 deg angle and indexed with 120 deg spacing. The CNC mill is particularly useful for indexing and convenient as I am drilling on a gradient.

The fixing holes for the sides. There are a total of 11 x 5mm holes per edge. As the holes are not drilled on the centre line they need to be mirrored. The picture shows my set up using a second vice for the mirror holes. To achieve this many holes without a CNC mill would be very stressful and time

My Semco vertical milling machine which is an exact Chinese copy of a Bridgeport. It is fitted with an Anilam Wizard 211 DRO. I have had it a for quite some years now and it serves me well.

It is a pity that my CNC mill does not do tapping. So the plane bottoms had to be set up on the manual mill. However, with the aid of the DRO and an automatic tapping head the tapping of the holes is carried out to standard and in a timely manner. There are a few cheap tapping heads on the market but I would go for a Tapmatic every time, worth its money.
What is a plane maker’s workshop?
When I first started making planes and was putting together a workshop with a very small budget, I had no idea what form the workshop was going to take – and I still don’t. I started with just a small Tom Senior milling machine, a 5” Raglan screw cutting lathe and a Fobco drill press. Looking back I can see that not only have I come a long way in improving my workshop but also in build and quality of my work. From the start I have always striven to make each plane better than the last. Although I have already covered the subject of my No 982 smoother plane elsewhere on the blog I thought that since I am currently working on the last batch (this plane is limited to 16 of each type, with and without brass cones) I would take the opportunity to described my workshop and some of the machines in it.
Jaespa W220DG Saw

In the beginning I was cutting everything by hand and didn’t even have a wood machine. It was a quantum leap just to get an ordinary band saw. After buying a pull down saw I found it unsuitable as it meant I had to be in attendance full time with the machine to pull down on the handle. I replaced it very rapidly with this Jaespa bow saw. It is the best friend any workshop could have. Very little gets passed this machine.


Here I am taking advantage of the 10 x 10” capacity to reduce the width of a pre-cut bar from my stock for the No 982 bottoms. This machine has a gravity feed controlled by a hydraulic valve which means that in the case of heavy workloads I don’t need to stand with the machine. This allows me to run more than one machine at a time (on occasions several machines).
The Milling

In the foreground is my workhorse. A Bridgeport Series II Interact 2, which must be 20 years old and like me, is showing its age. This was one of the early CNC mills controlled by an Heidenhain TNC 151 (by today’s standard it is an abacus). A replacement for this machine would cost a very nice new car.

As you will see throughout all my blogs I use it for many operations and here I am using it to mill and de-scale this hot rolled bar which is to be used for the No 982 bottoms.
This machine is my only experience in programming and it has taken me a long time to reach some proficiency. I wouldn’t want to replace this machine with a VMC but I would like a nice open style bed mill with an Heidenhain control (in my dreams).
Although my current machine performs many tasks it is still limited (in scope but not in work quality) and I sometimes find things easier to do on my manual mill. I have also become very dependent on DROs and no longer trust vernier readings.
It is such a wide range of work that this CNC mill does I no longer want to do my work without it. As much as I might want a CNC lathe I would sooner update my current mill first.
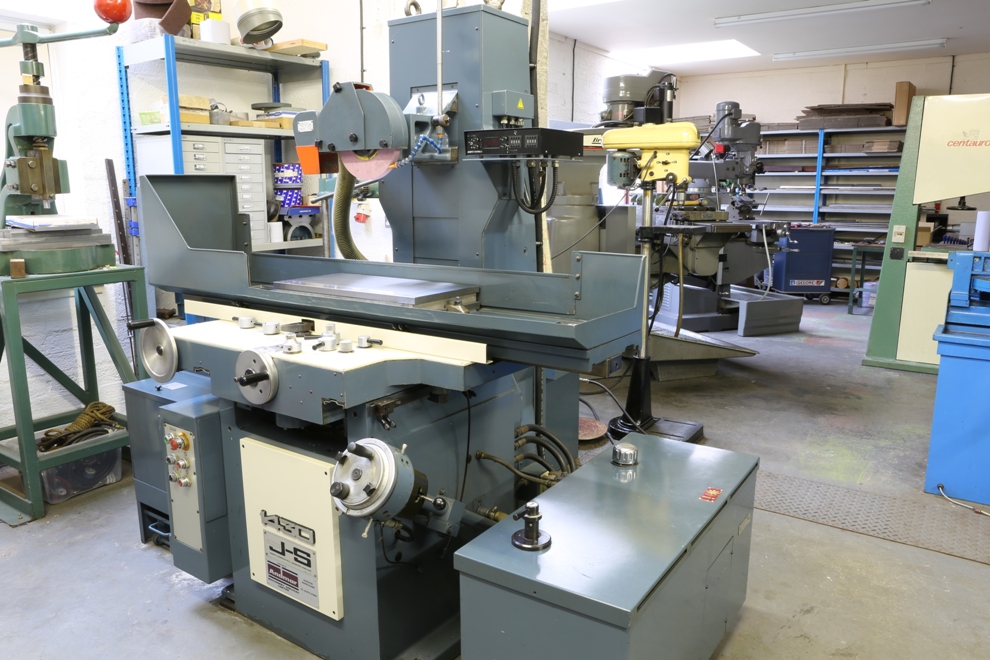
Jones and Shipman 1430 semi automatic surface grinder

Up until 9 years ago I outsourced the grinding for my blades and it was my experience that outsourcing is fraught with problems. I was extremely fortunate to find a machine of this quality which allowed me to do the grinding myself and enabling me to keep everything in house. The machine was originally made in the 1960’s but had just been rebuilt by Andmar (who work very closely with Jones and Shipman to achieve the good build quality). This machine has a good 2’ x 1’ chuck and it has proved very useful for much more than just blades. I have also become very dependent on it for tool making, as I make all my own tools and work holding jigs. In short, this machine has improved the standard of accuracy to everything that is made in my workshop.


All the bottoms and sides of my No 98 series planes are ground on all sides and again after assembly for the final finish.
Was it really Christmas Eve since I last blogged!!!!!!
The first batch of planes are now finished, they were not easy but it hasn’t taken me 10 solid weeks to get this far.

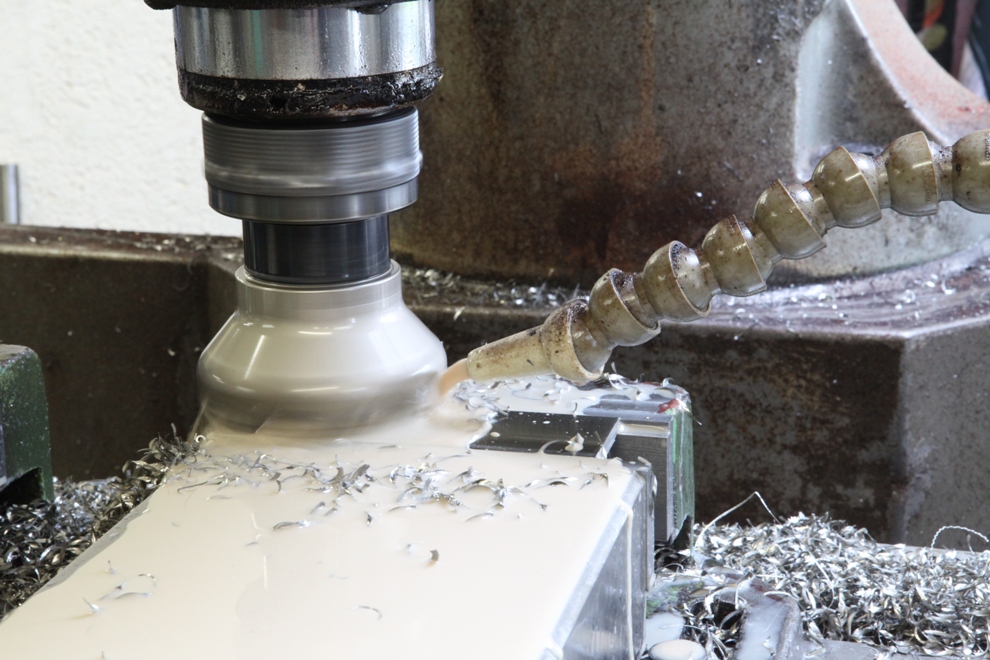
I seem to have landed here without any pictures of separating the bottoms into front and rear. This picture now shows the beds being milled. There is a surprising amount of material to move and has cost me a considerable amount in tooling. Stainless steel does have its disadvantages.

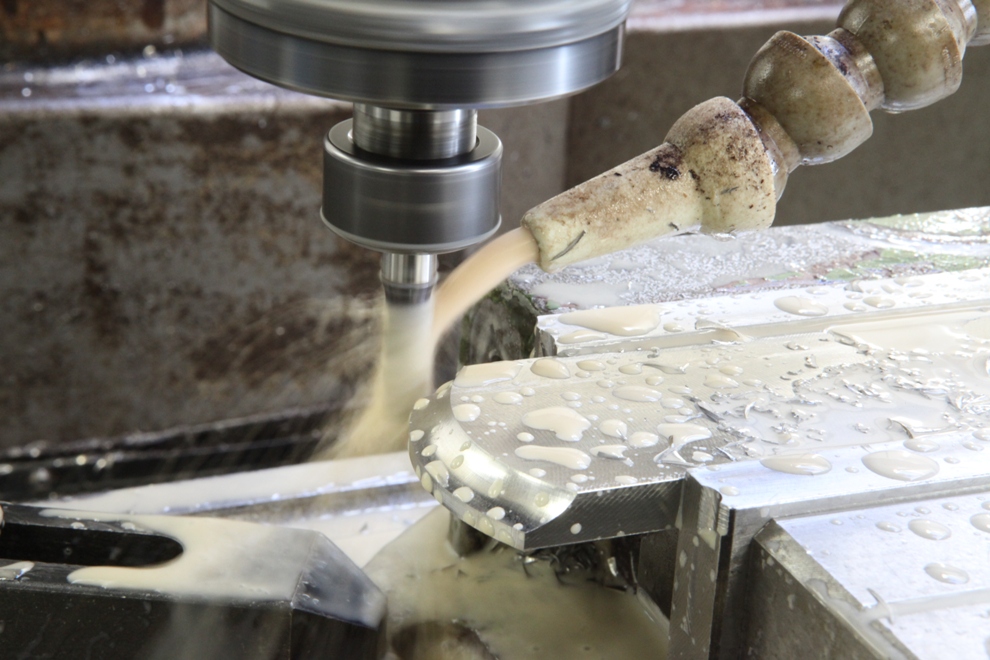
The front end of the bottom. There are two operations here. The first one is to machine the angle for the front end of the mouth then a small rebate is machined to catch the sides of the mouth from the rear section. This will lend a desirable amount of support, especially when it comes to peining the dovetails otherwise this part of the dovetail will cave into the mouth. It also provides additional rigidity to the plane body because any stresses could force the two halves of the plane to jiggle. It doesn’t sound very technical but it is descriptive. It could show a step where the front and the rear of the bottom join. Of course we are only talking very small amounts here (+/- 2 thou).
Something that always amuses me on the traditional mitres is the tongue and groove joint. This does absolutely nothing.
(more…)
Powered by WordPress