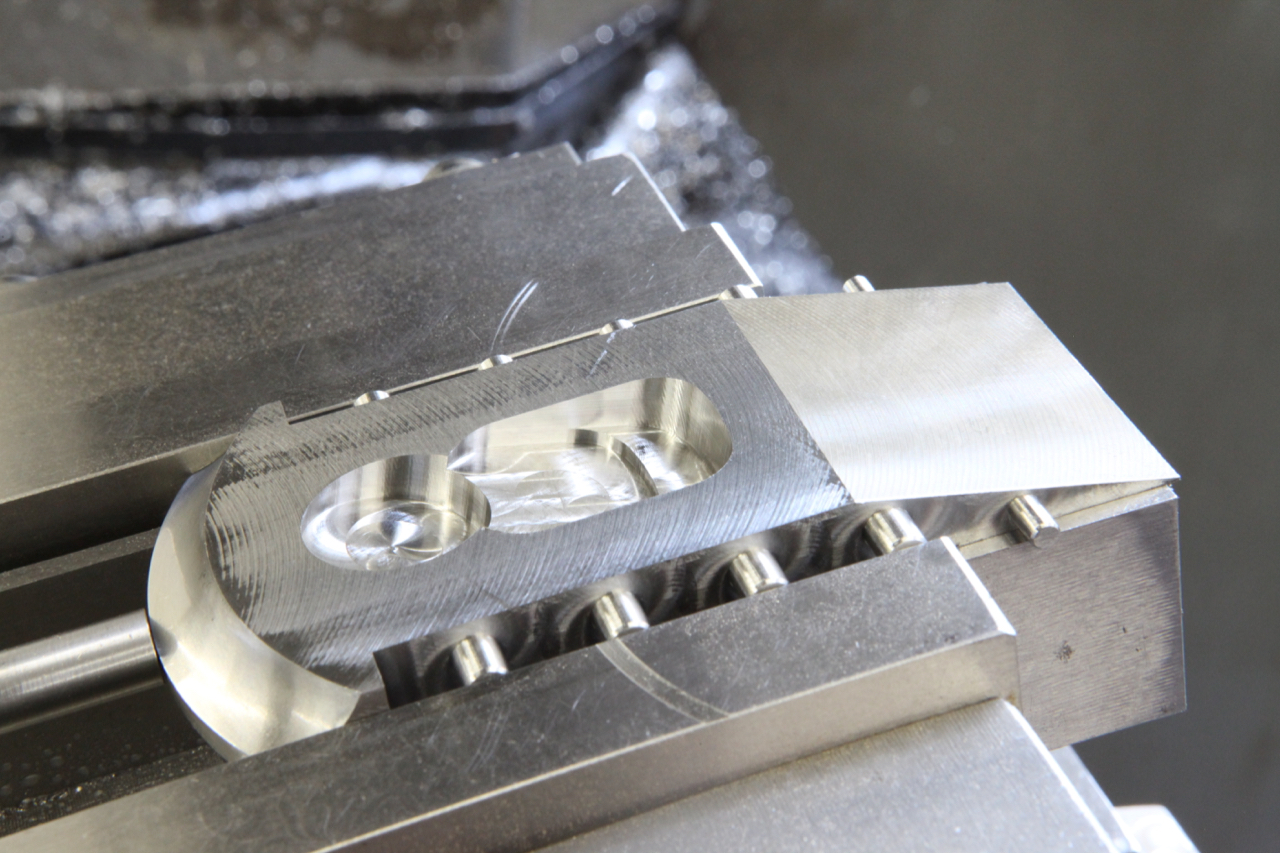
Showing the bottom blade bed modified to stop the blade passing through the mouth.
Showing the bottom blade bed modified to stop the blade passing through the mouth.
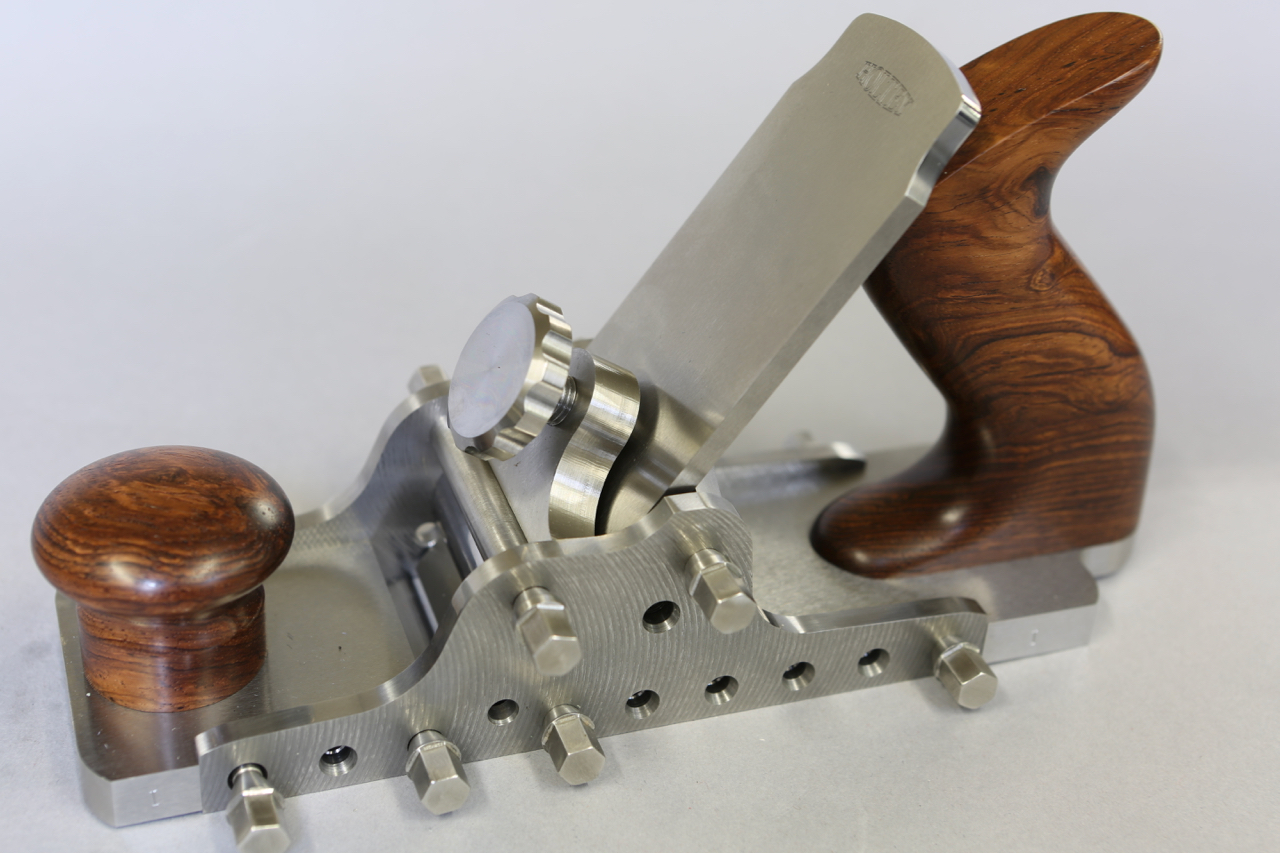
Just thought I would put this picture up of the No 985 smoother in its chrysalis form, still some work to go but on course to be completed for the end of the month.
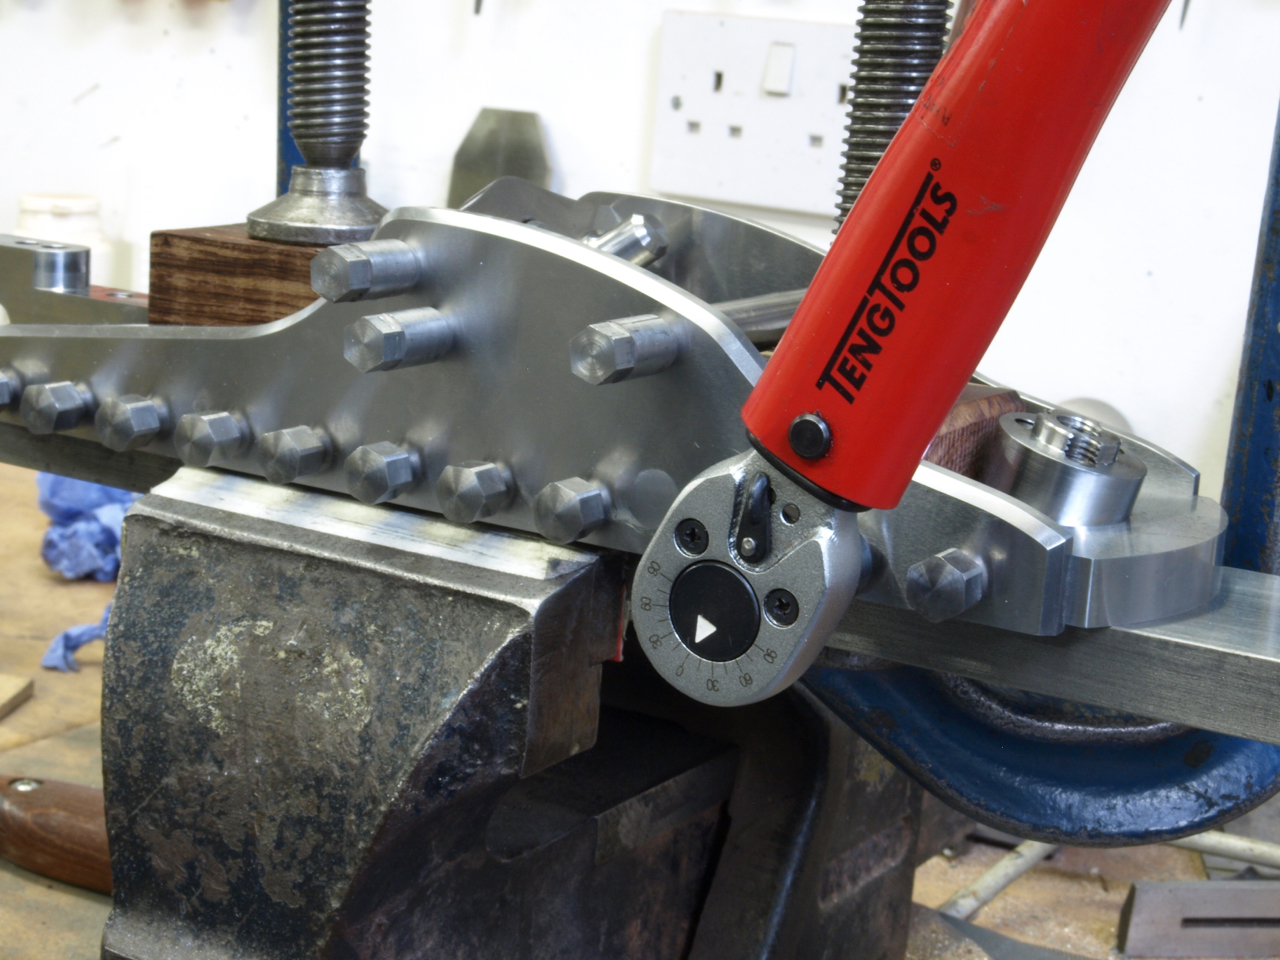
I was hoping to have some more pictures on the No 985 but I had a lot of other work to be done. Here is the same method of fixing on the No 982 plane. Showing the final torque on the screws after applying thread locking compound
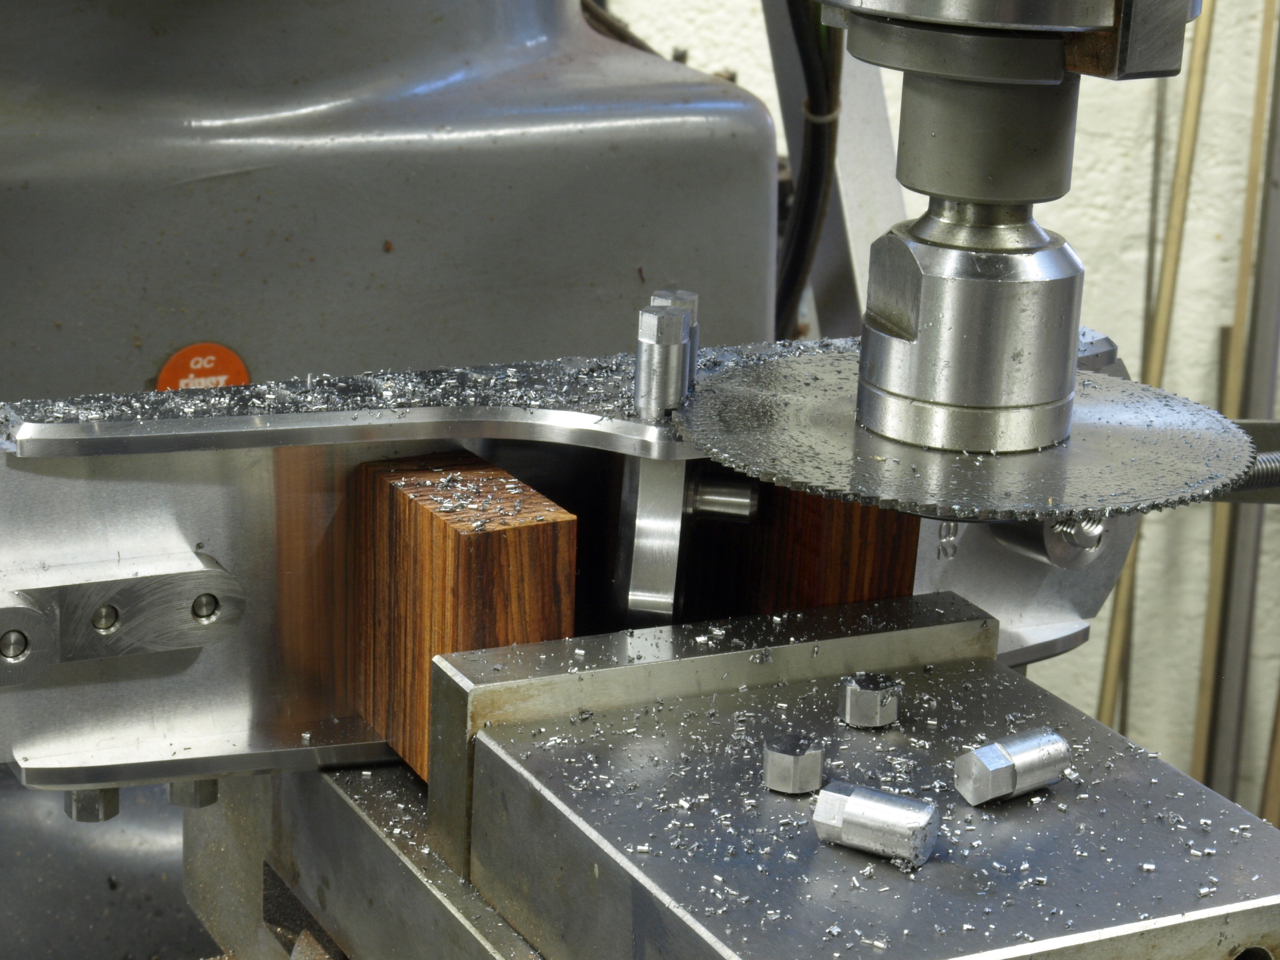
The bolts being trimmed off. This is how I will be doing the No 985 soon!!
I still keep revisiting the drawing board making final adjustments to my new plane the No 985 – seems to go on forever. Whilst I have been doing this I have been making comparisons between non-adjuster planes and adjuster planes and I am working on the basis that having an adjuster does double the price. I will try to explain the difference and why the work compounds.
Since designing my own planes I have moved on a long way from the earlier Norris examples. The Norris planes with their adjusters did tend to be a bit basic, like most planes of this time, almost bordering on primitive. You could literally recess the infill and drop the adjuster straight in, securing with two wood screws.
I will explain with an example of where a lot of the work goes, which doesn’t appear to have much to do with the actual adjuster. My adjuster designs are truly integrated into the plane, I don’t just pop an adjuster in as an extra!
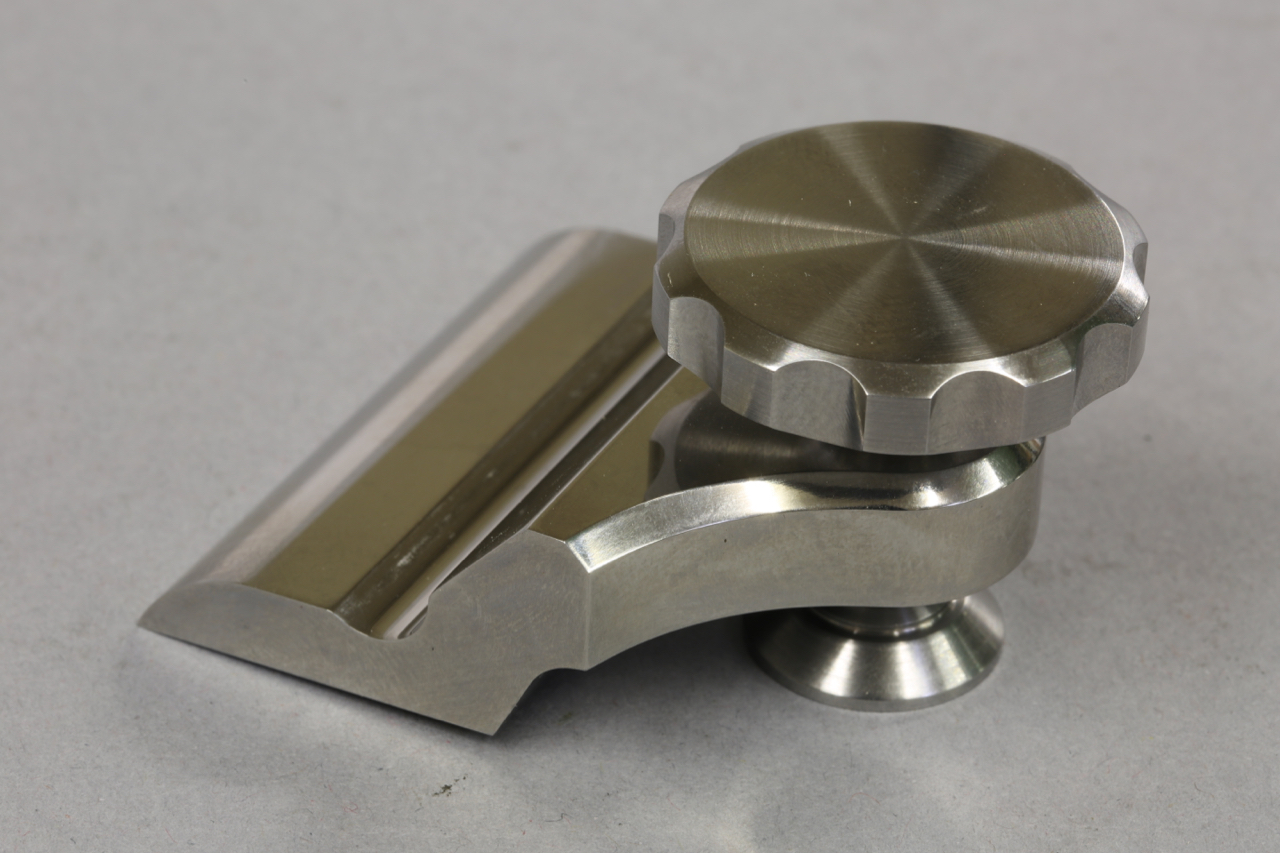
The photo below shows the swivel which is balled so it matches any irregularities whilst connecting with the blade. This is, like most of my design elements, my own innovation.
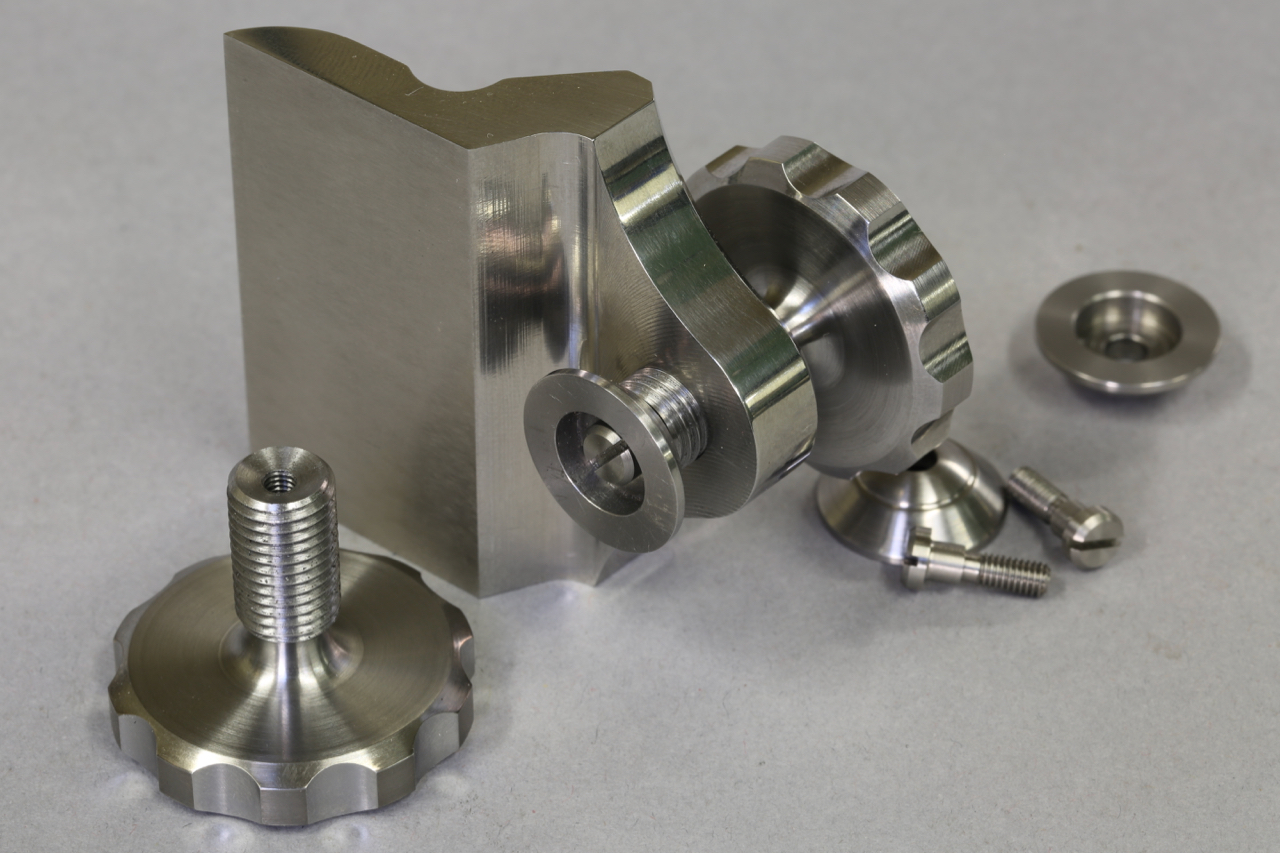
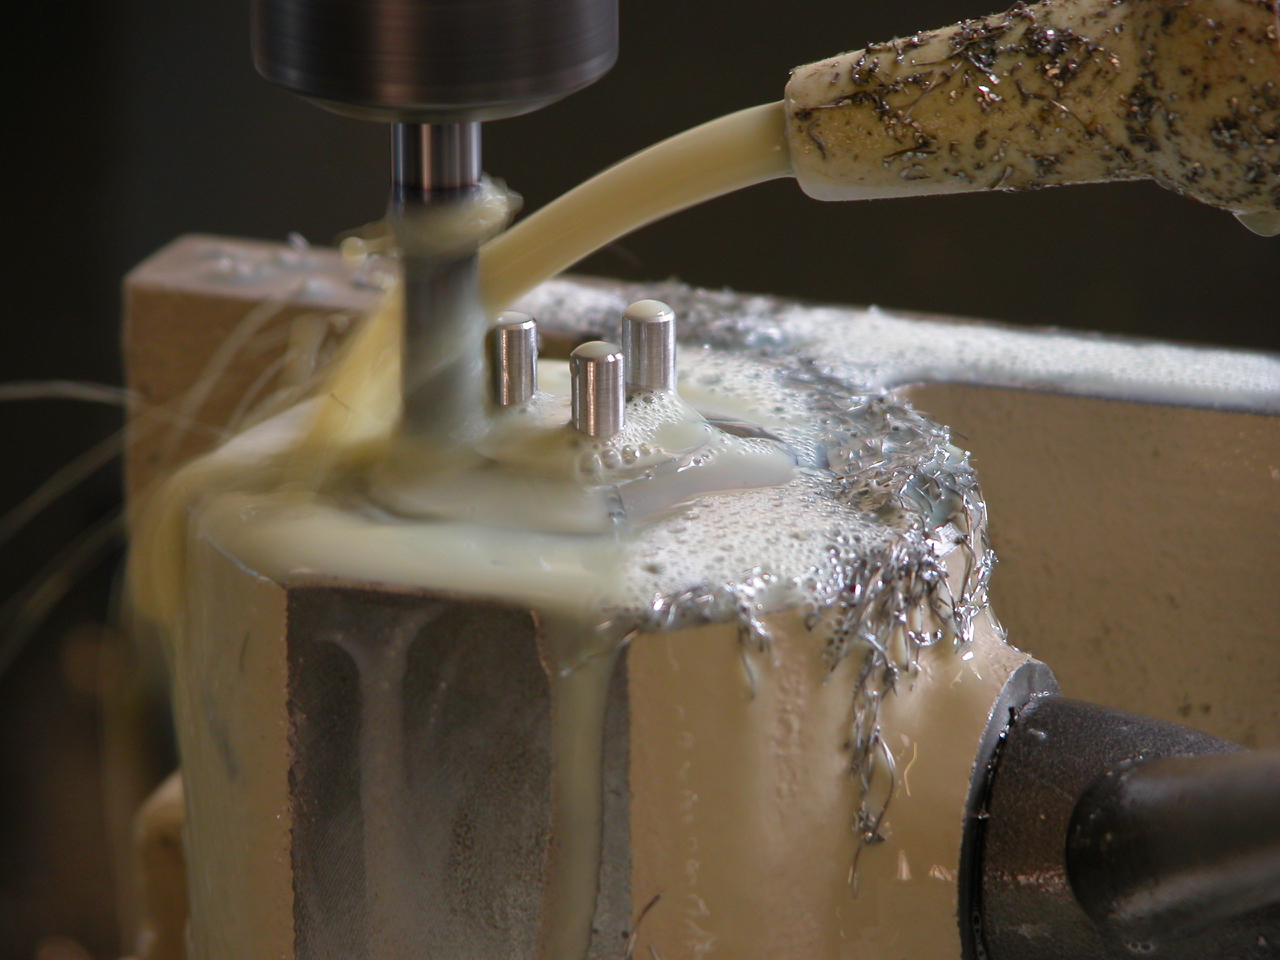
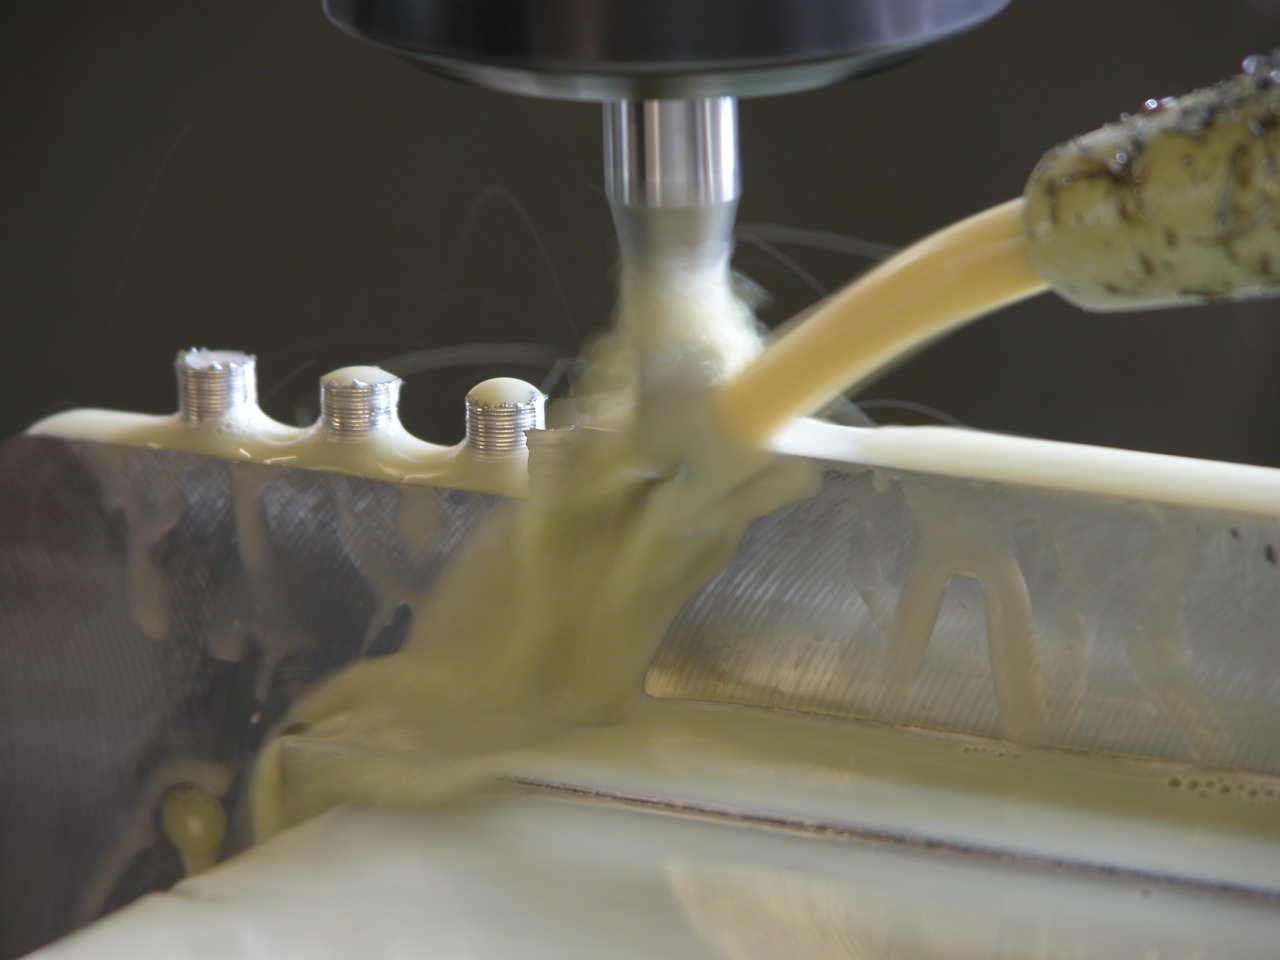
As you can see the lever cap (from my No 984 plane which is blogged here:http://www.holteyplanes.com/blog/category/no-984/, showing the machine working) is stepped/recessed so that it will carry a swivel. This is necessary with adjuster planes as the swivel shoe will bridge the adjuster holes in the blade. From my research it appears that I am probably the first pioneer to drop the chip breaker on bevel down planes. The first plane I made like this was the 11-s (see photo)
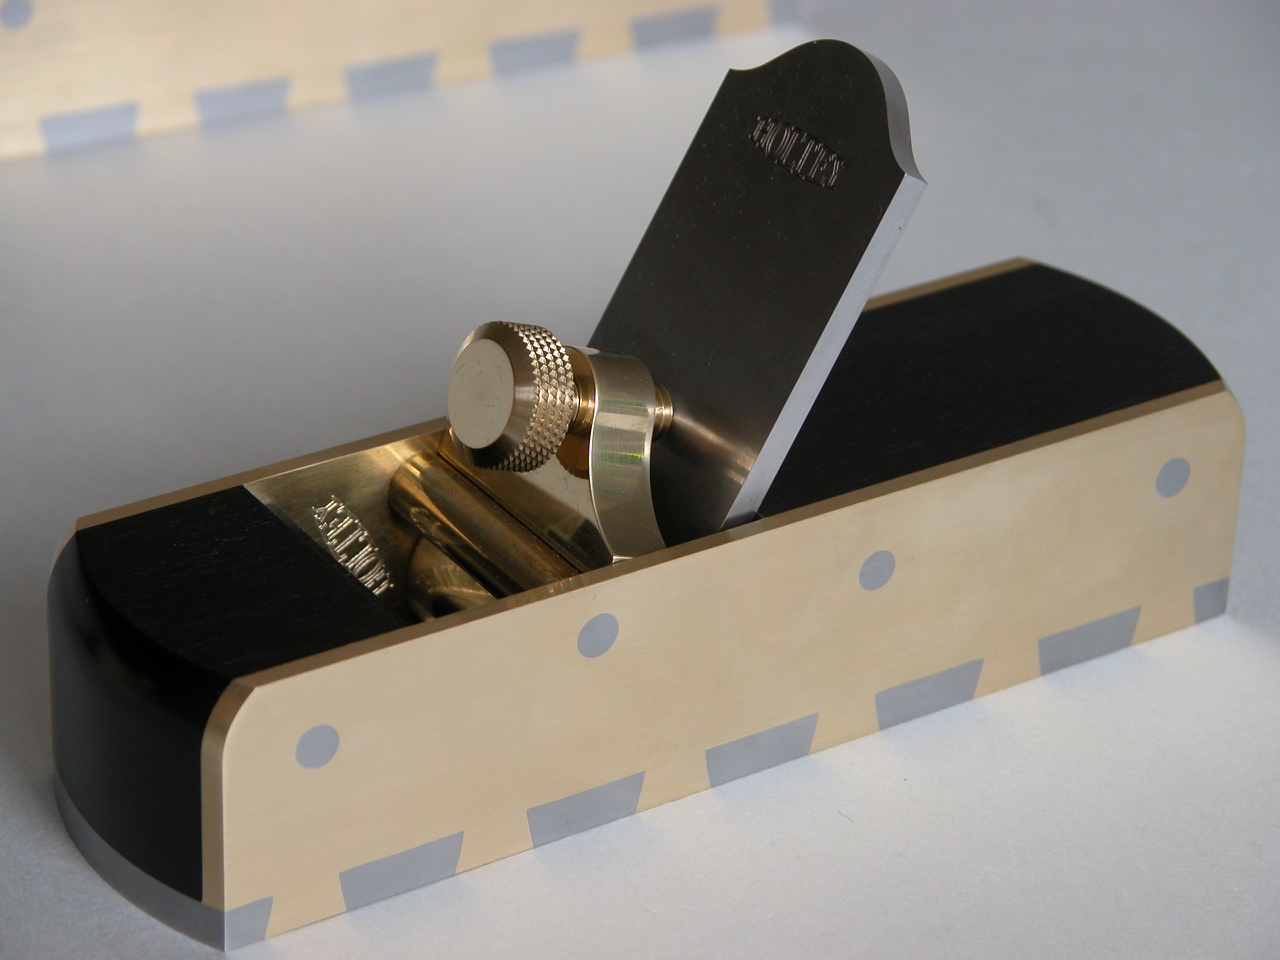
As the 11s has no adjuster drillings the lever cap was quite straight forward and less work. When I made the No 982 I was able to avoid the holes in the blade with the lever cap placement but it put some limitations on the design.
This is an example of the adjuster recessing in the No 983.

This is the bottom for the No 984 showing the adjuster recess.
In summary: to add an adjuster, both adjuster and plane have to be truly integrated. Of course the adjuster has to be made as well.
I have spent a long time on my drawing board this year working on a new design – designated No 985 which will be part of my range of non-infill planes, which I very much prefer. This smoother is a non-adjuster type plane which means a reduction in work as the adjuster is a big item – both to make and accommodate, which will show in the price. Some people prefer a non-adjuster plane and I have not made this on a full handled plane before.
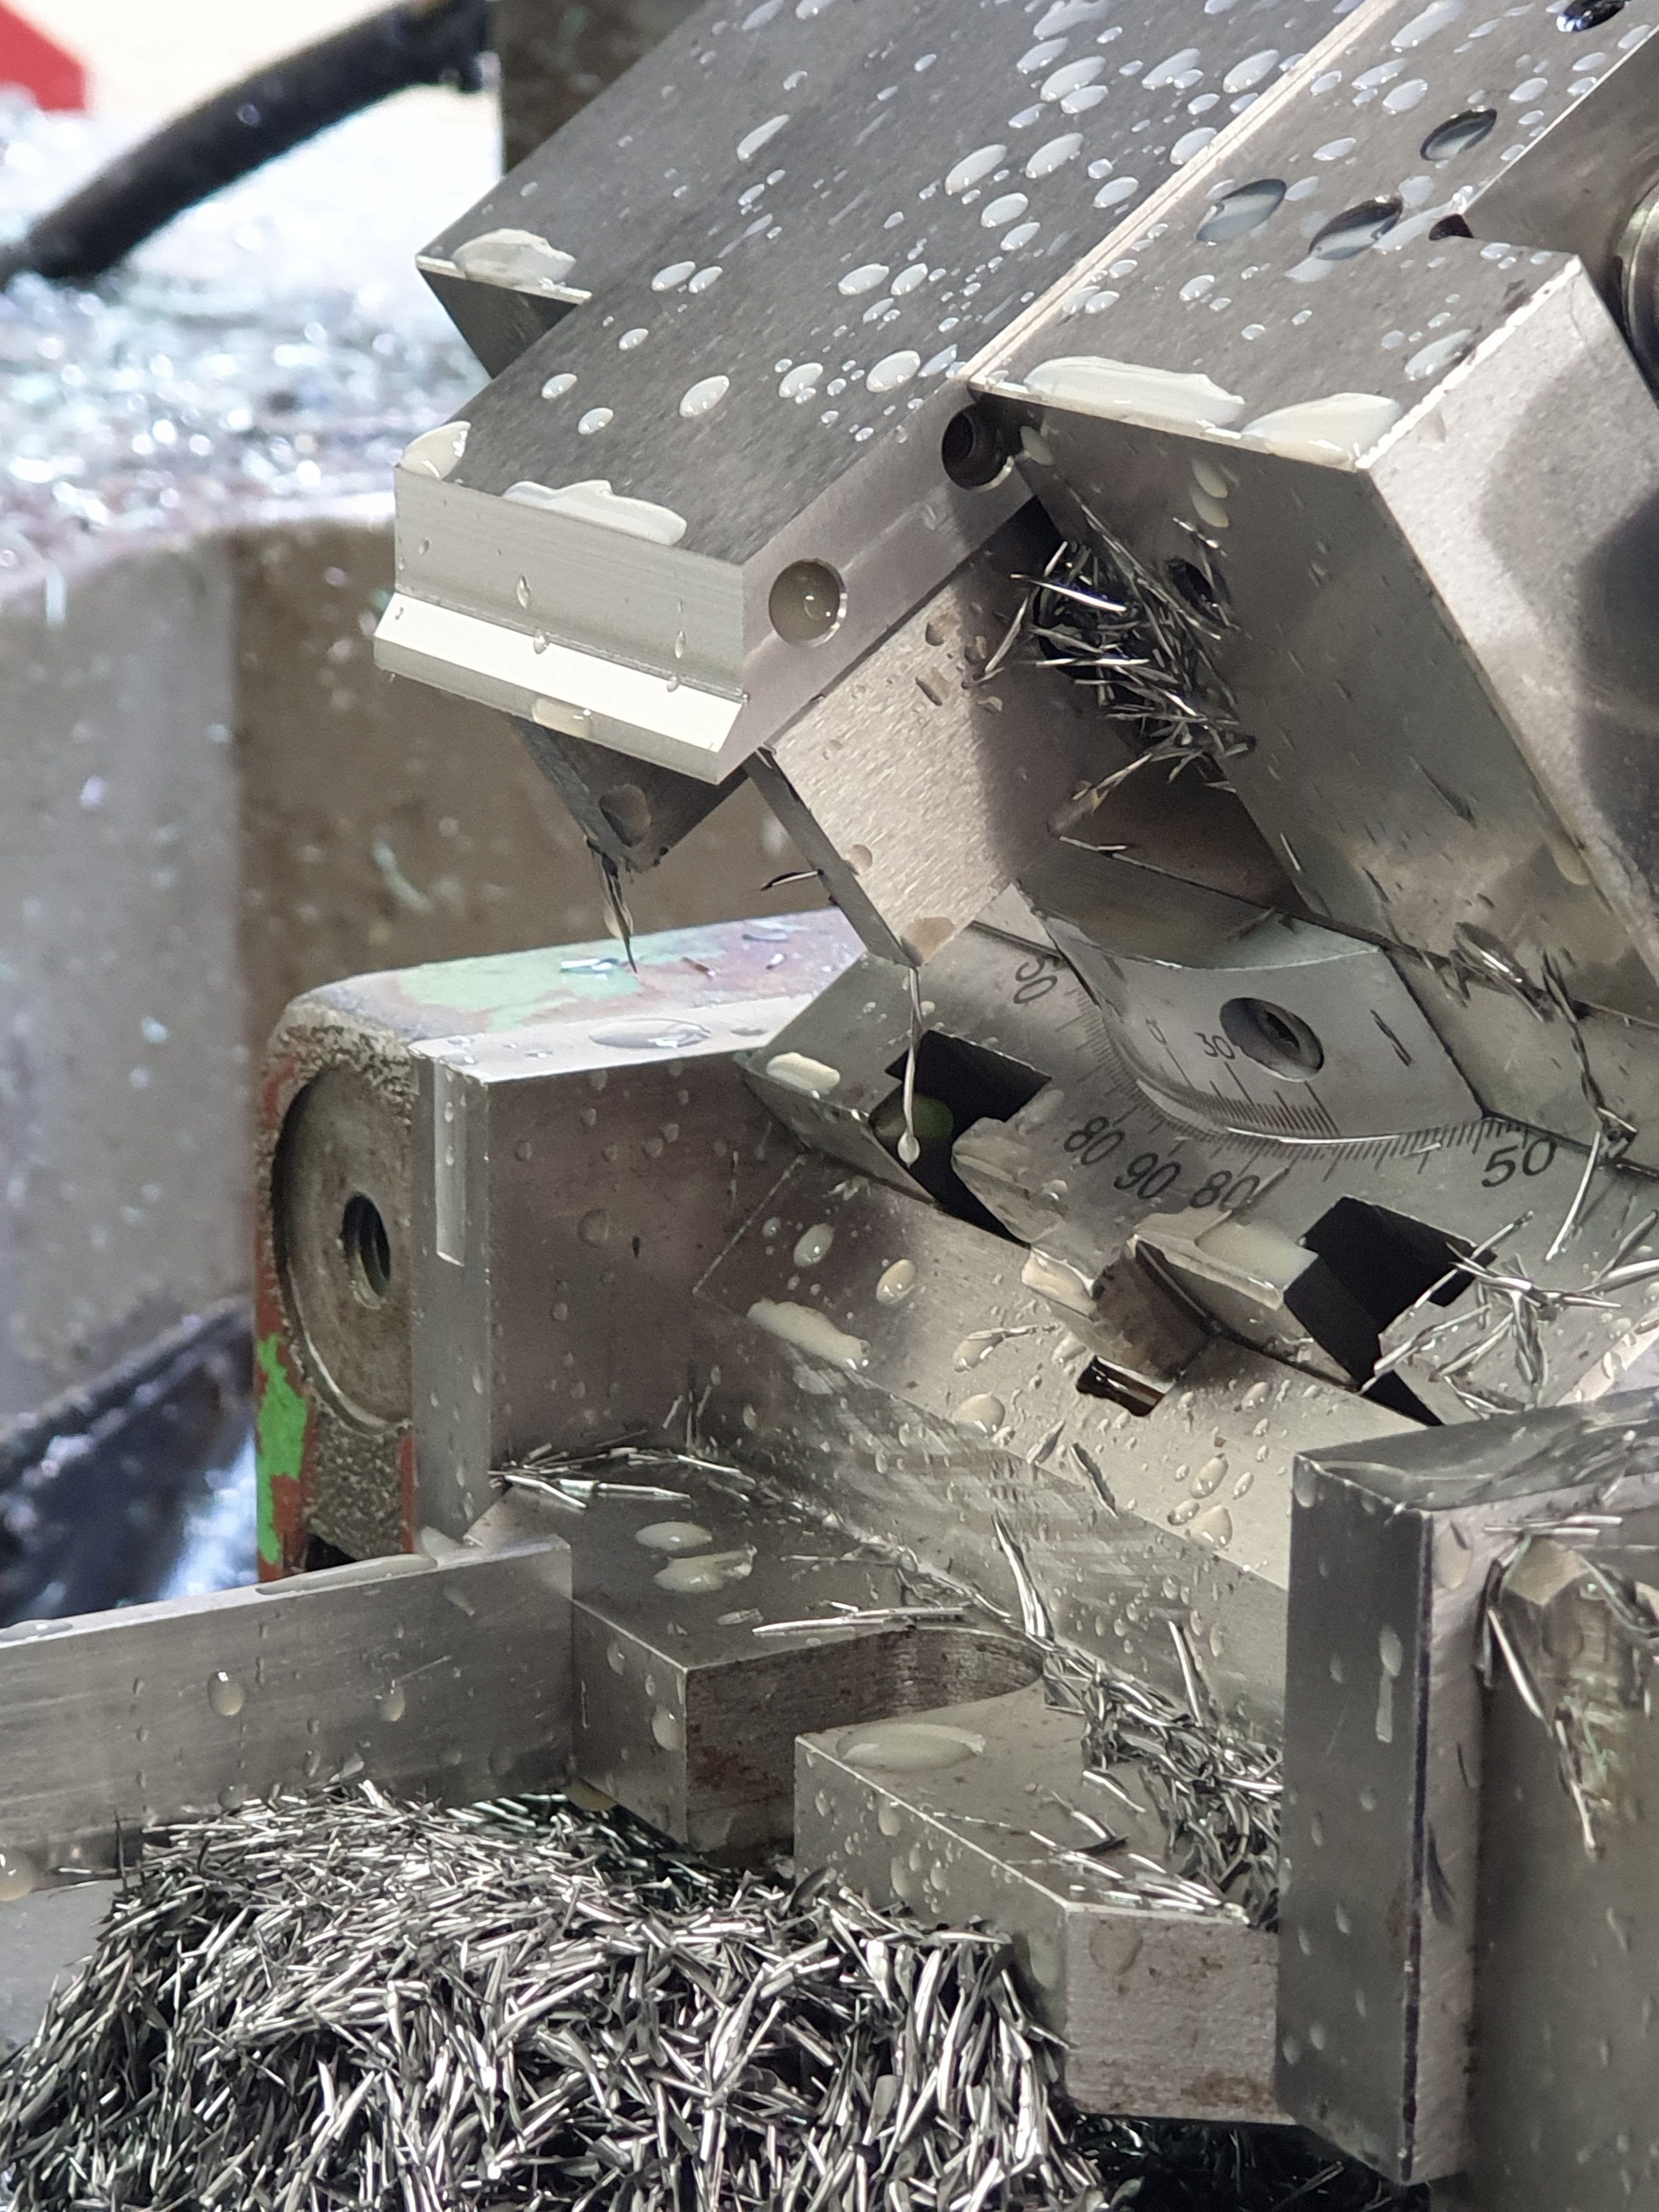
This plane is to be made from 416 stainless steel which is expensive and flat sections cannot be sourced in the UK. My experience with this alloy is that it is the best for my purposes. It is also preferred for making rifle barrels. It is very nice for working with and has a lovely texture to it. And I can stick it on a magnetic chuck for surface grinding.
Whilst waiting for the stainless to arrive I have made a start on the handles.
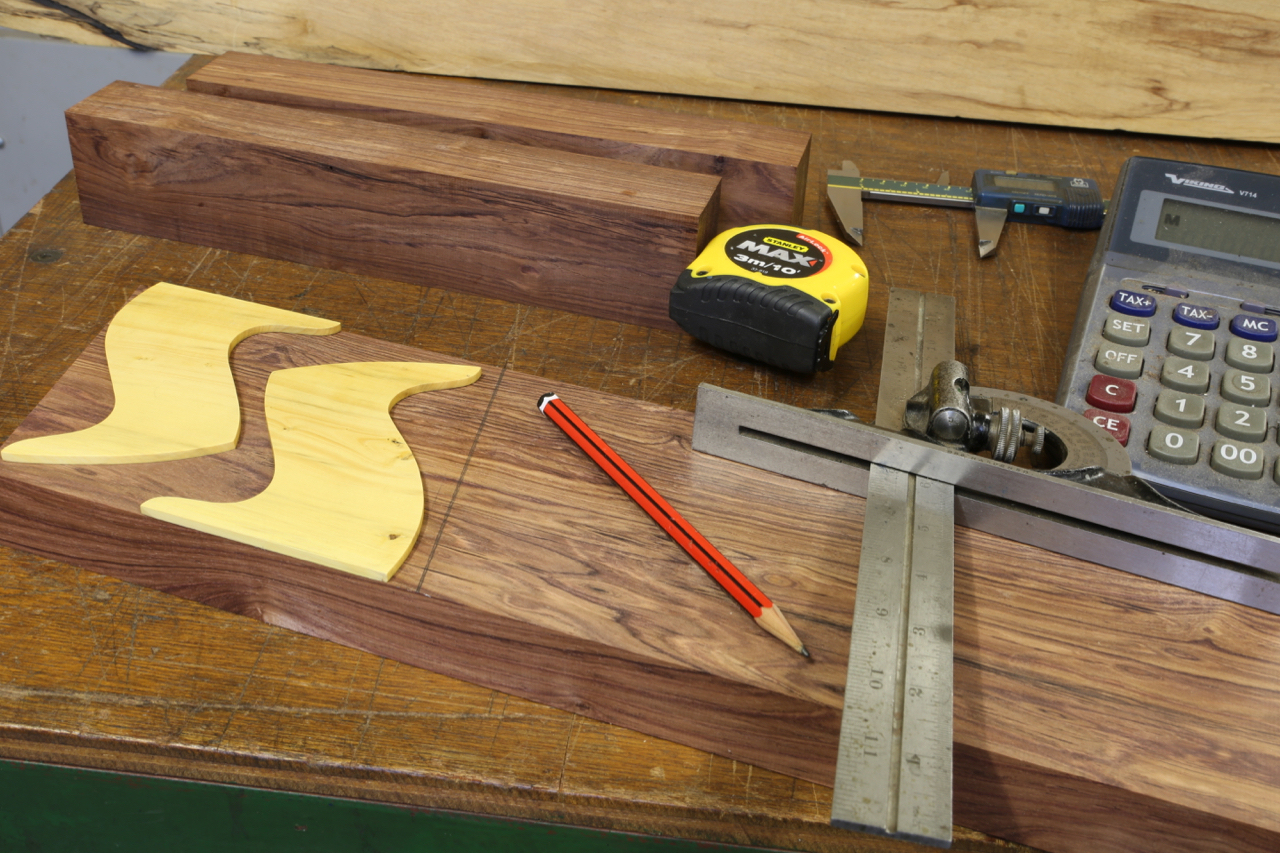
This is an area in which feedback would be greatly appreciated. Since I am making a smoothing plane my objective is to keep it as short as possible. A lot of the older planes were 7 1/2″ long which makes sense for finishing purposes. However, these planes were usually handleless, which can be uncomfortable to use. Once you introduce a handle it is going to increase the length. As this is a non-infill plane I will be using a round bun, which also needs a little bit of extra room. I would like to make the handles short for use with three fingers plus the index finger resting on the side of the blade. What I want feedback on is would you prefer a taller handle so you can use four fingers which will make the plane longer, or do you prefer three fingers and a shorter plane?
For those who have experienced my No 98 they will have noticed how comfortable the handle is as it has plenty of room for four fingers
- http://holteyplanes.com/. However, it is better to have the plane shorter if you are going to use it for smoothing/finishing.
If I use the taller handle the plane will be 8 3/4″ long or 8″ with the shorter handle.
A lot of modern smoothing planes seem to be about 9 1/2″ long which is neither a smoother or a panel plane – needs redefining.
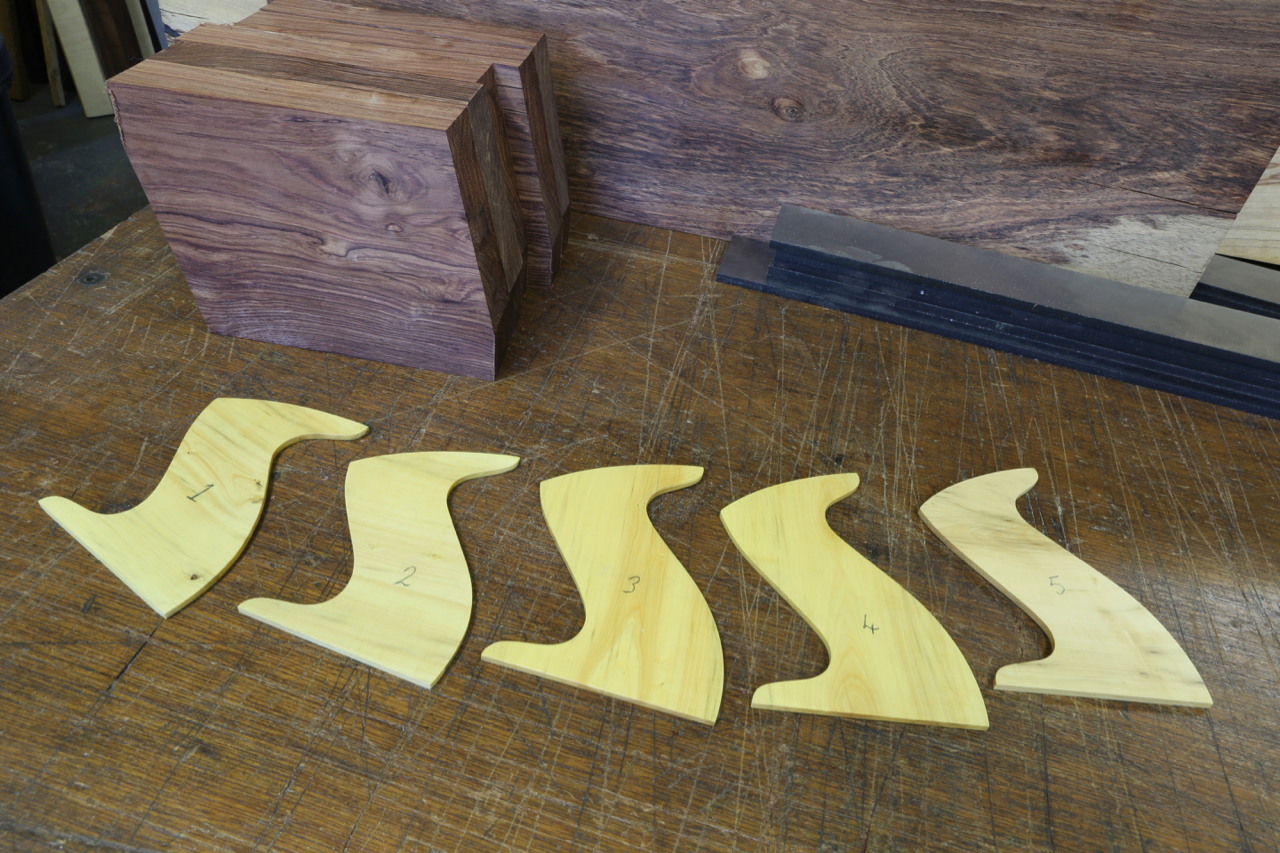
My handles are all hand made and I make several templates to find the one I am happy with.
Some more components for the No 98 plane. Showing the integral rivets being cut in situ
Finished items are the front and rear handle bosses. All in stainless steel as usual.

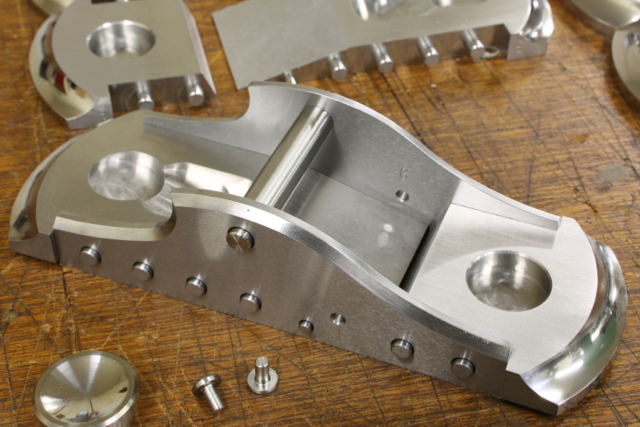
All the chassis work done on my No 983. A lot of f…… work done
In conversations over the years I have always been praised for my (primitive) drawings as CAD is the way now. (See the dinsaour card on my Facebook page – thank you David) I have never had to time to learn CAD. The hardest thing was to learn an early Heidenhain control unit for my mill. I am just starting a new batch (yes, I know I am supposed to be retiring ![]() ) of these No 983 planes, mainly because I sold the last one which was mine, I am going to use this opportunity to explain some of the workings in more depth. Maybe because I am getting older the work seems to expand but I have never allowed economic restraints to get in the way.
) of these No 983 planes, mainly because I sold the last one which was mine, I am going to use this opportunity to explain some of the workings in more depth. Maybe because I am getting older the work seems to expand but I have never allowed economic restraints to get in the way.
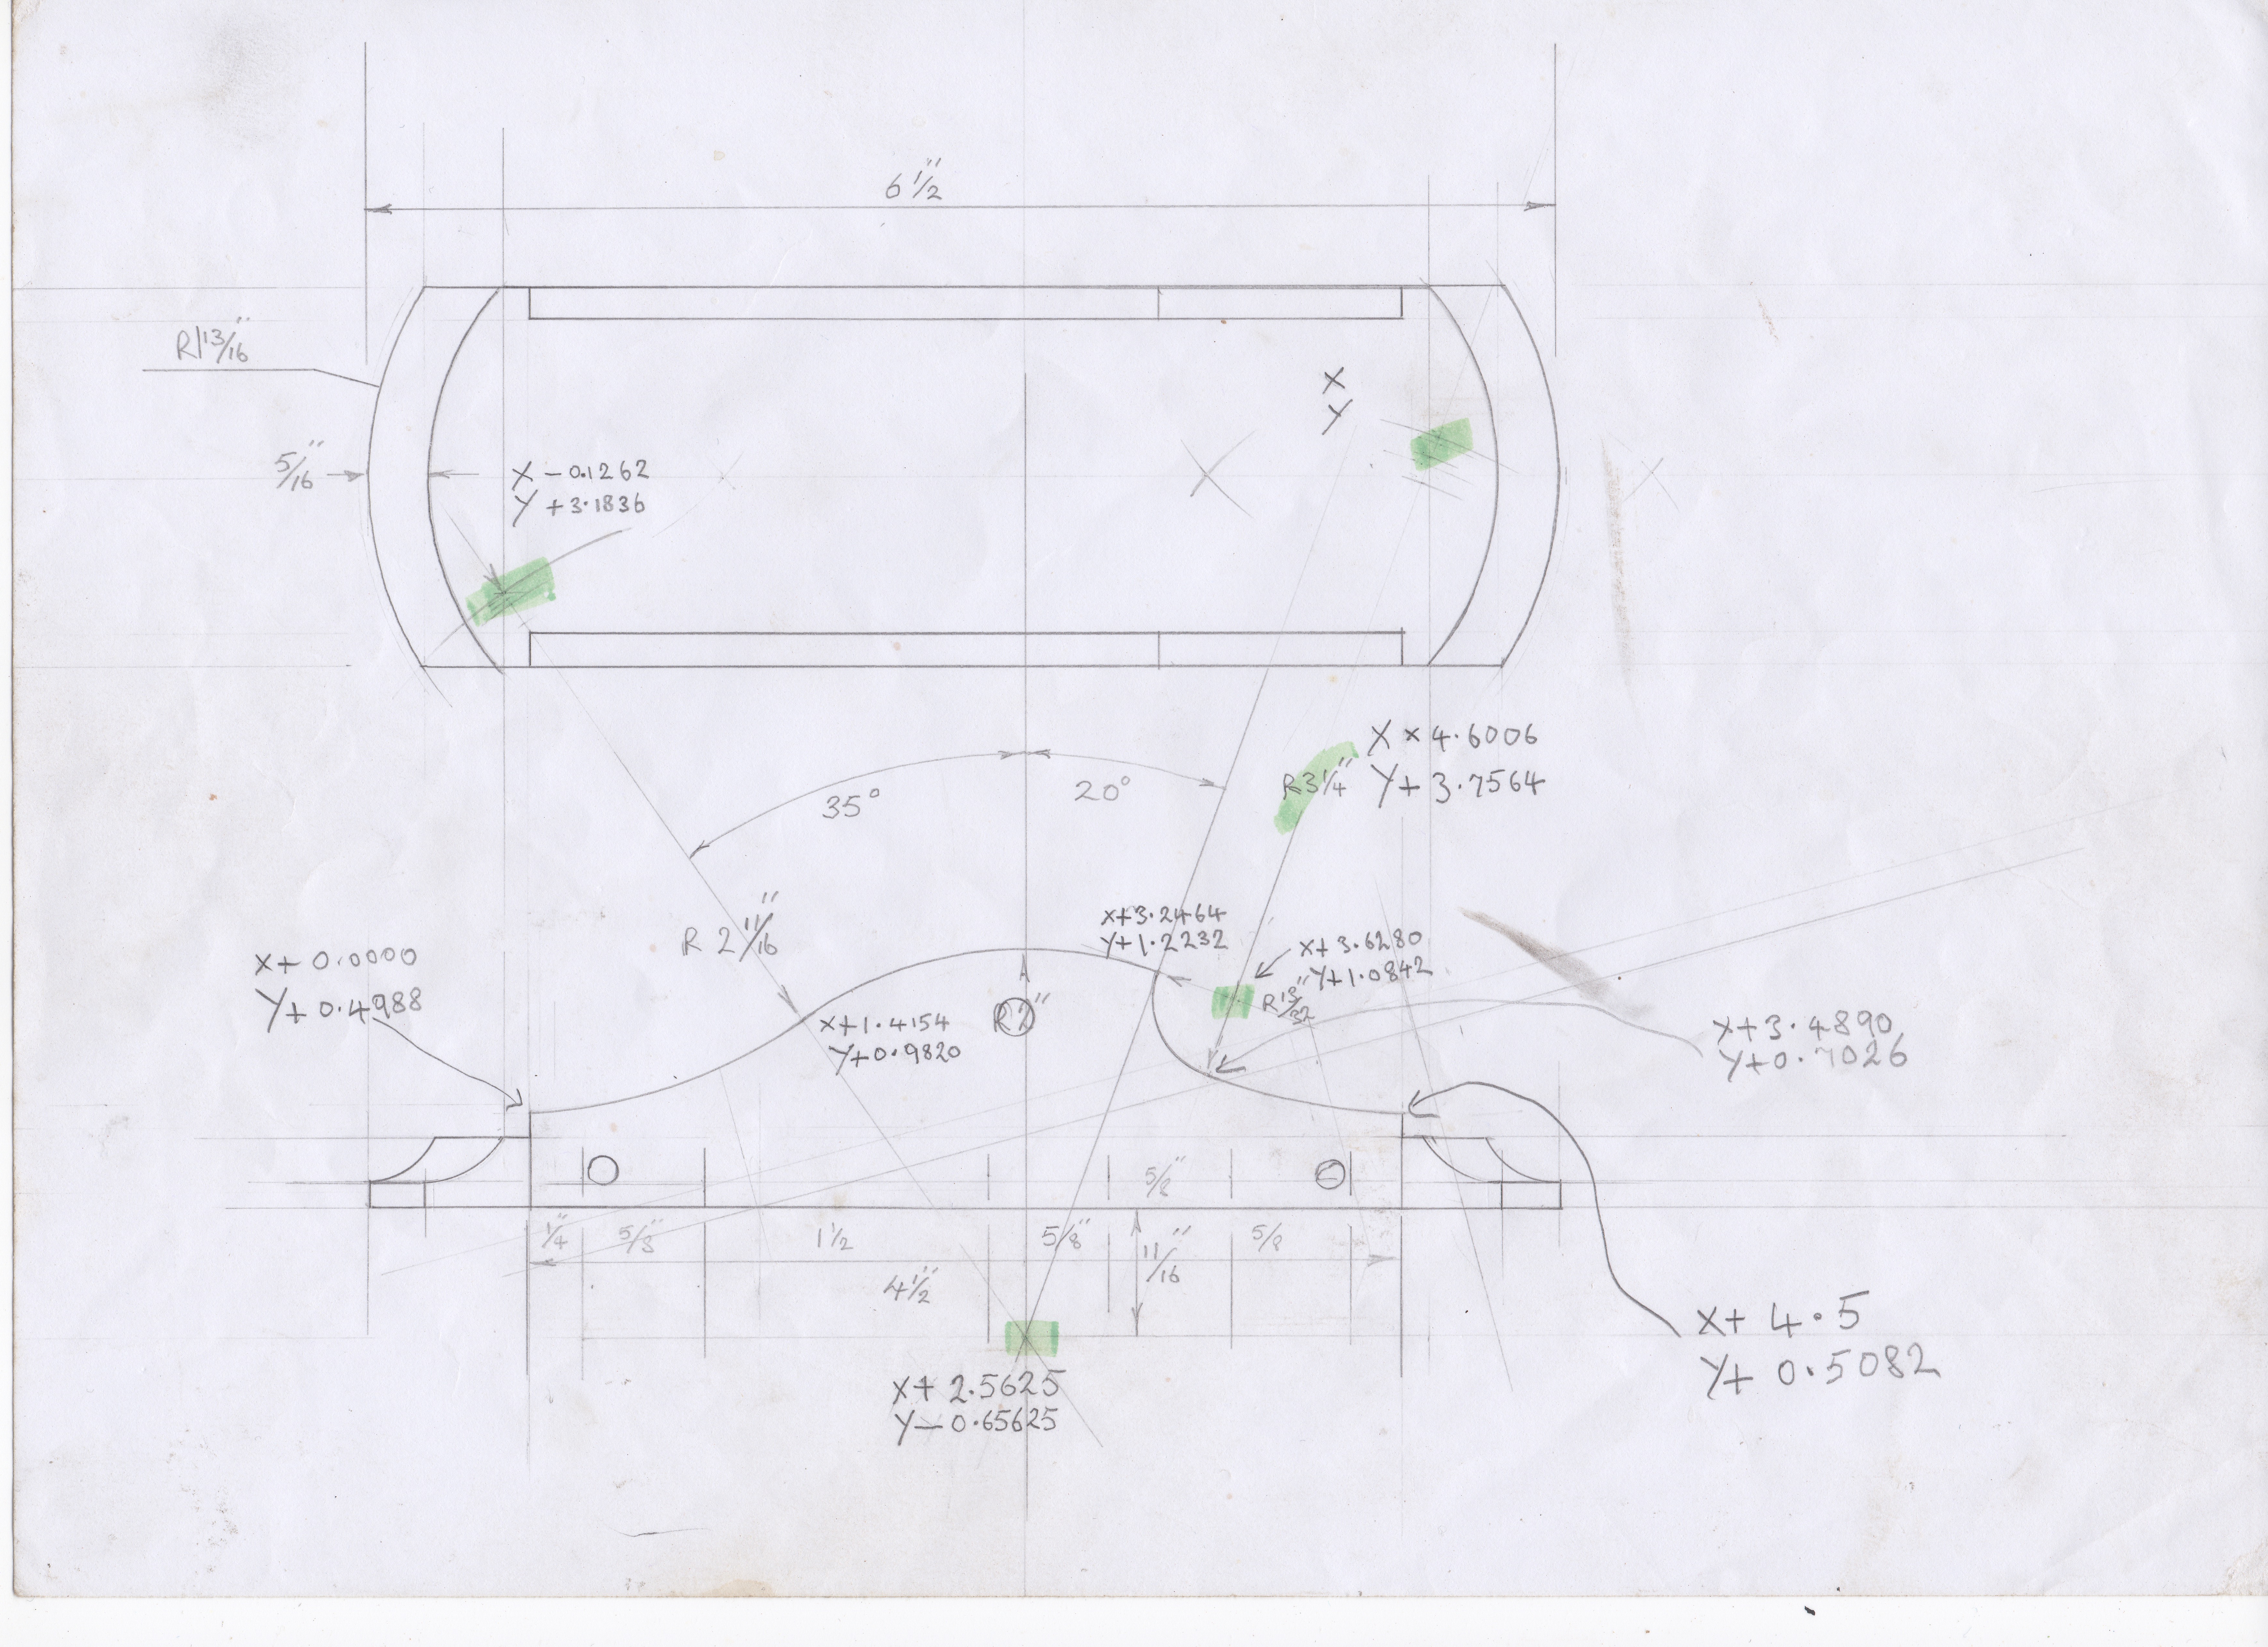
Going back through some of my drawings, which are very untidy, I decided to post some up. Starting with this side layout of the No 983 – warts and all. This is how I work and then I have to convert it into a suitable dialogue for my Heidenhain. Luckily I am the only person who has to understand this.
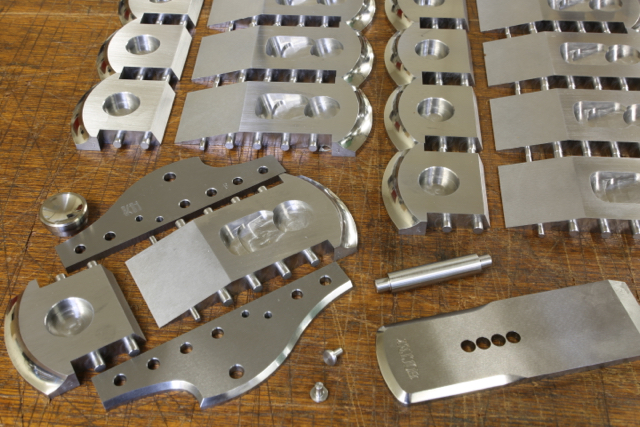
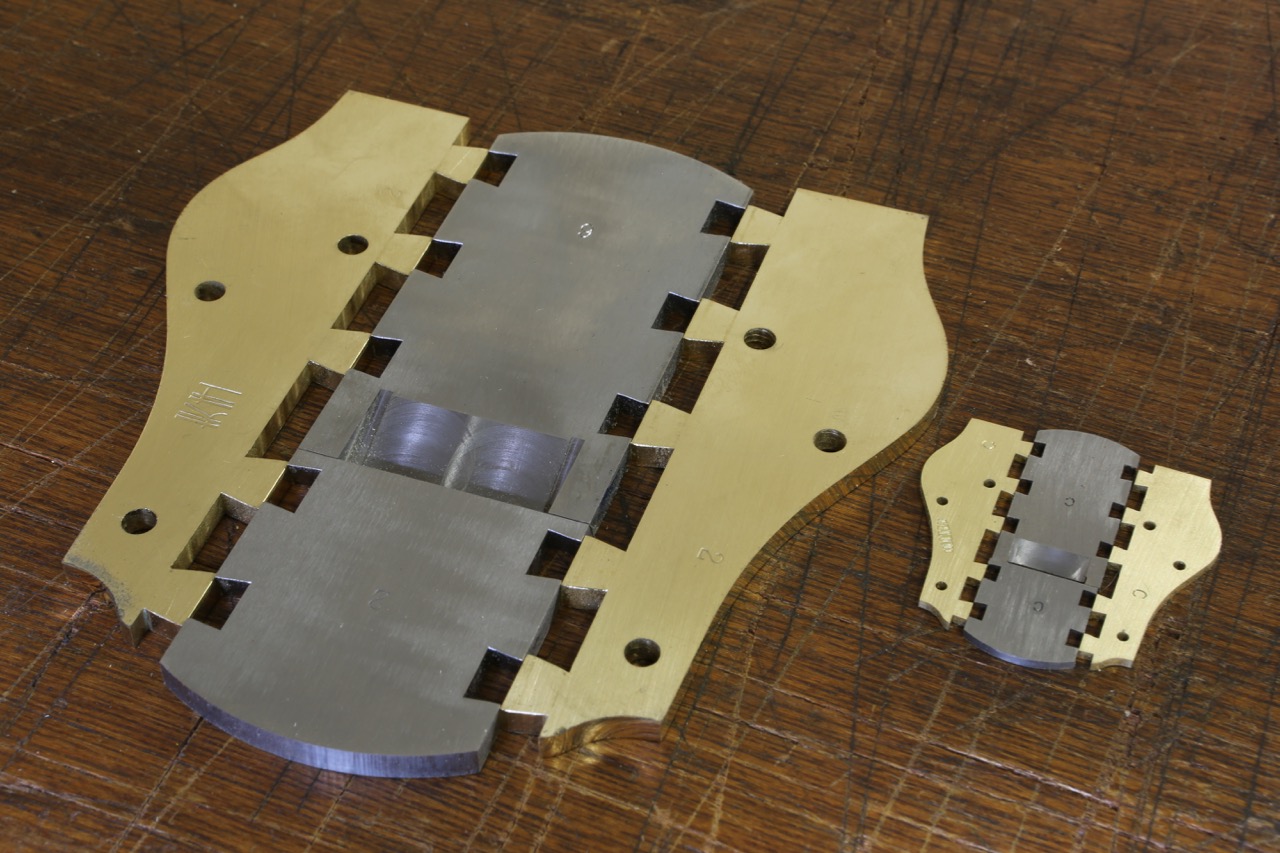
It is rare to get the components from both planes together – full size and one third size. The work is still the same. Despite all the years I have been making these planes I forget the amount of work involved.
I had hoped to use the adjuster components from the No 983, as I showed in the last blog. However, I wasn’t quite happy using them in this application. We all know what that means – I started again. This has cost me another two weeks.
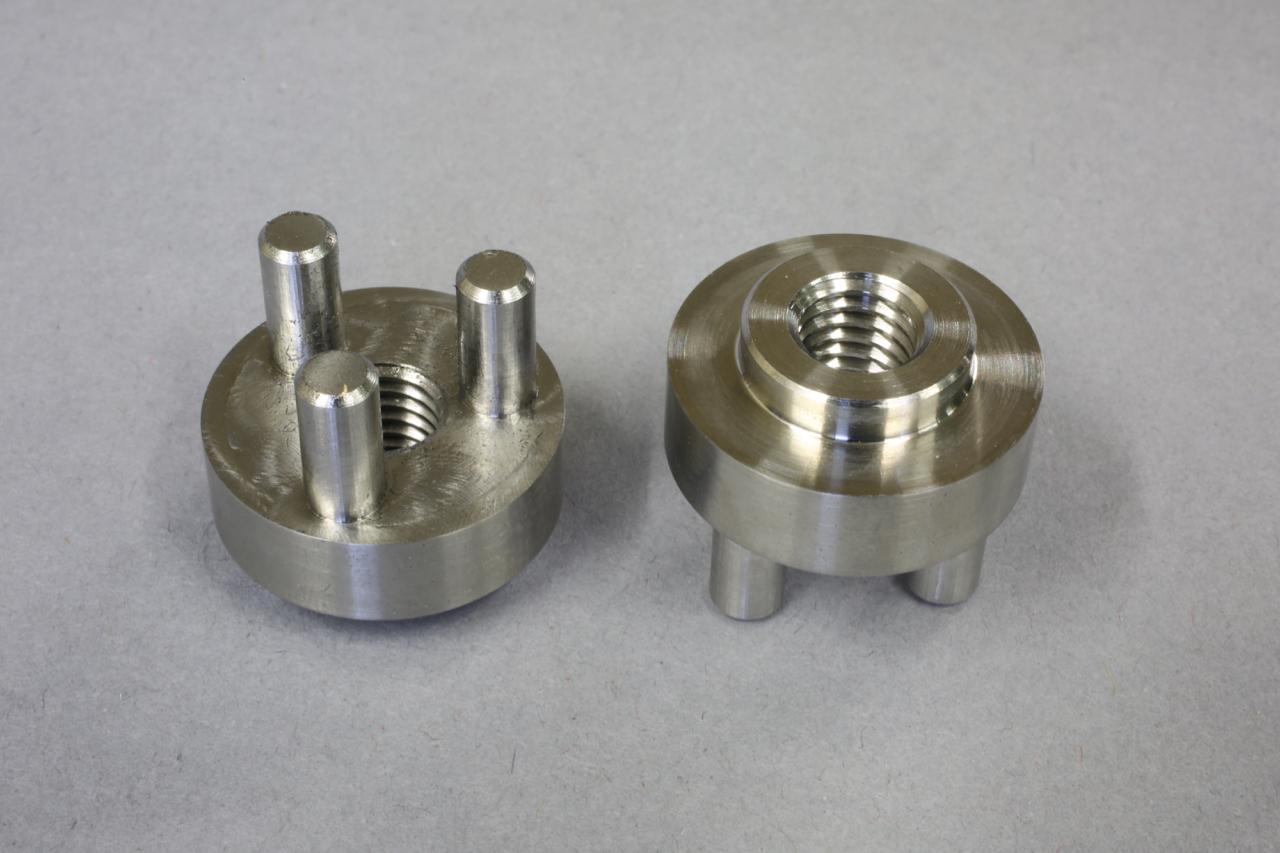
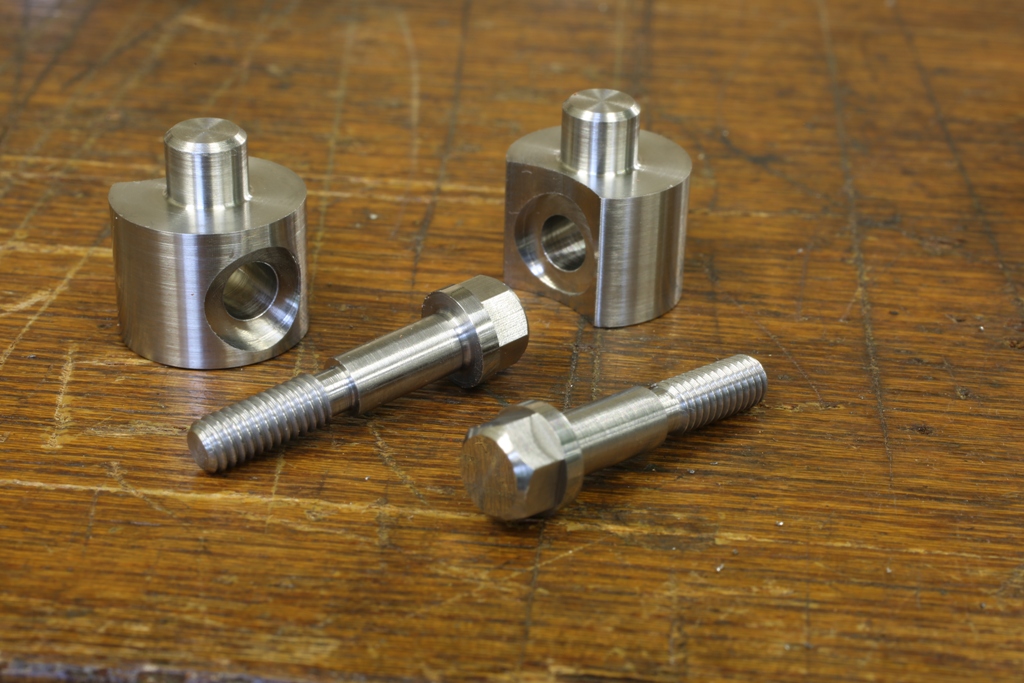
I had to make a dedicated holding fixture for both lathe and mill. Part of the work on the spindle is individually paired with it’s traveler part keeping the end play down to less than a thou.
Of course there will be some end play in the threads of the main spindle. I work on every component to keep this end play down to a minimum.
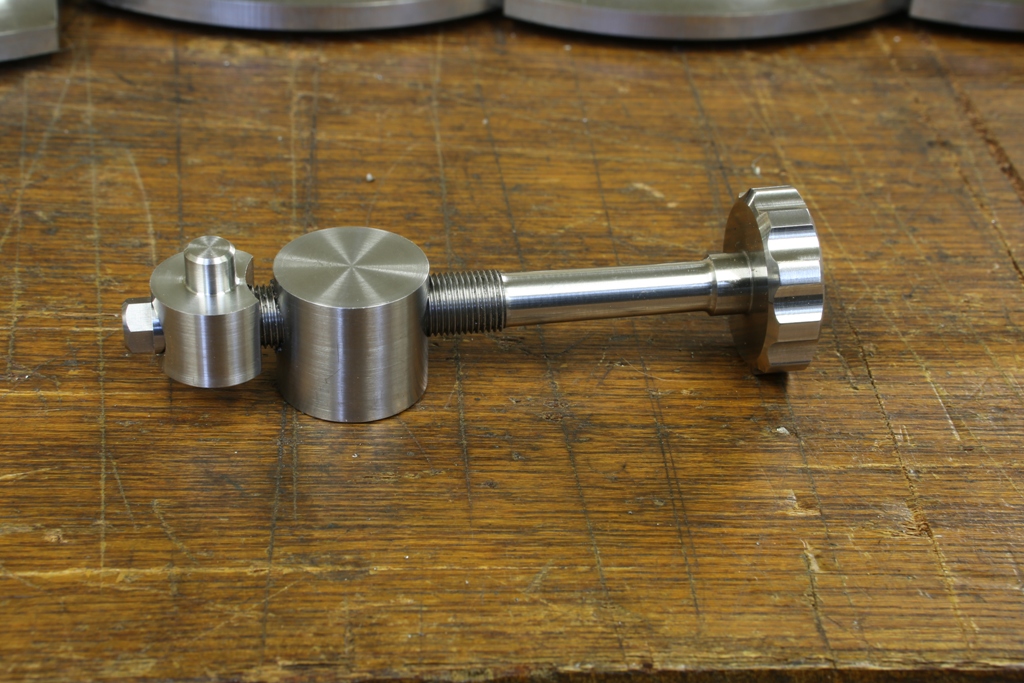
This now concludes all the metal parts. I have wooden totes to finish off, will blog these later. There should be completed planes by the end of next week.
Powered by WordPress