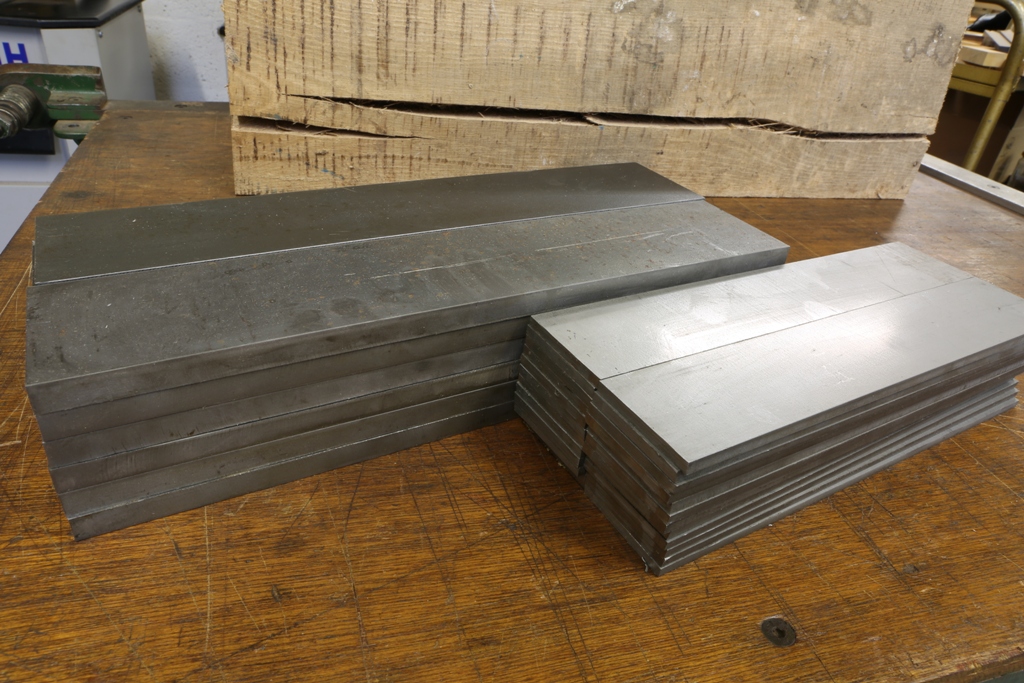
The blades arrived back from heat treatment and after many hours grinding and polishing they are now finished. Just packing them in oiled paper until the planes are ready.
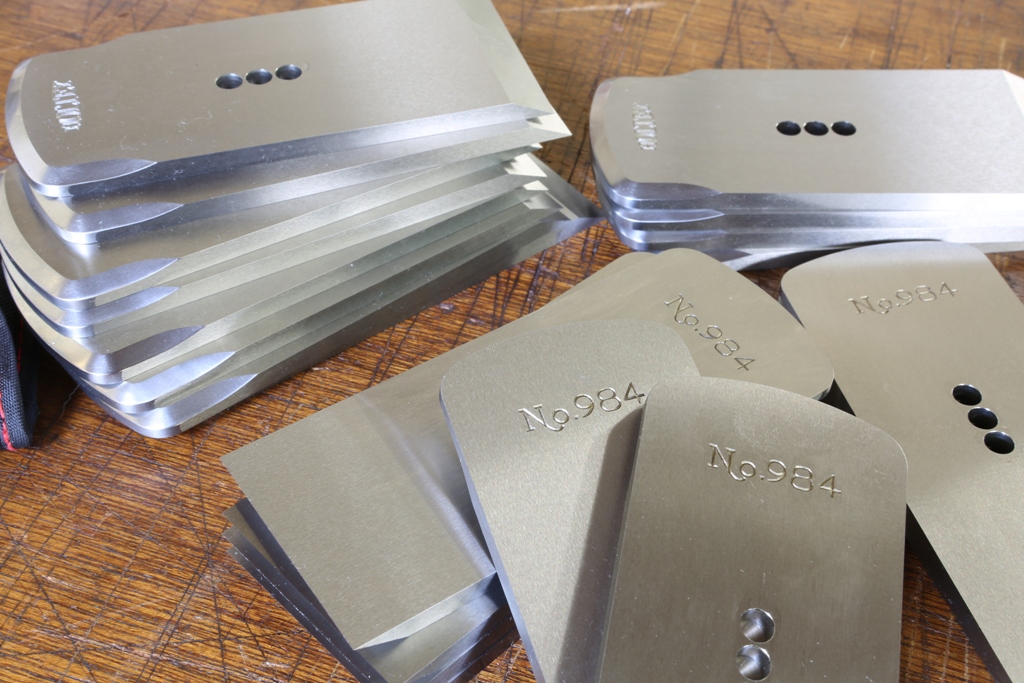
The hardening is the only thing I outsource. Everything else is made inhouse.
The blades arrived back from heat treatment and after many hours grinding and polishing they are now finished. Just packing them in oiled paper until the planes are ready.
The hardening is the only thing I outsource. Everything else is made inhouse.
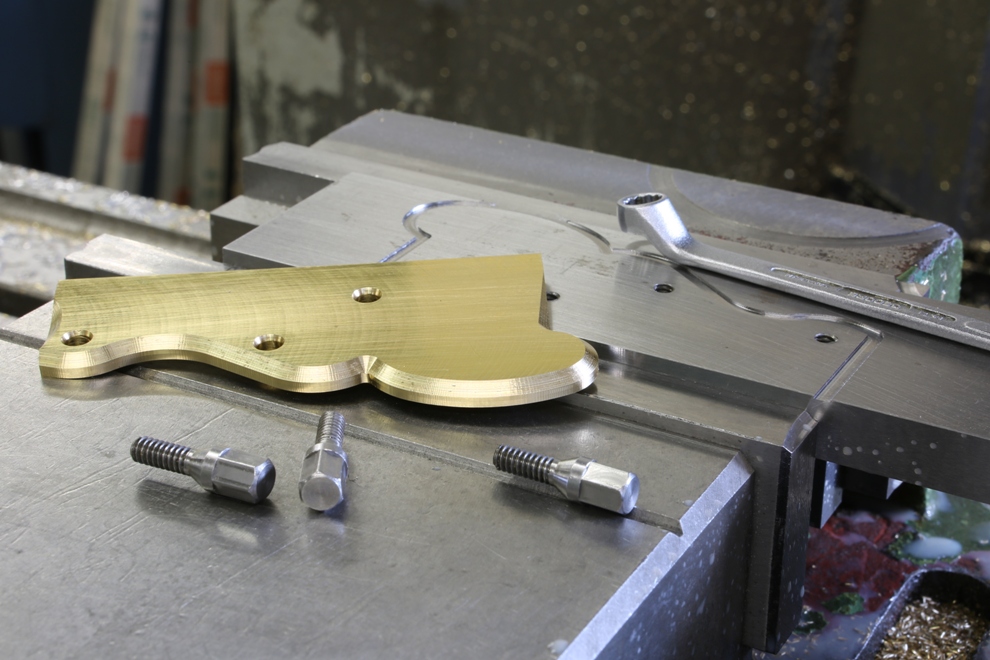
One of the boring sides of this detail. It is no simple polishing job as the valleys formed by the mill are very hard to smooth out.
It is a case of starting with a coarse abrasive and working down to 1200 grade and then I wrap a piece of denim cloth infused with metal polish for the final polish.

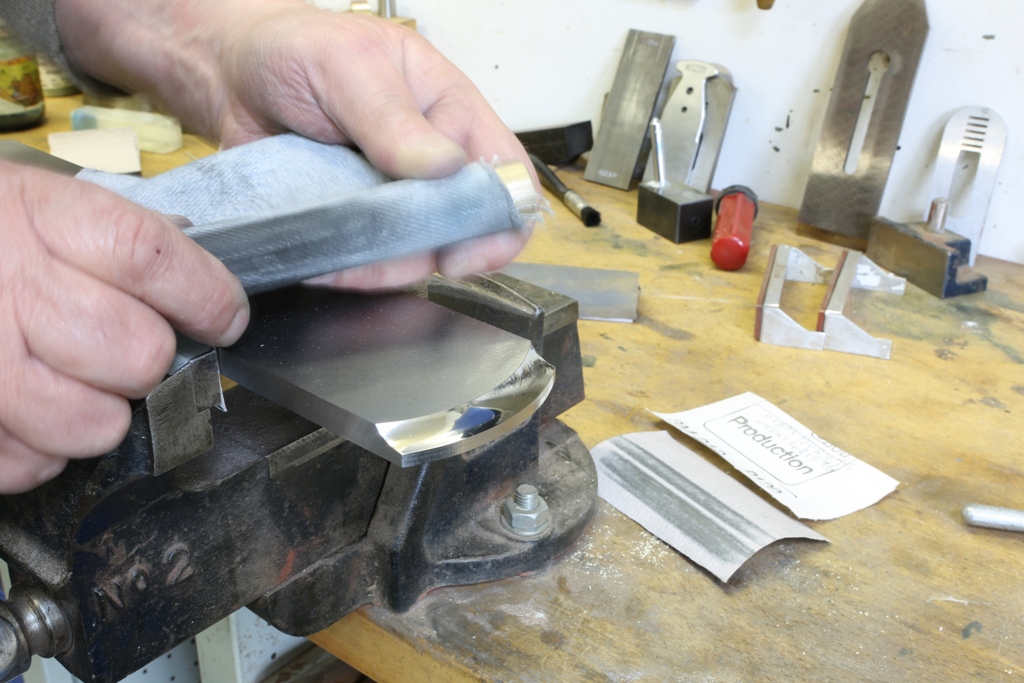
That is a reflection of my magnetic tool rack which looks like a row of vertical scratches.
It seems odd doing polishing at this stage but it is the sequence which I choose to do the work in which gives me the finish. When all the riveting and adjuster recessing are complete I can surface grind the inner parts so everything is sharp and pristine.
Somebody on a forum described my work as being clinical and having no soul, maybe he is right and it is dammed hard work to keep it up ![]()
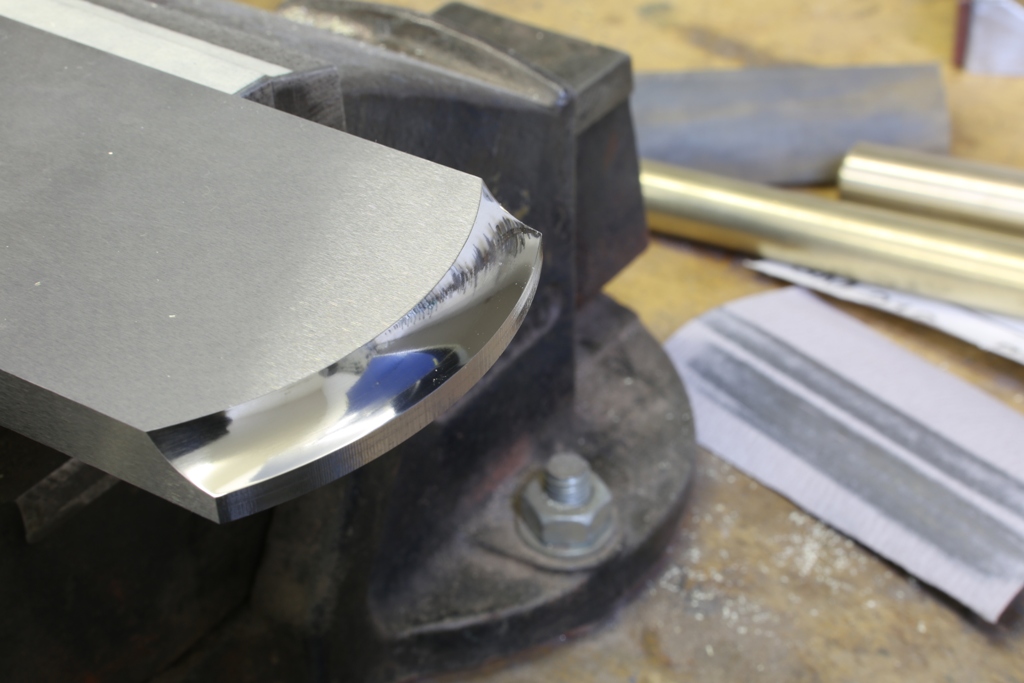
A little bit more of my daily drudge ![]() and a little bit more pain.
and a little bit more pain.
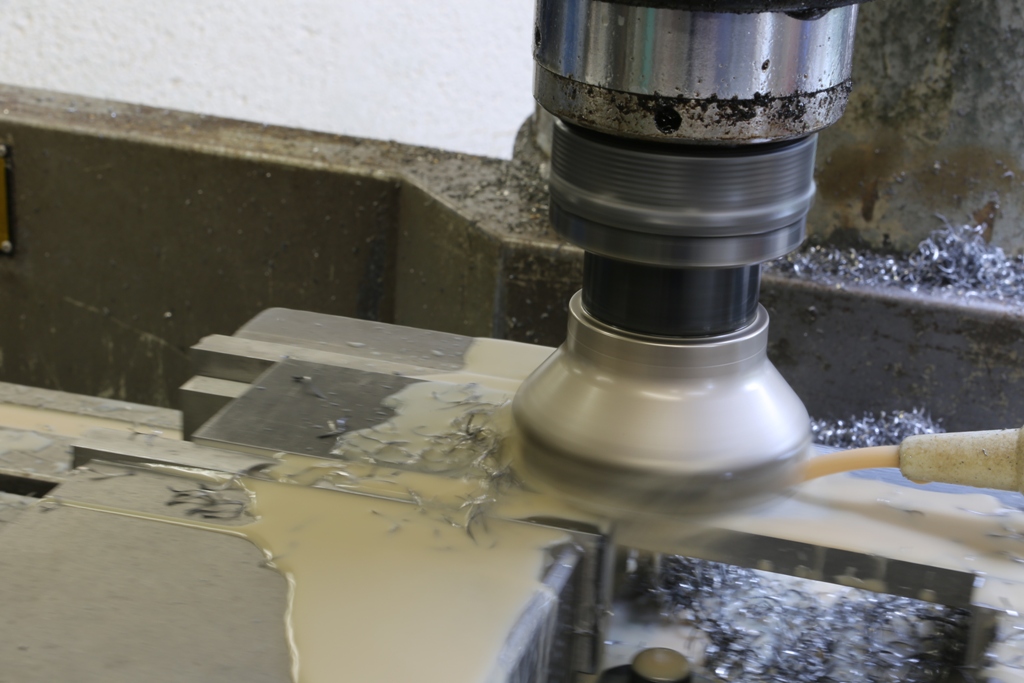
This is not so kind on my mill. I use 4 cutters in the forming of this detail for the front and rear bow. When the milling operation is complete there will be at least two days polishing them. Lots of sore hands and fingers. The last time I did this (on No 983), I had to have my hand stitched up by the local doctor.
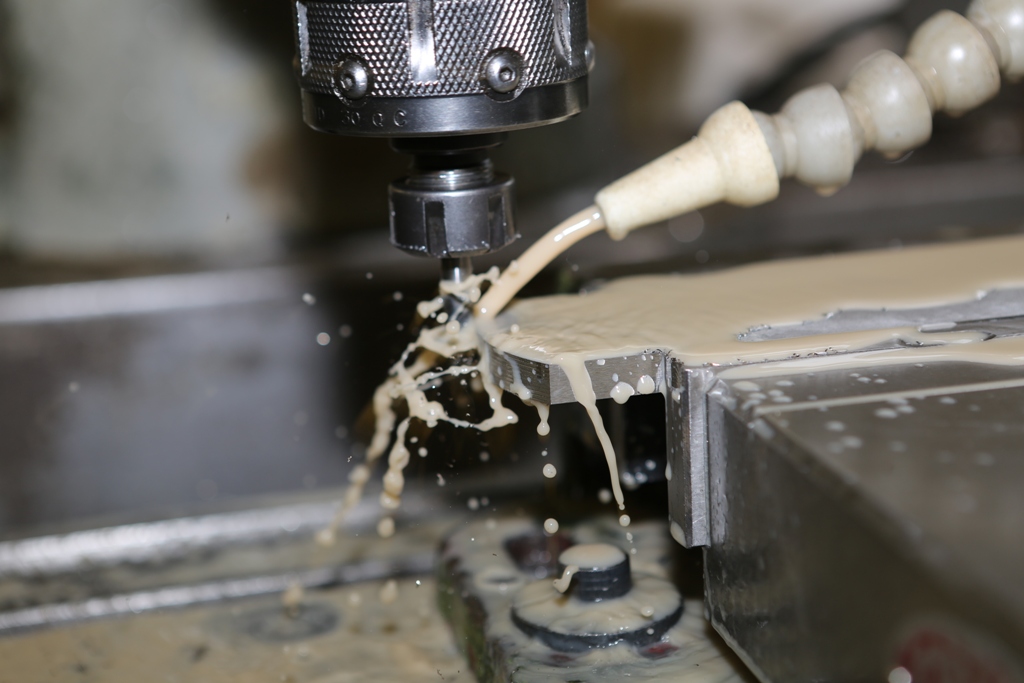
The surface grinder has been the busiest machine in my workshop for the past few years. All my sections, after size adjustments in the milling machine, are precisely ground all round. The same with all the tooling and work holding I make. This is necessary to get a good reference throughout all my work.
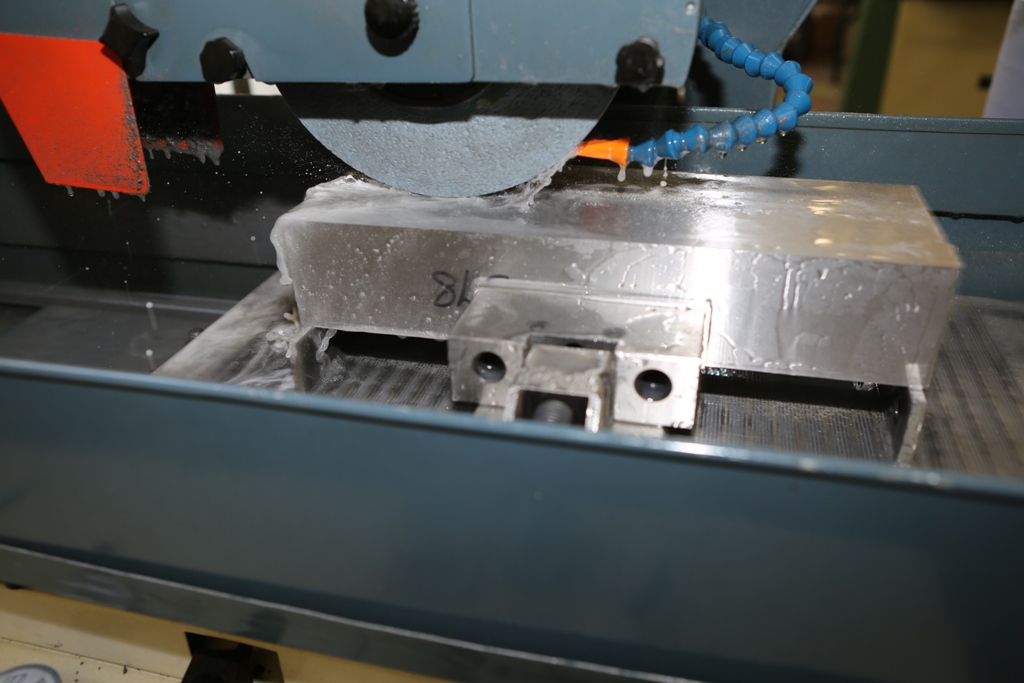
These are the bottoms being ground on their edges insuring that they are square and parallel. It is not often I use a flash but it is nice how everything has been frozen in time.

I have also been busy during this time with the blades. The blades are being profiled in ‘Siamese pairs’ for easier work holding. These have already been stamped with the HOLTEY logo in the fly press, I do this first as the edges close to the stamping area can become distorted.

After the blades are separated they need to have a bevel milled on and the chamfers polished before sending them away for heat treatment. The polishing to the chamfers is important as it would be very hard to do after the blades had been hardened. When the blades come back from the heat treatment I will be surface grinding them all round.
As I have said on my web page the No 984 panel plane is to be my last. This is the beginning of the promised blog. I have been a bit slow starting as I have been busy with stock sales and many enquiries. Thank you very much for all your nice comments – I am not actually retiring as most people I knew retired and died, I will keep up the coffin dodging and I have many other things to do. These No 984 planes will keep me going for about 3 months.
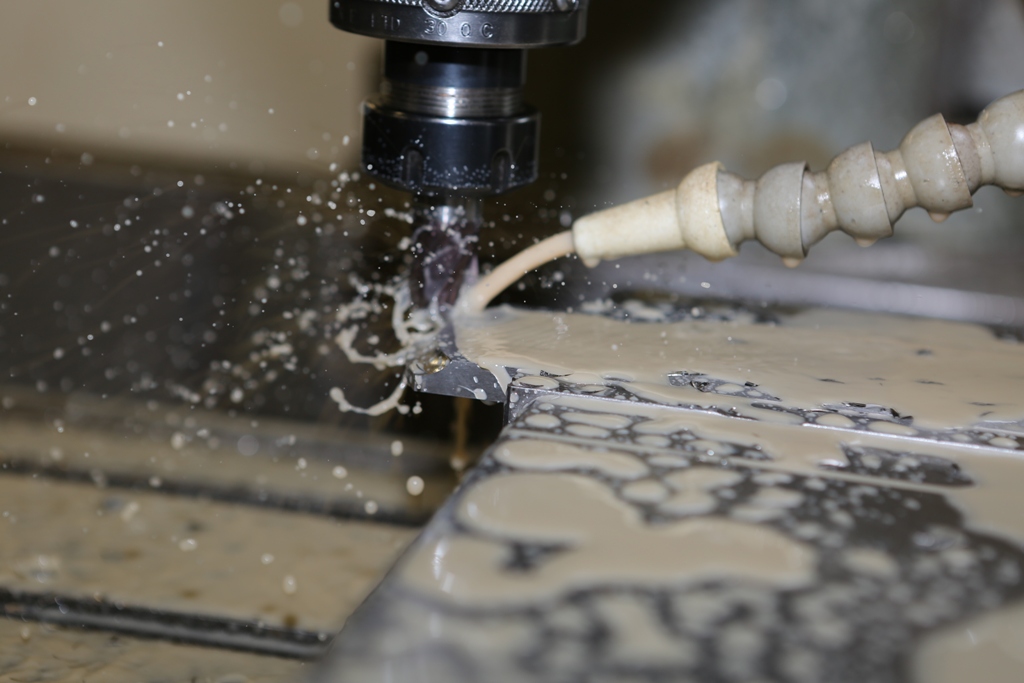
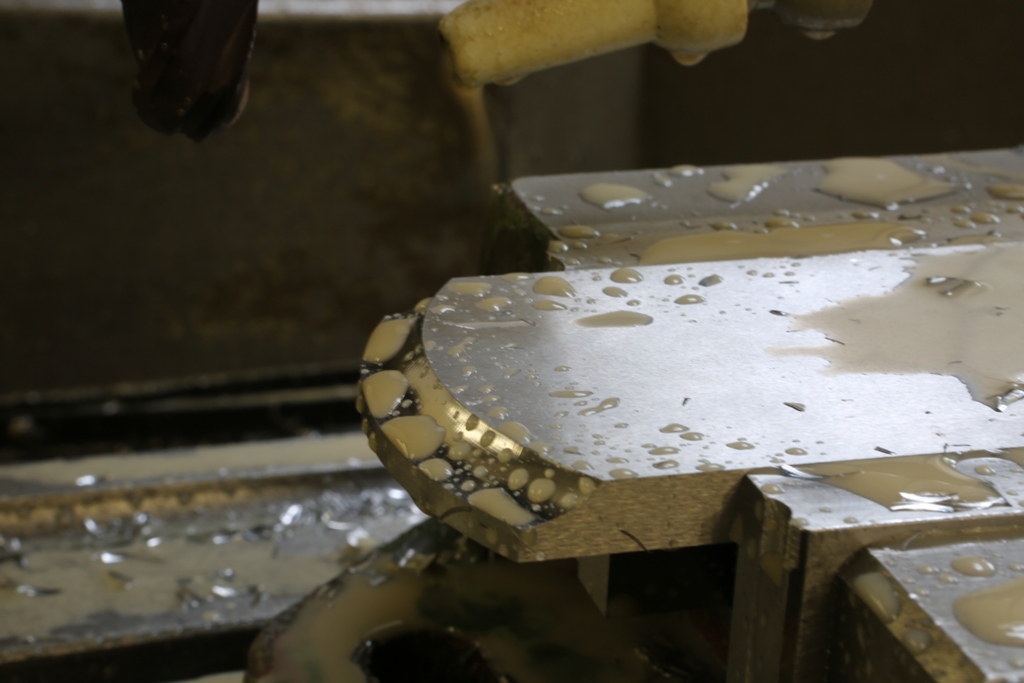
This is the 420 stainless steel that I am using for the bottoms and sides of the plane. The plan is to start knocking some weight off them. I am trying not to let the weight of the finished plane go over 3 kilos. All surfaces will be milled and ground. The steel that I have here is enough to make a limited batch of 12 planes.
Here begins the slog, there is a lot of material to come away. This picture shows a bottom starting out 12 mm thick and it will end up just over 10 mm in the finished plane.
Chariot Plane
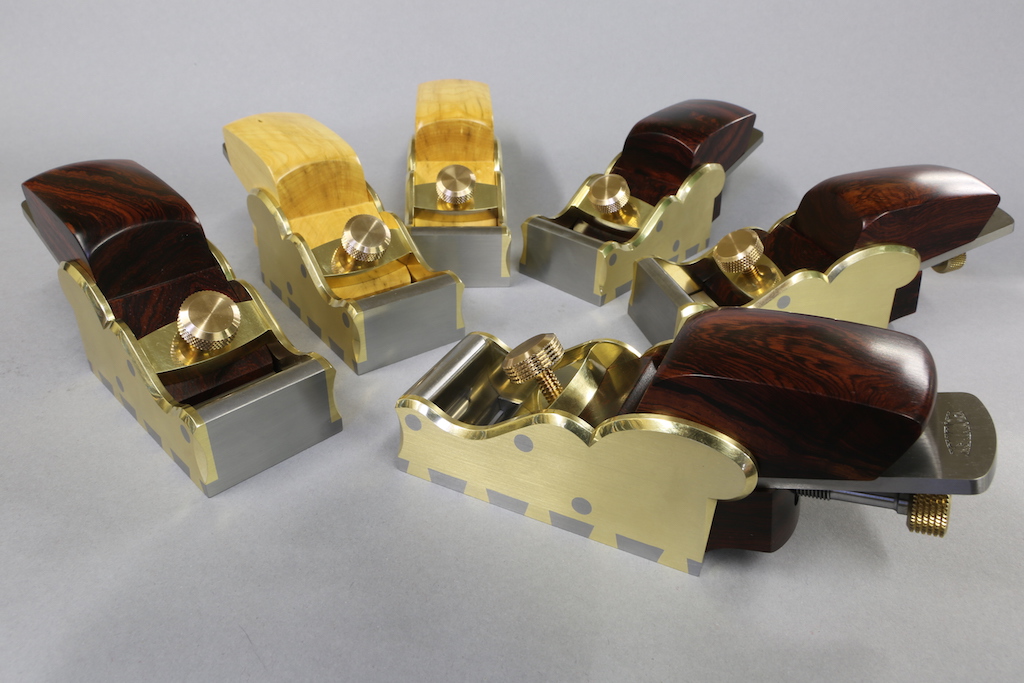
I find that I try to avoid using the term A28 because there is a lot more here than on the original A28 plane. These six are the last I will make as the cost of making is too high.
One of the original A28 Norris planes was sold at David Stanley’s auction Sept 2014 for £8,000 (+ commissions). In the light of this my price of £4,800 is very reasonable, especially as my plane is far superior in quality and construction. Who knows what these will be worth when I am gone.
There are some who would think that because this is cut out with a CNC mill there is no work here, to them I say “make one” ![]() There was a lot of work to get here and still a long way to go. (all finished now – look out for the next project).
There was a lot of work to get here and still a long way to go. (all finished now – look out for the next project).
It has been a long time but the Chariot Plane is now finished. I have some No 983 planes to complete and then I am moving on to something new.
Unfortunately in future I will have to charge my UK customers postage. I have managed to absorb this in the past but cannot any longer, mainly due to insurance cost increases.
Overseas customers will still pay the courier charge at cost.
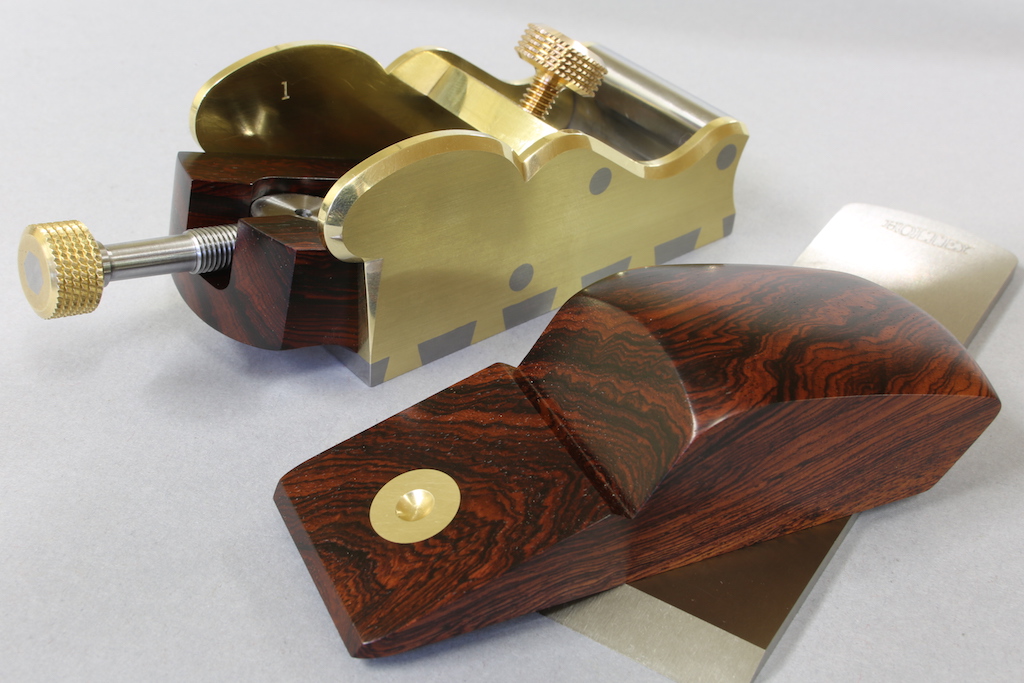
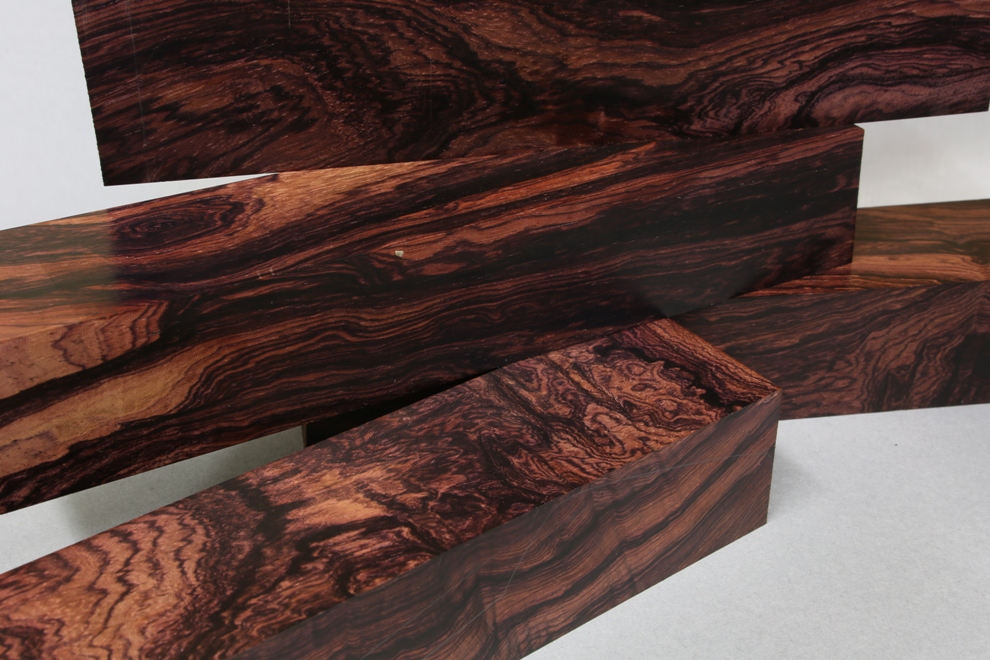
Despite having some part made infills which had been drying for 20 years, I decided that I preferred this piece of rosewood (which has also been in my workshop for a long time, and I have very little left) – Dalbergia Cubiquitzensis – it has more ‘bling’ ![]()
I am in the process of making a small batch of these planes, which will include this rosewood, Boxwood and a mystery wood – photos soon.
I am occasionally asked how to dovetail. It is a bit of a cheeky question and it would take me several months or more full time to teach this properly. Sometimes people seem to forget I am running a business.
I have been making dovetailed planes for over 25 years now and I still keep trying to improve my system. Another plane maker described my dovetails as made on the CNC and are very cold and clinical – is this how one would describe a precision job? Then guilty as charged.
Here are some photos of part of the dovetailing process.
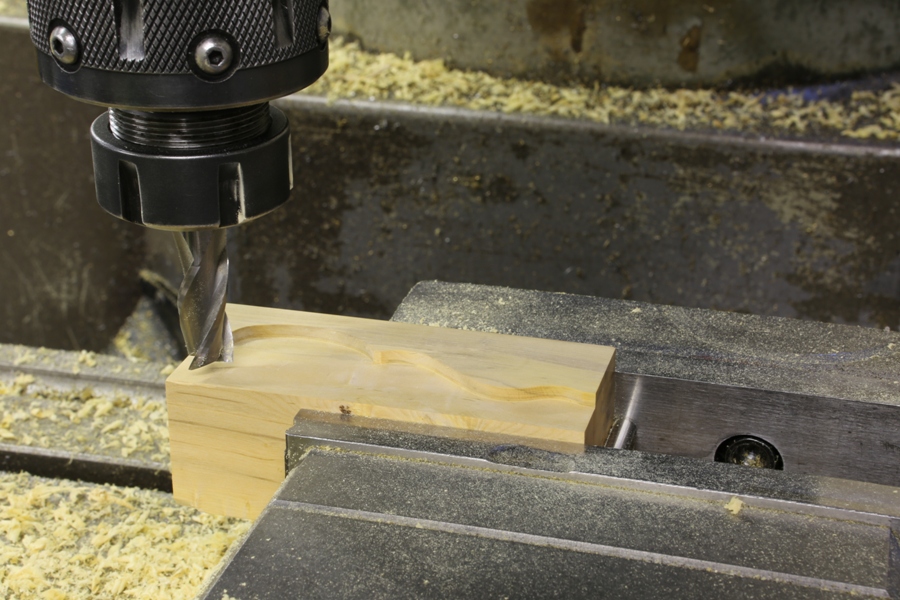
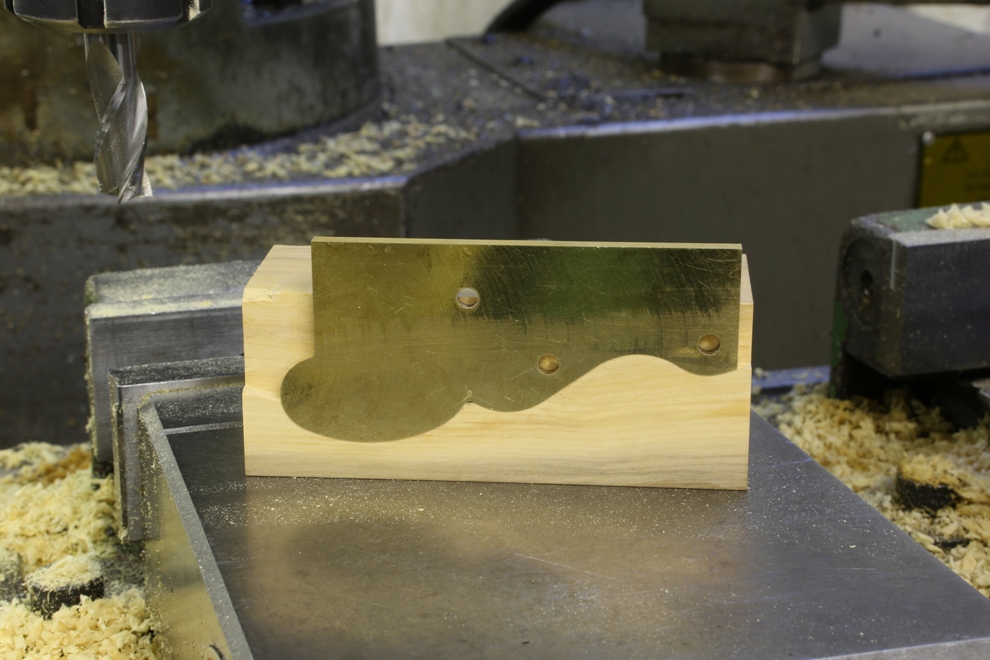
Sometimes it is frustrating that I have to do this much work before closing a plane up. The pictures above show a Boxwood spacer which supports the sides whilst peining the dovetails. Sometimes I use aluminium for this process but as I am only making 6 planes it doesn’t have to do much work. Also the sides of the plane will not be scratched when removing the spacer. A lot of work for a piece of tooling which will be discarded after six uses.
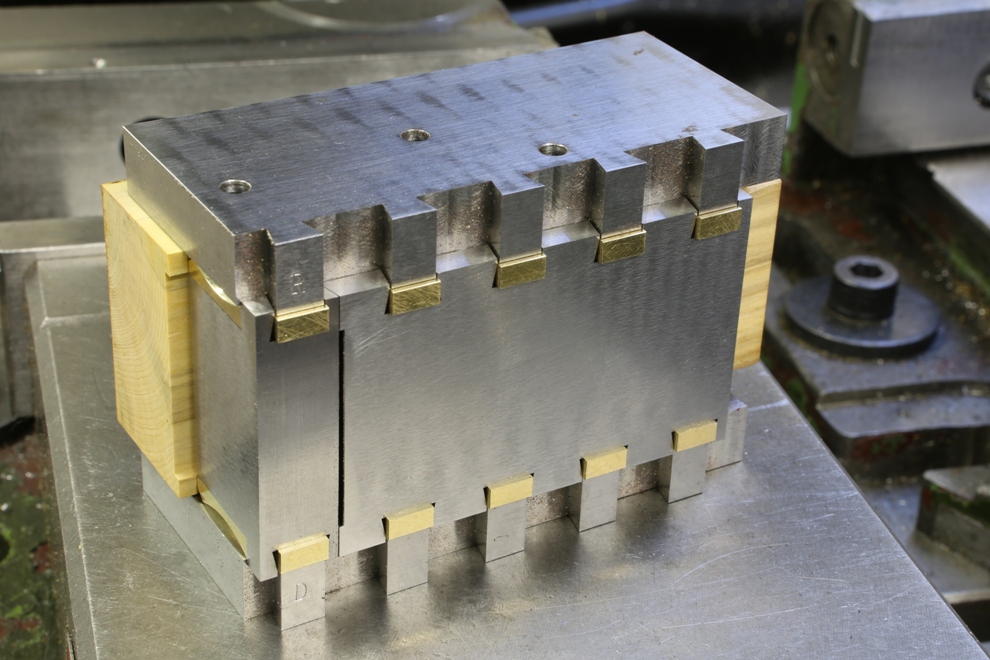
Showing everything in place ready for clamping in the vice. Note that the clamping plates support the dovetails as well. There is no movement and everything stays true to size.
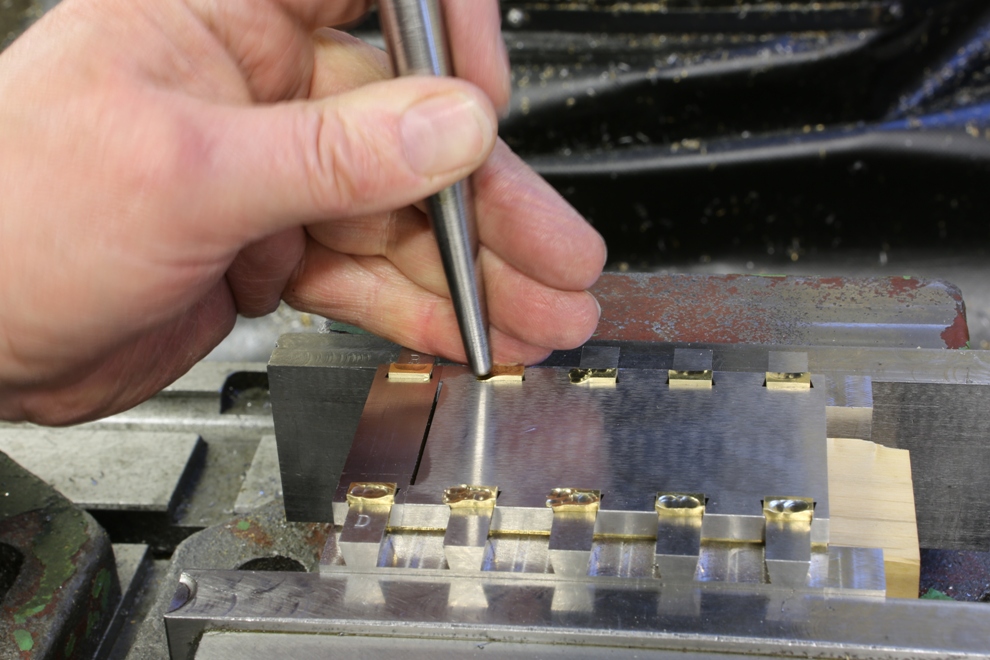
This is the first stage of peining. You will see that the peining looks quite messy and untidy as I am stuffing the extra brass into the voids.
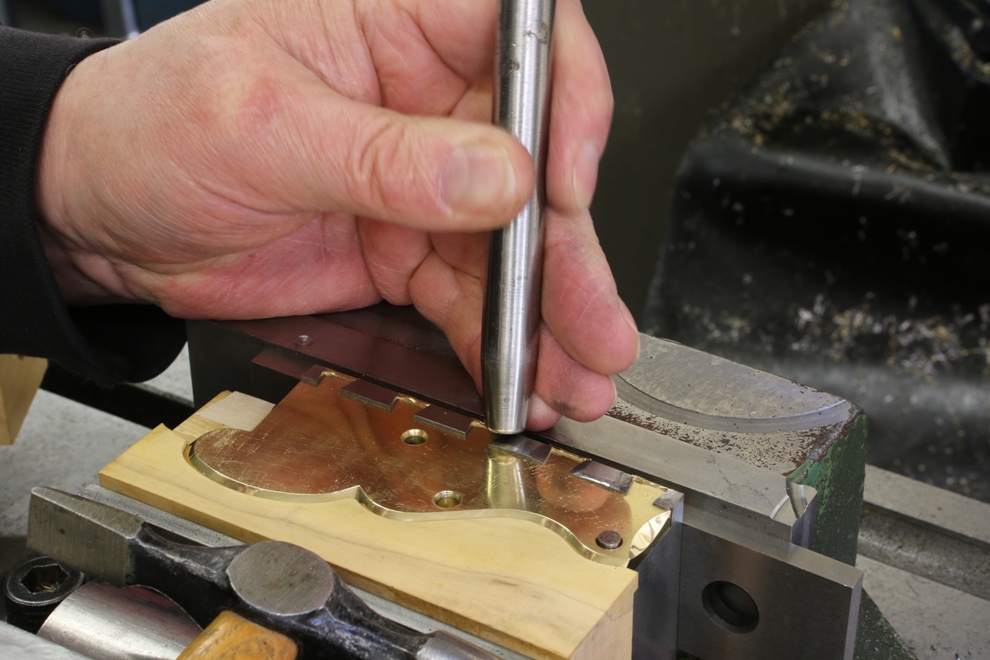
The last stage of peining the dovetails is the sides. Again the assembly is clamped in a precision vice with a spacer plate between the uneven peining on the underside so true reference is maintained.
The use of bimetals will show up any untidiness.
Easy isn’t it ![]()
Powered by WordPress