Another plane which will be a future rarity. Just a one off as all future projects will be.
Another plane which will be a future rarity. Just a one off as all future projects will be.
Showing the bottom blade bed modified to stop the blade passing through the mouth.
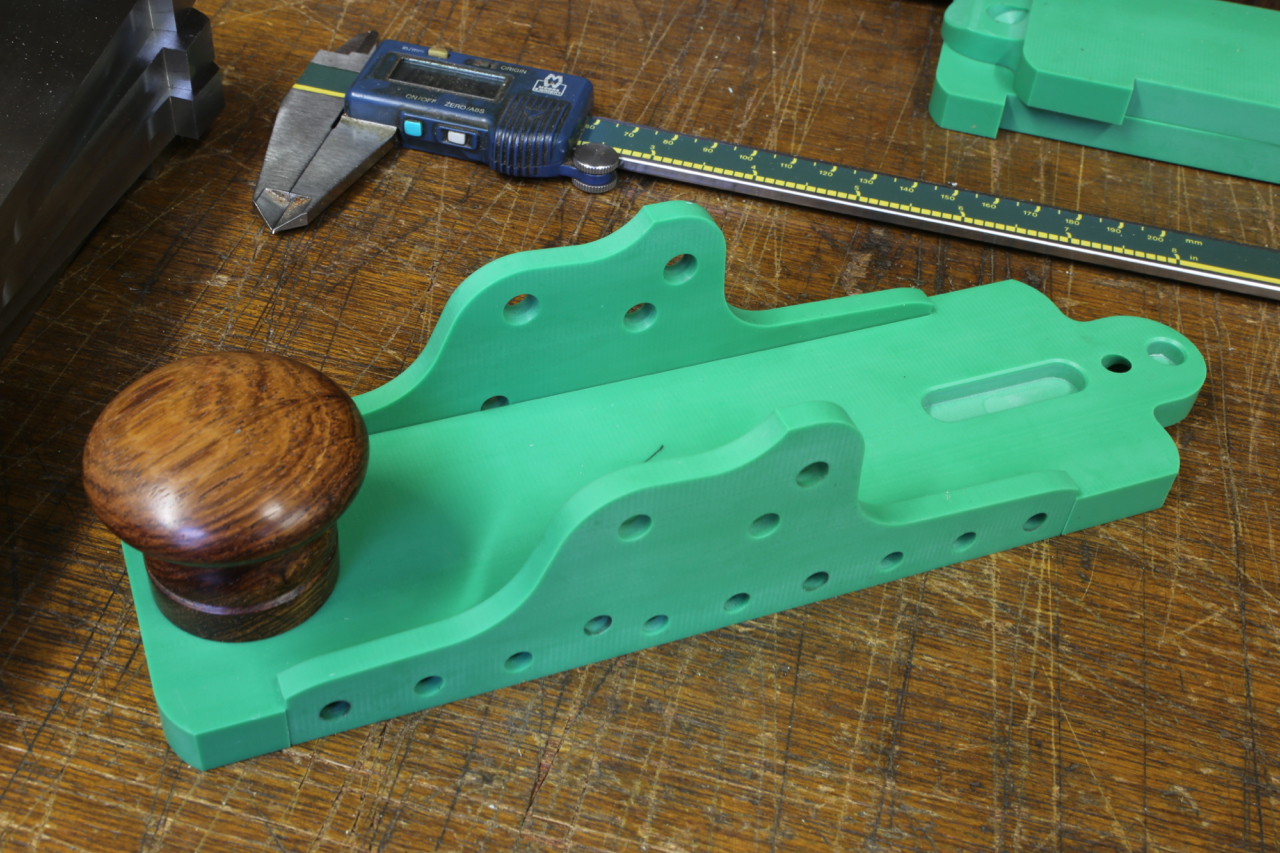
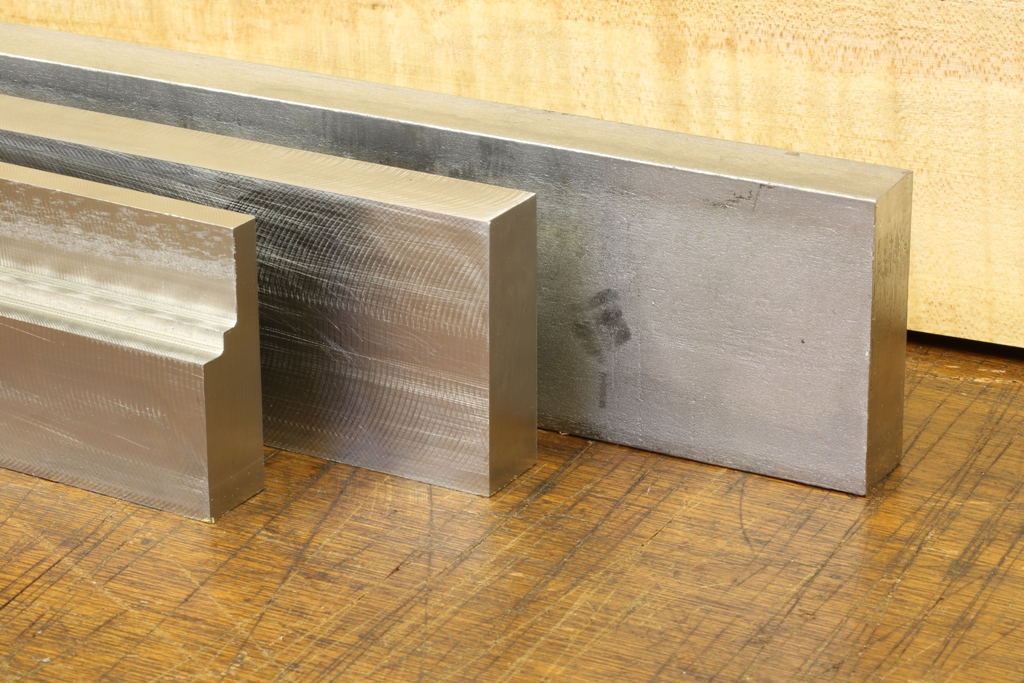
Work commences on the stainless sides … you didn’t really think I was going to make it out of green plastic?
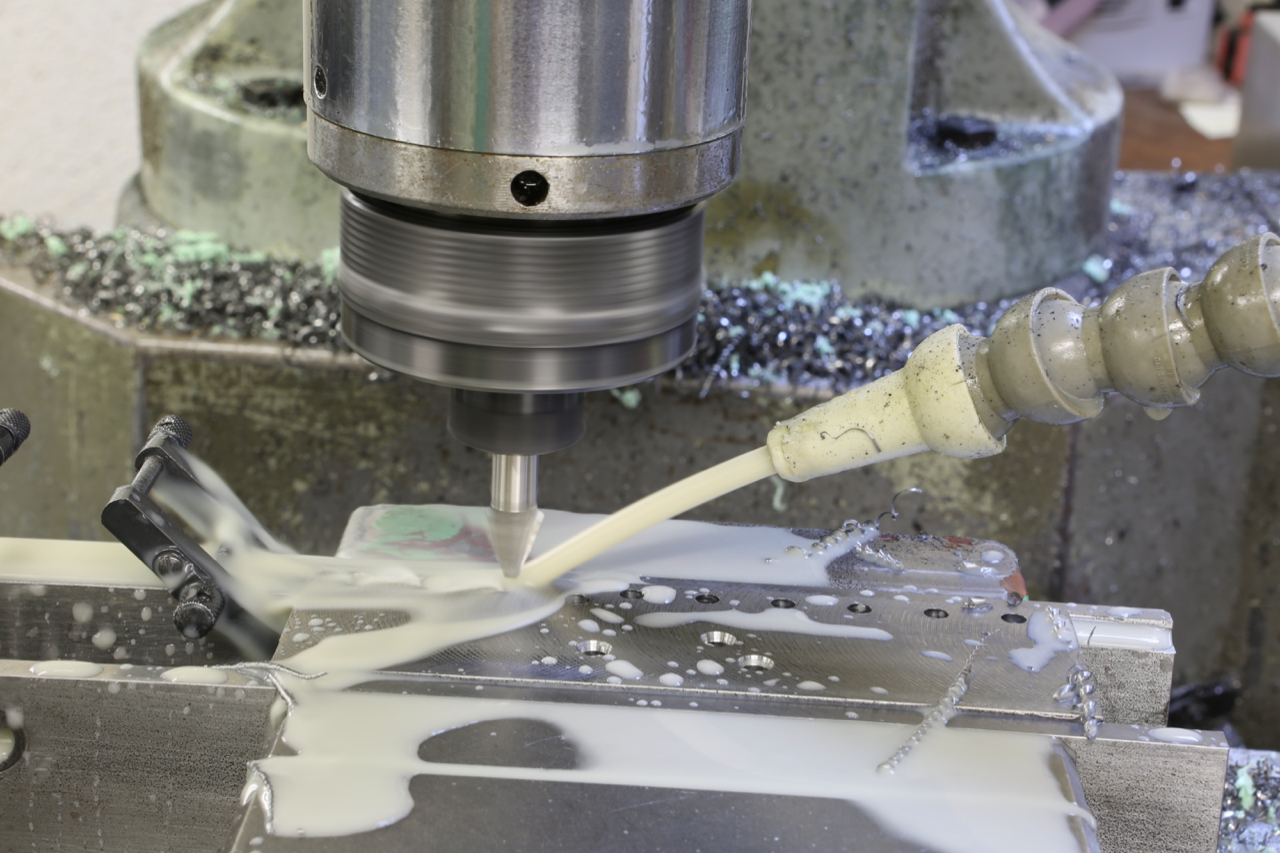
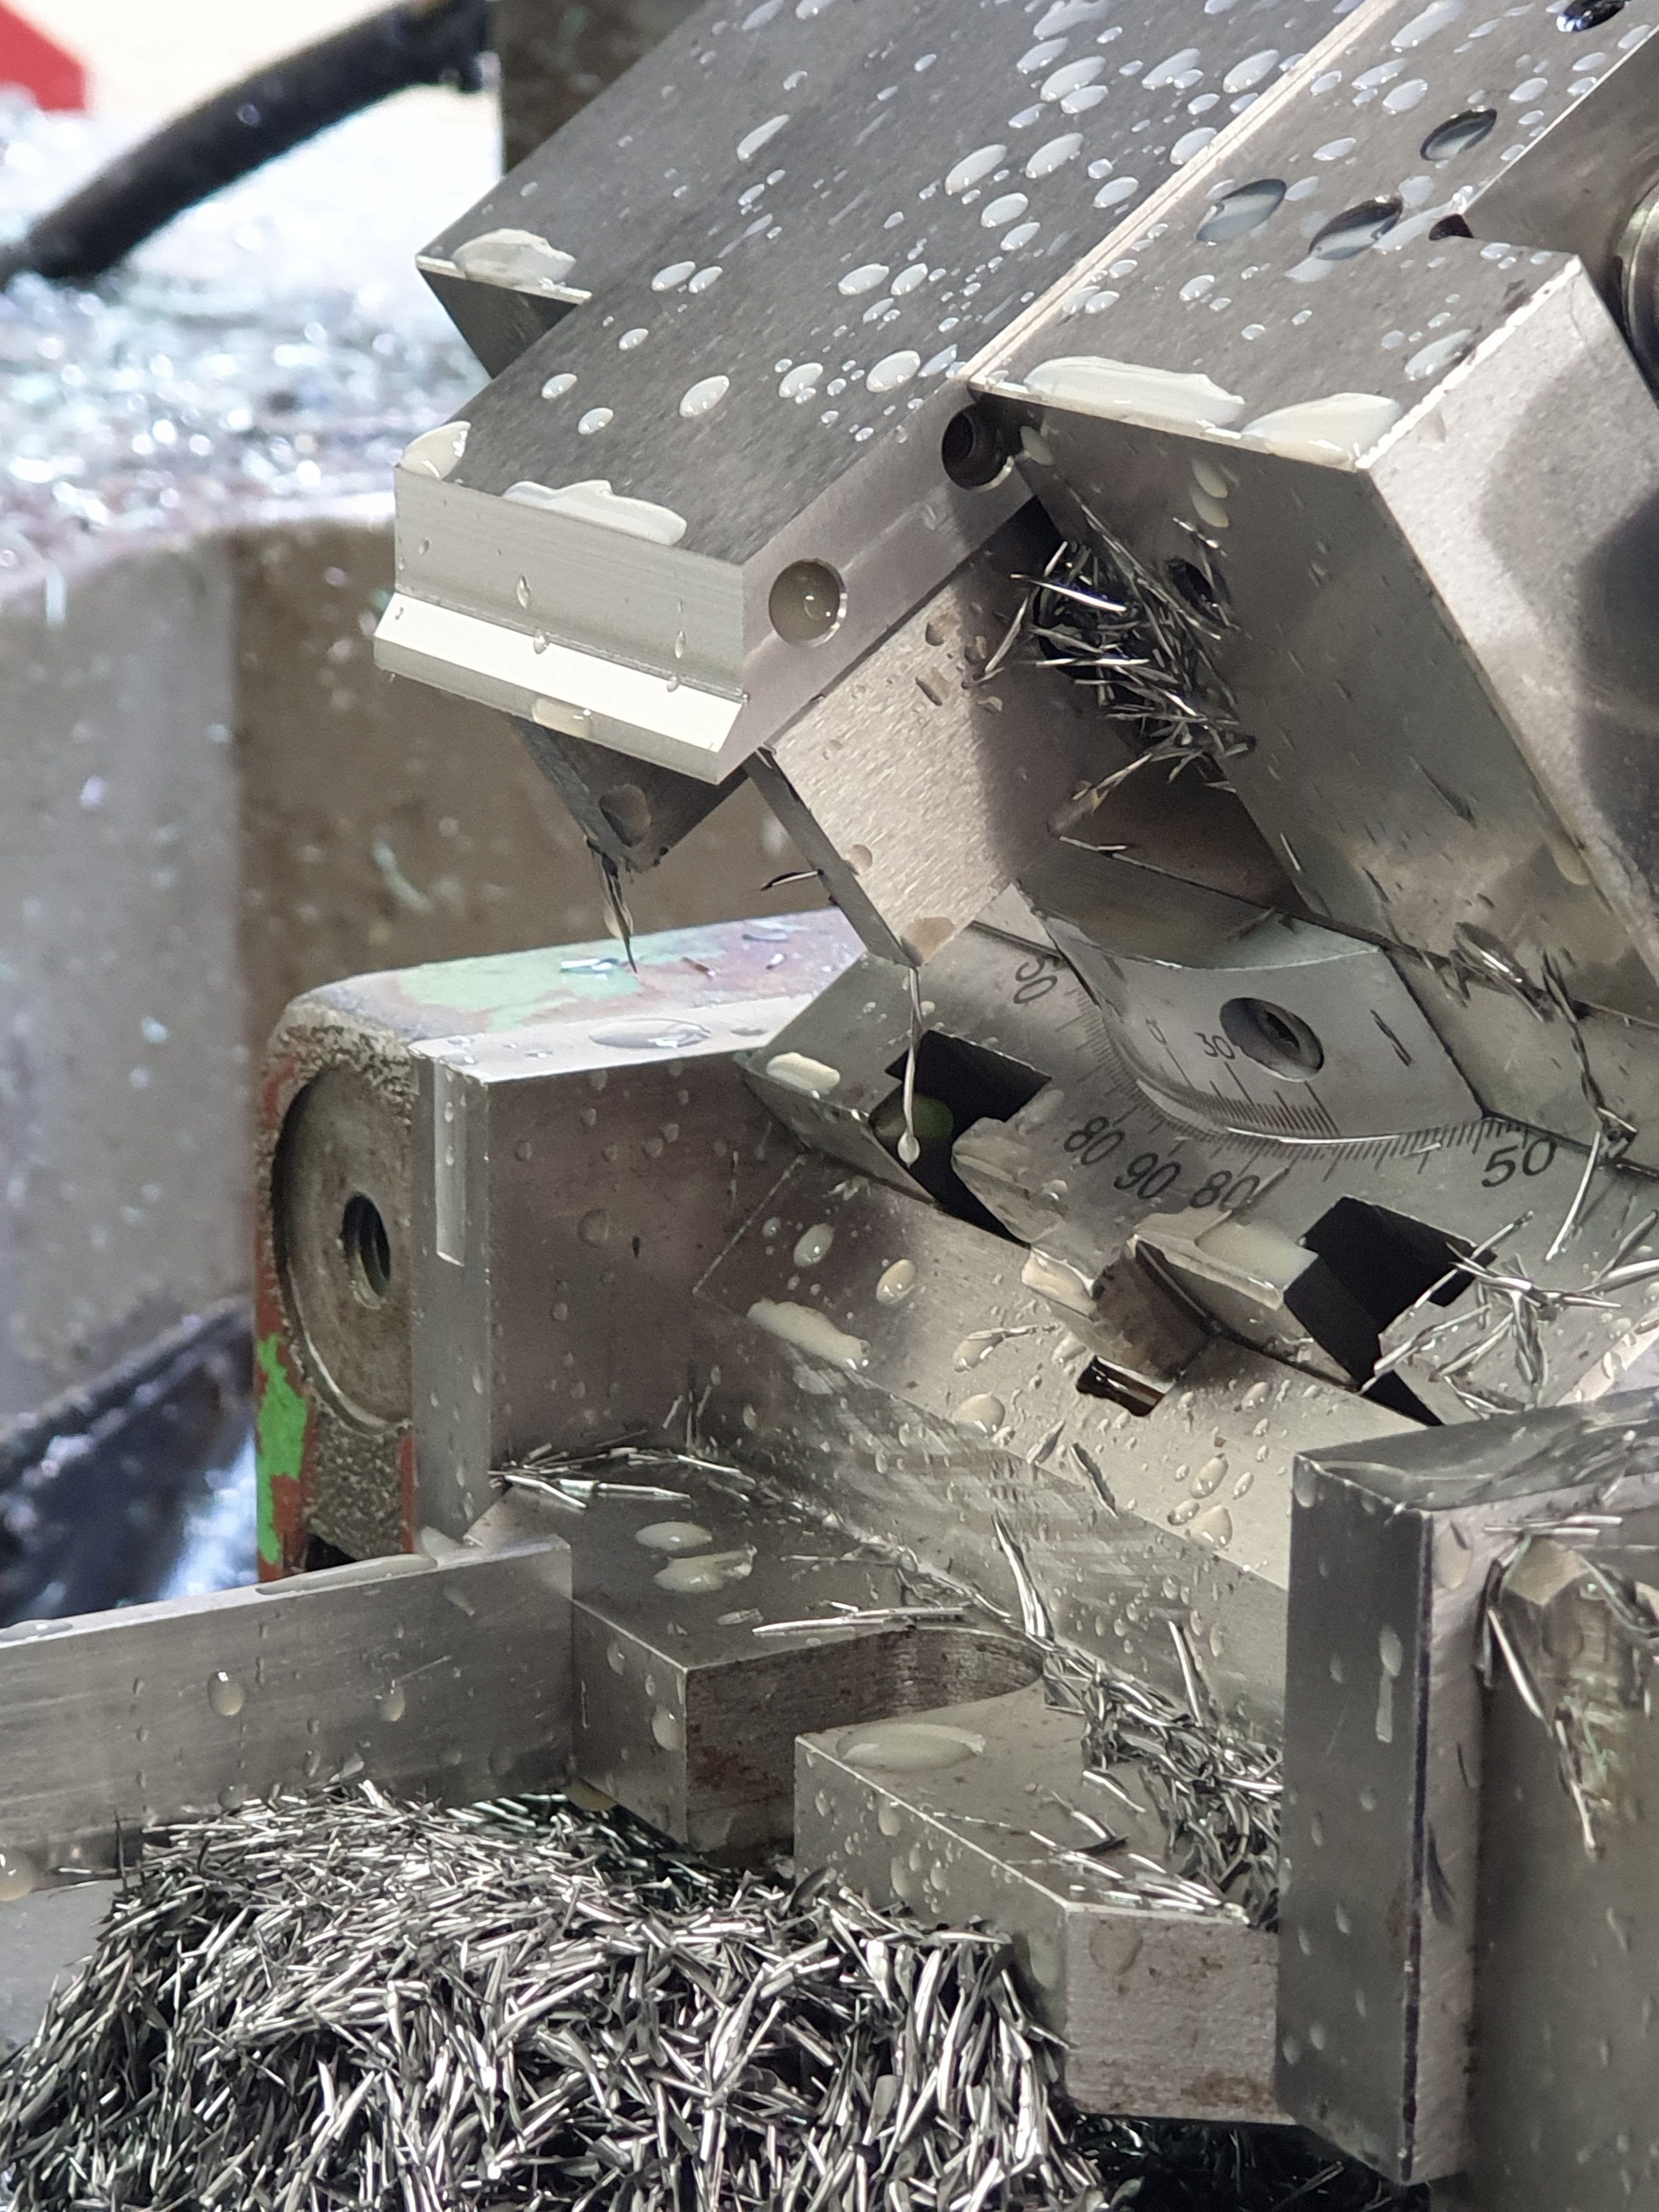
After a milling operation is finished everything has to be broken down and set up again for the next stage. This usually means making new fixtures and writing another programme. Always a lot of understated work on every new design.
It is always sad breaking down the machine just when everything seems to be working nicely. I have to be extra careful I haven’t missed out a side (done it before!).
One of the things that makes me different is that this is not just a craft job, this work is precision and takes a lot of planning.
I have decided to try and keep everyone informed as to the detailed work that goes into these planes. A well known manufacturer once said that I always manage to keep my work hidden.
During the course of finishing off bits and pieces out of the back of the cupboard I decided I would put together some more No 98 planes. I was horrified to find not all the pieces there. However, I had already promised a plane to someone so I need to get on with it.
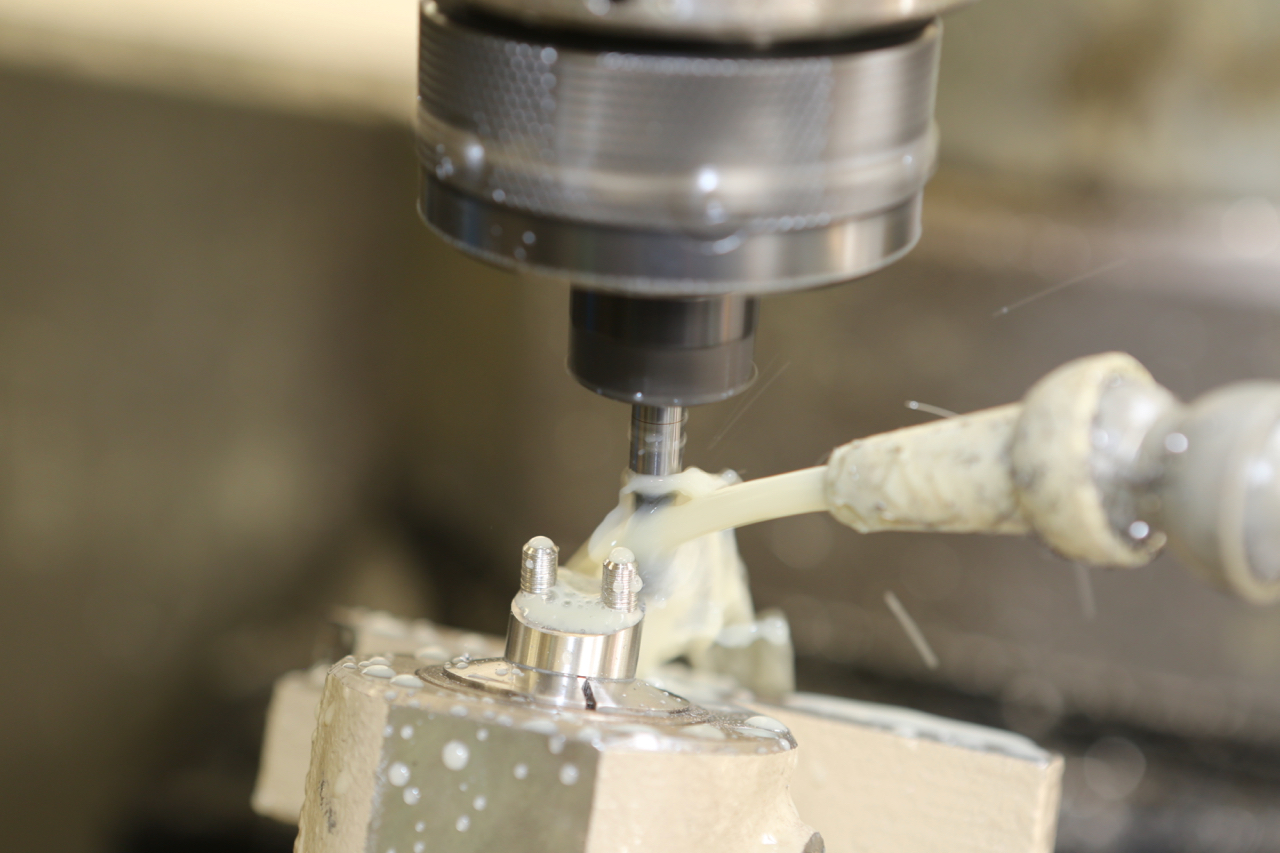
I am just making components as I need them. I will start with some pictures of the adjuster boss and post as I go. This No 98 plane was the start of my own designs (and the start of bevel up smoothers in general). You will notice from just these few pictures how much work is involved.
An enormous set up for a tiny component
Planing the end off to initiate a 15 deg angle
Milling out the integral rivets at the same 15 deg.
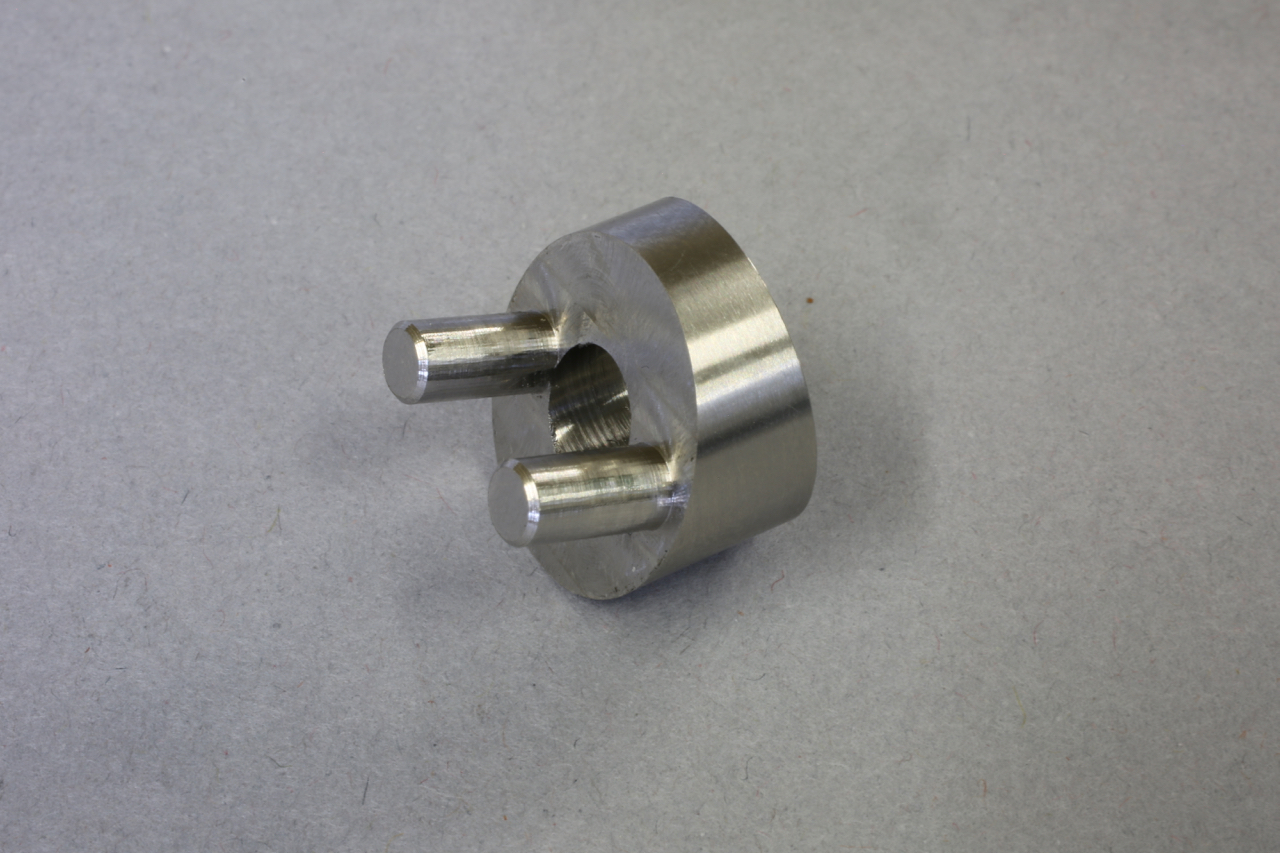
The finished item
You can pick out where this item belongs
Over the years I have and many enquiries for this No 98 plane which I hadn’t been able to fulfill. So those of you who want one this is your only chance to get one. Just making a few. See my website for pricing.
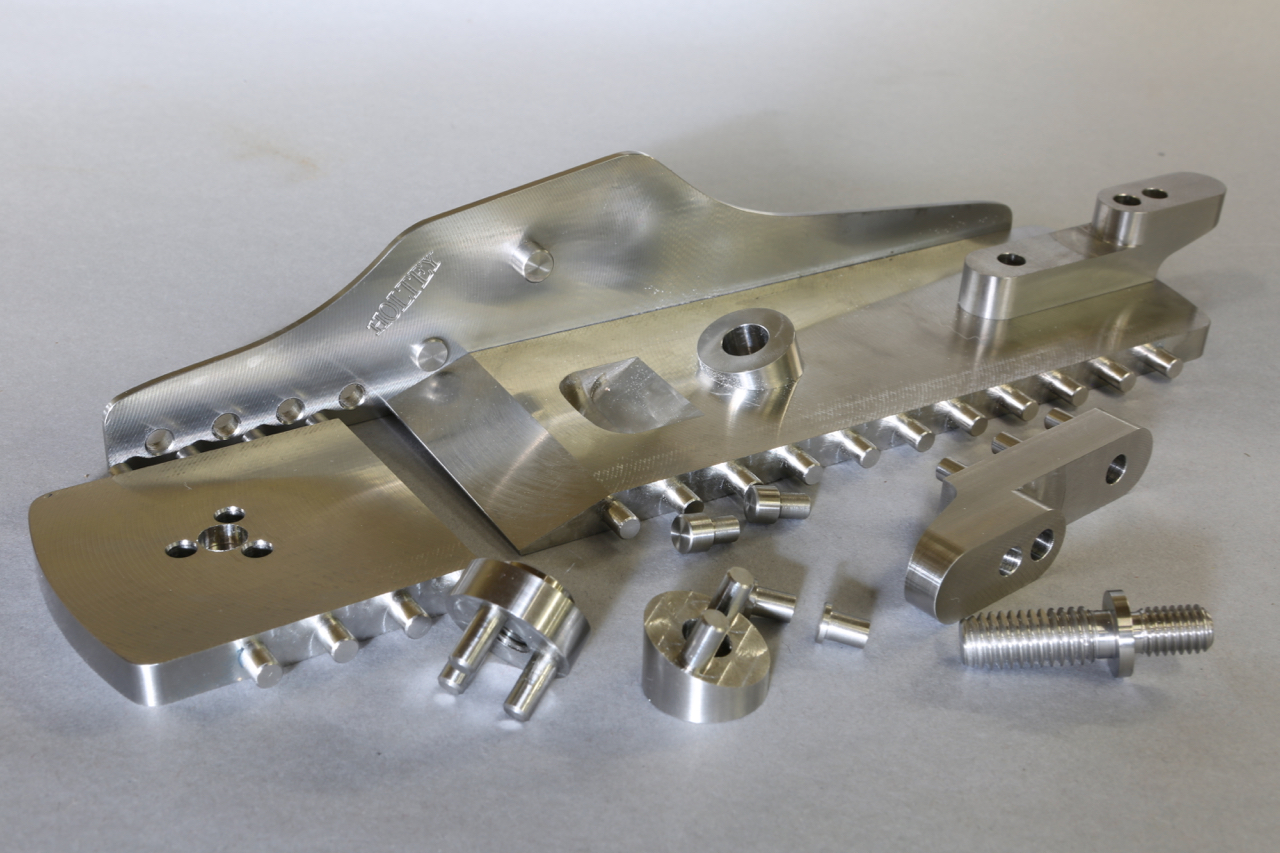
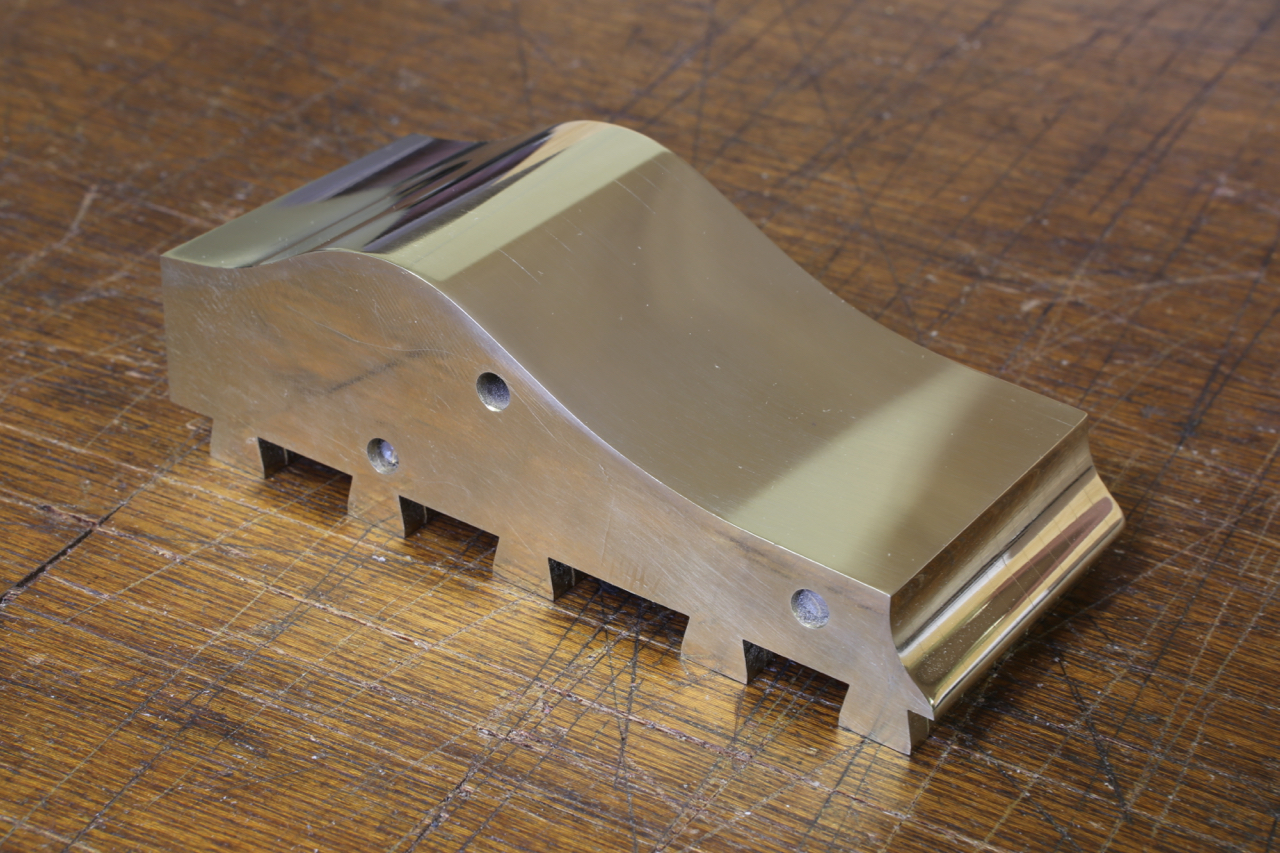
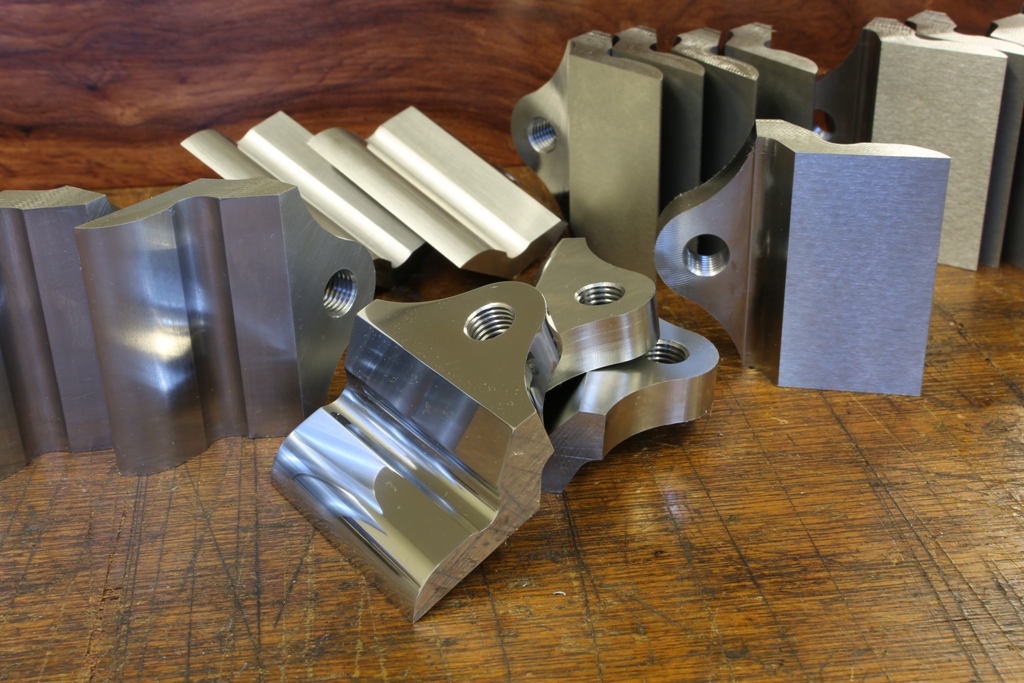
All the chassis work done on my No 983. A lot of f…… work done
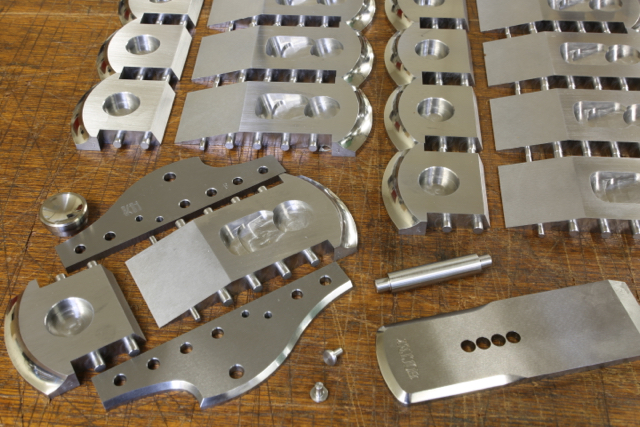
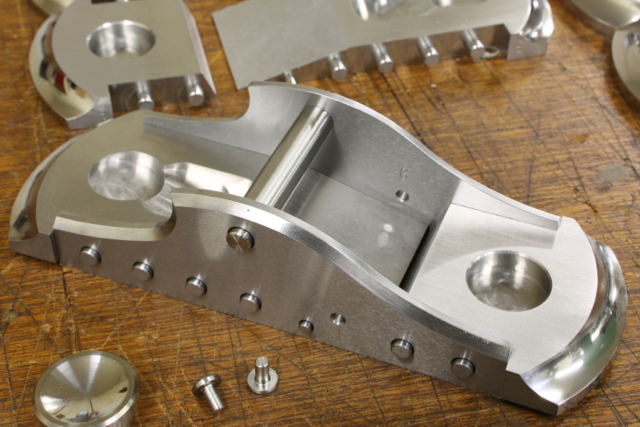
Edge polishing to the sides is usually done with all the sides in a block to keep all the edges true and square.
All my hand work it has to be as good as the machine work, at the risk of looking clinical with no soul ![]()
LEVER CAP
As with many of my components these are fabricated from solid bar. The three pictures shown below are starting from a raw bar, removing the excess and shaping then the finished product.
This has probably been one of the most labour intensive of all the parts. Now that they are done, with the exception of polishing (which is no mean feat), I am very happy to move on to the thumb wheel and pressure pad.
Update: A modification has been made for ergonomic purposes. An additional chamfer has been added in case there is any contact with fingers or knuckles.
The pictures don’t do justice to the time spent on every little operation. Although I have taken many photographs along the way I don’t have time to document every little stage. The effort for every detail can seem a bit over the top, and I make little revisions all the time – the overall design will still be as the posted line drawing.
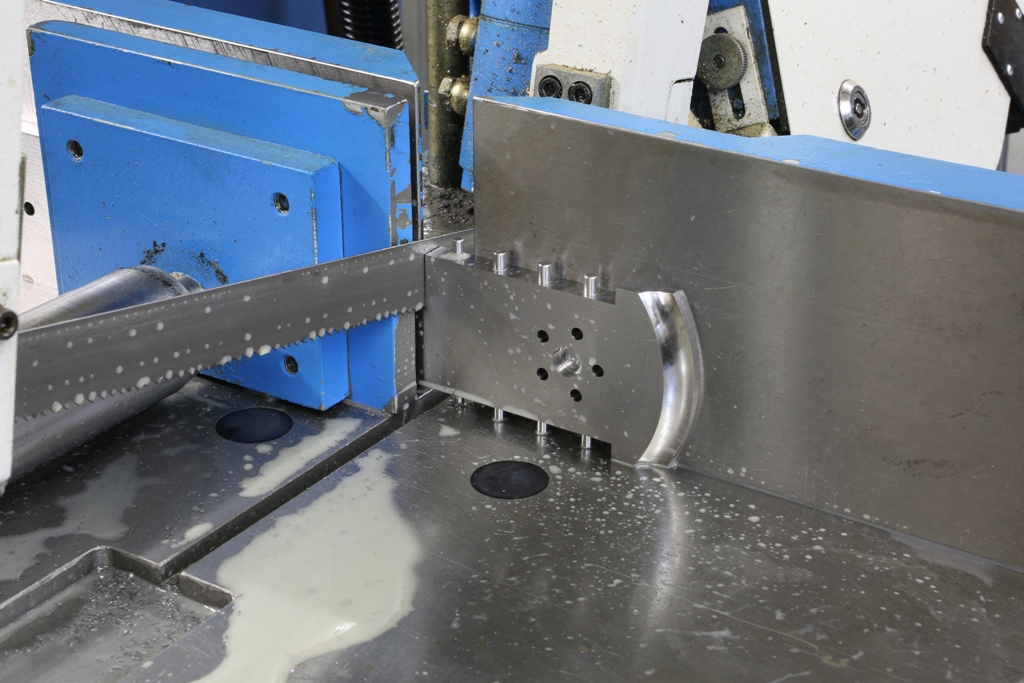
This is a nail biting moment, once I start cutting there is no going back. I can take hours double checking before I separate the toe from the the rest of the sole.
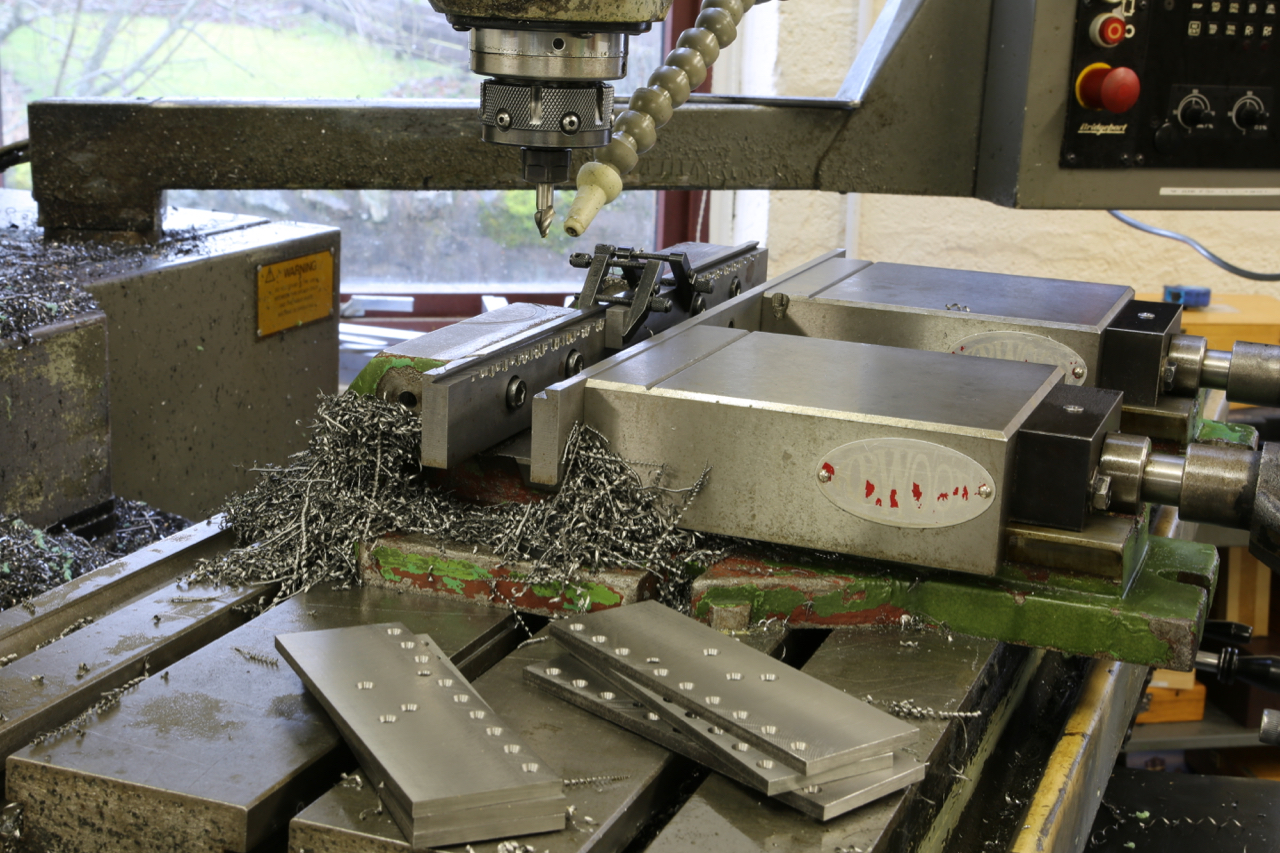
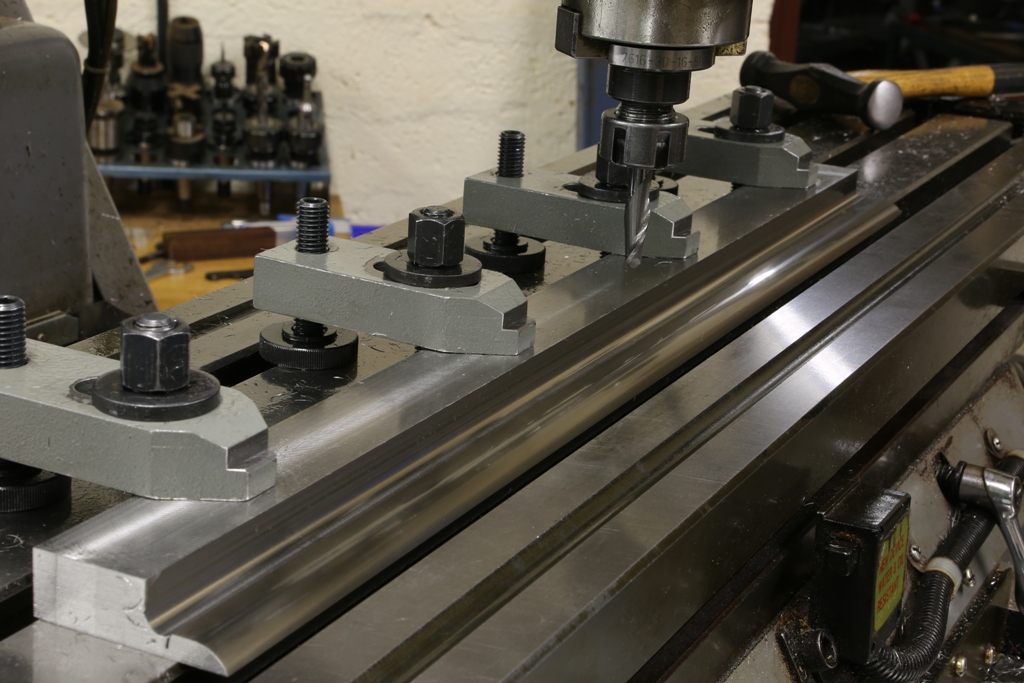
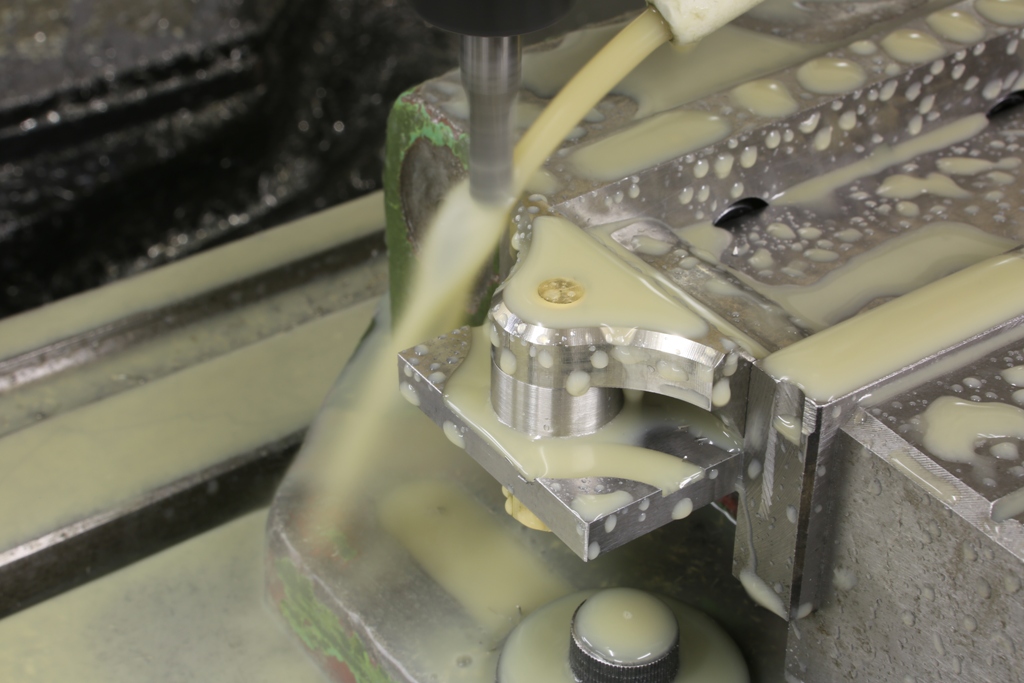
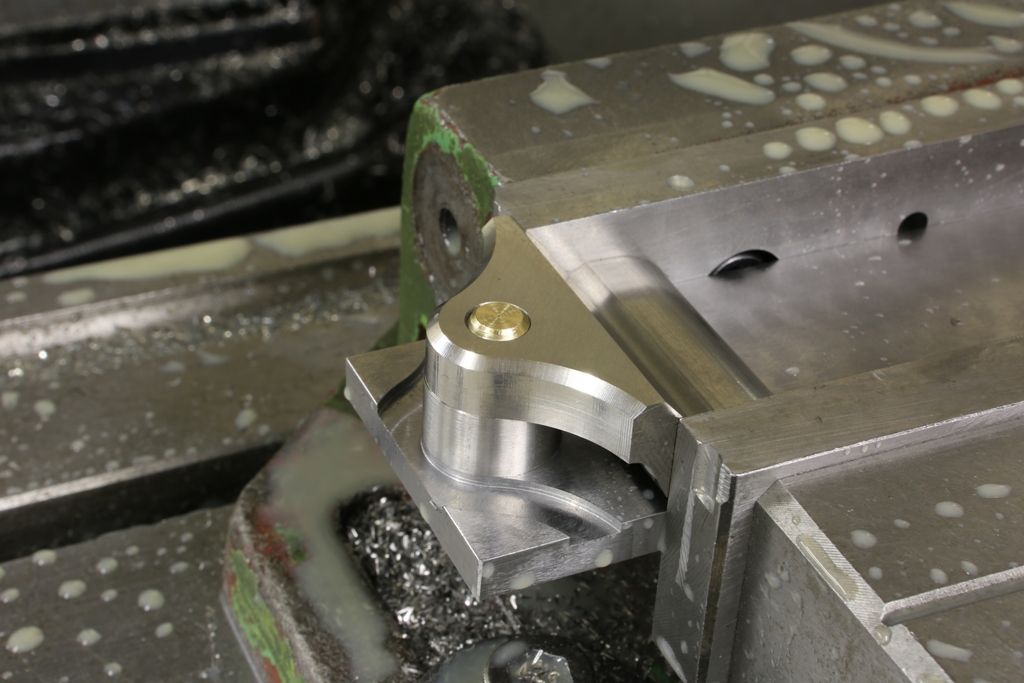
Here I am milling the blade bed. The rest of this operation hasn’t been photographed as I covered this in the No 983 blog and it is almost identical as are the adjuster recesses. You can see that the work holding vice jaws are purpose made just for this plane. This enables me to get a firm grip.
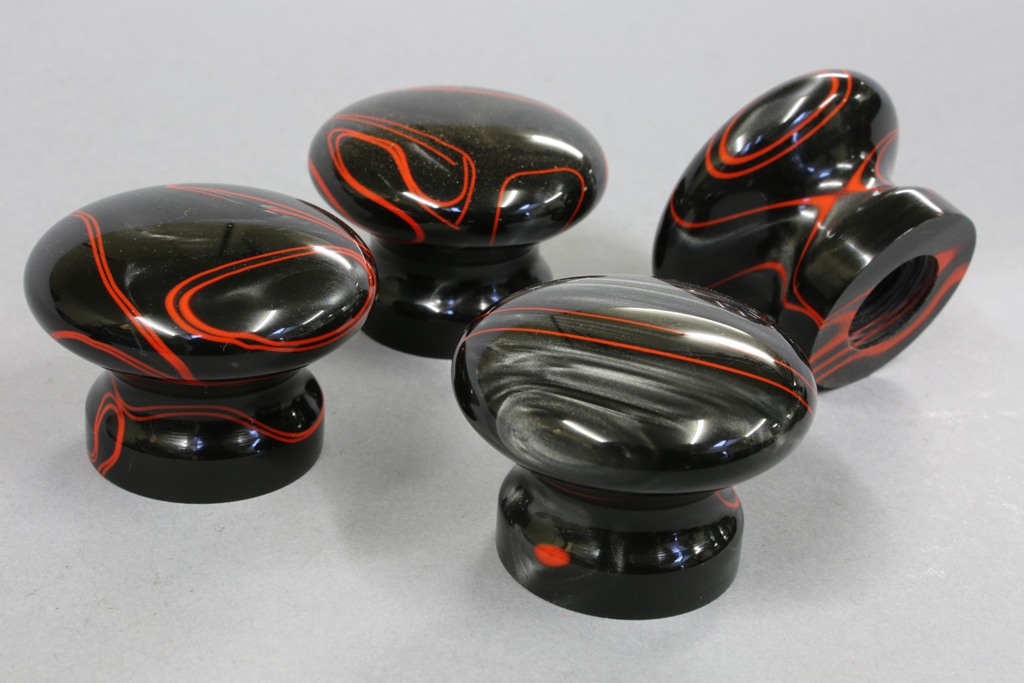
All my buns start off as a true square block. All drilling, tapping and recessing is carried out on the mill
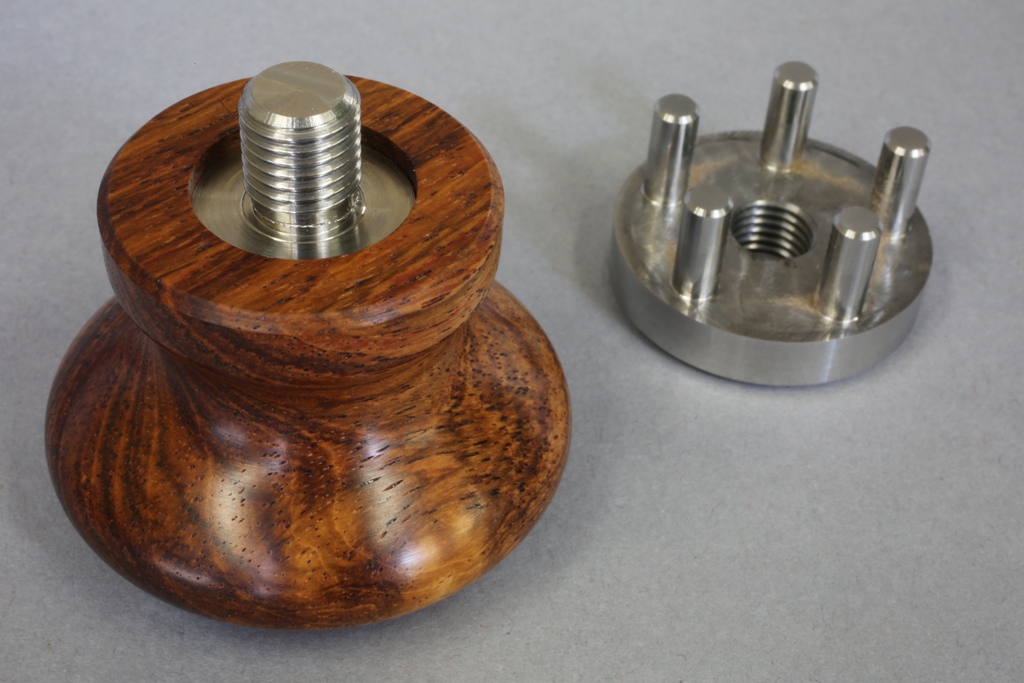
The bush shown here is to be epoxied into the front bun. You can use some imagination as to how I arrived here. The combined strength of the bush and its bun is considerable. Note there are two flats which make it impossible to remove the bush once the epoxy has cured.

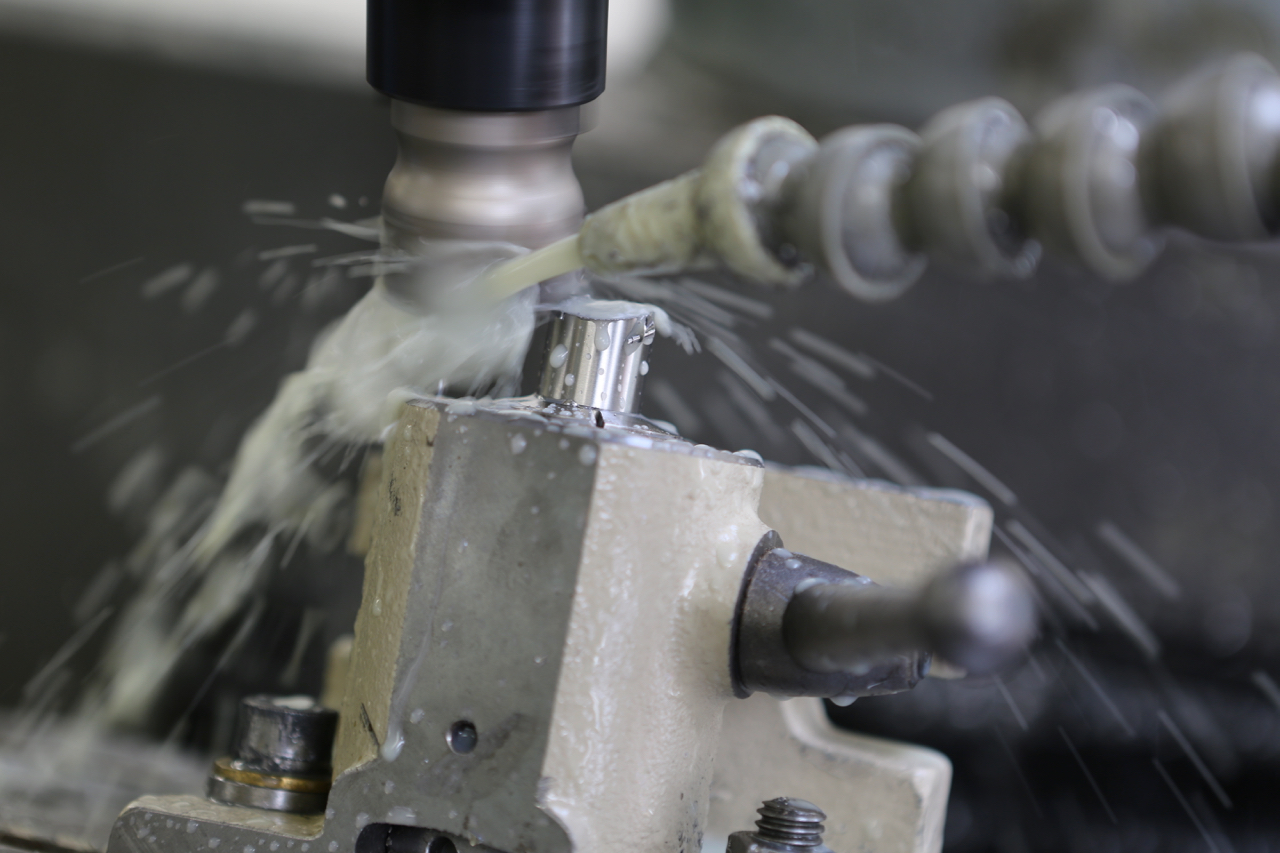
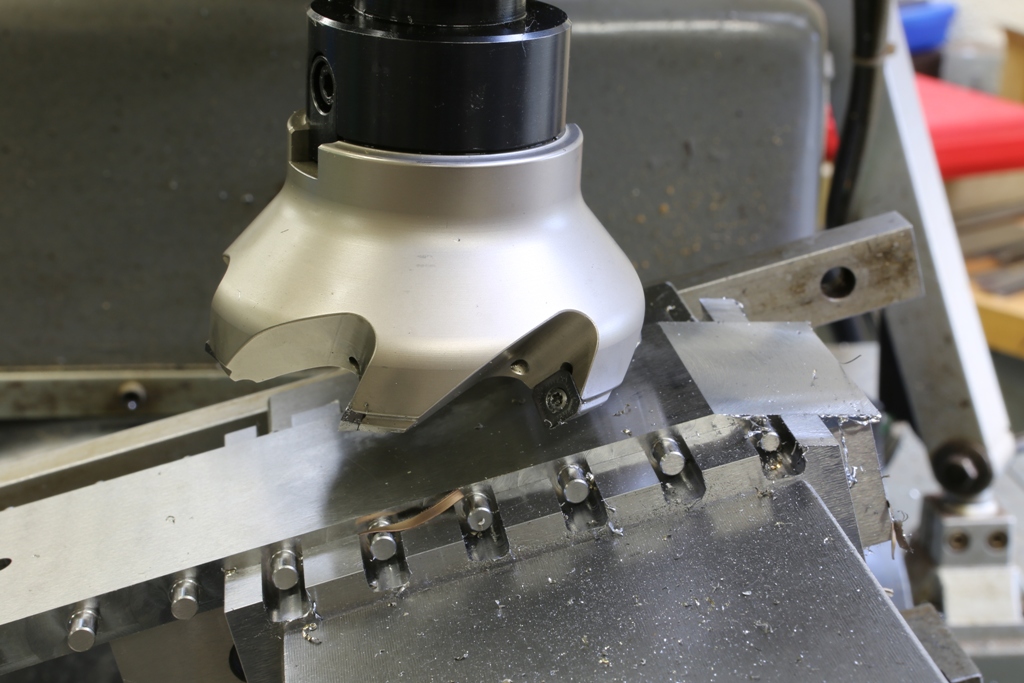
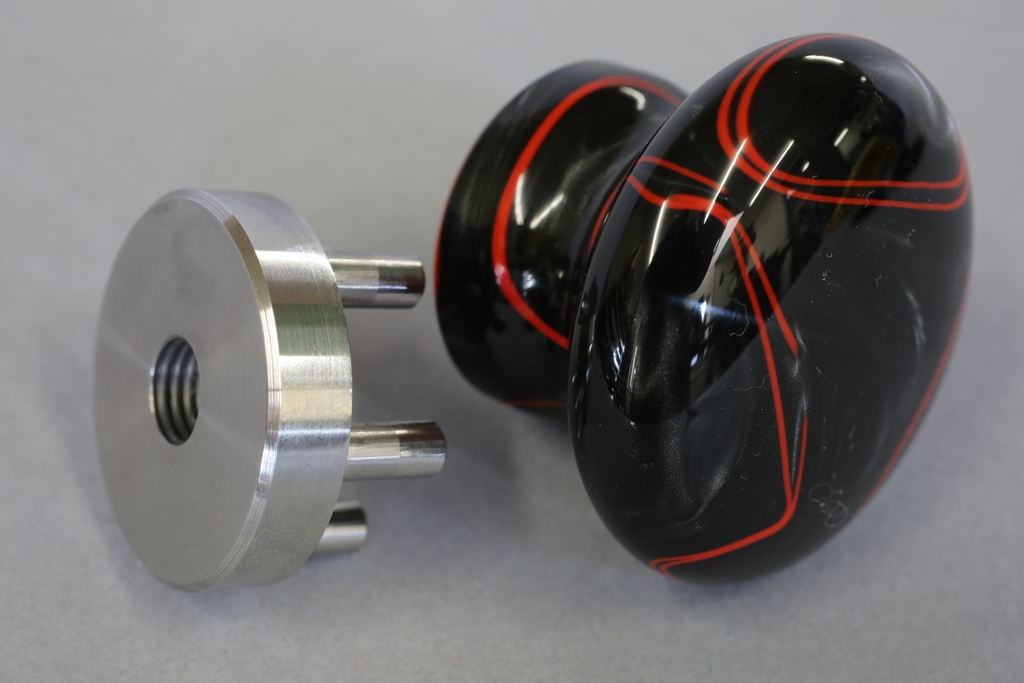
This is the milling operation for the five integral pins/rivets to the bun boss.
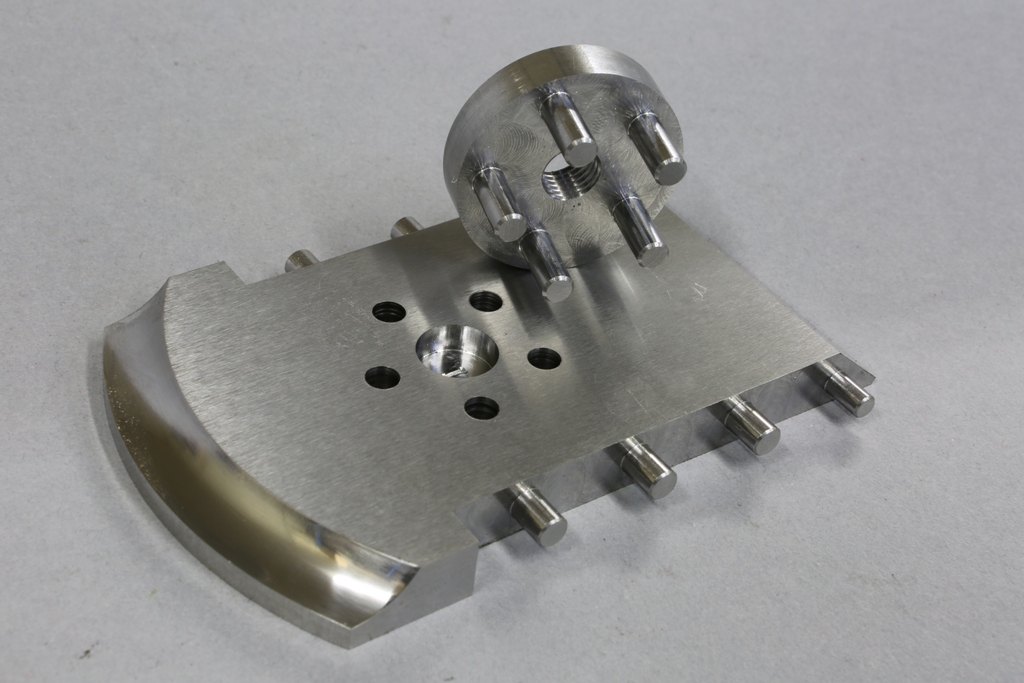
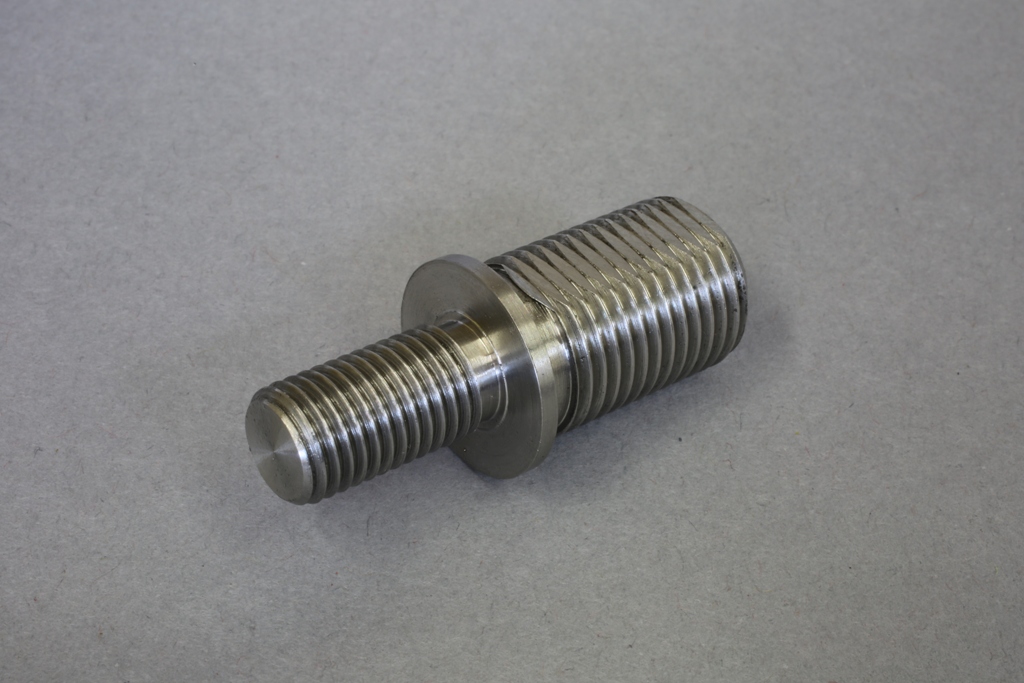
This is the finished boss for the front bun. I have chosen this method of fixing for its strength. I wasn’t happy about tapping blind holes. Who cares, it is not about cost ![]() It is going to be the only one of its kind.
It is going to be the only one of its kind.
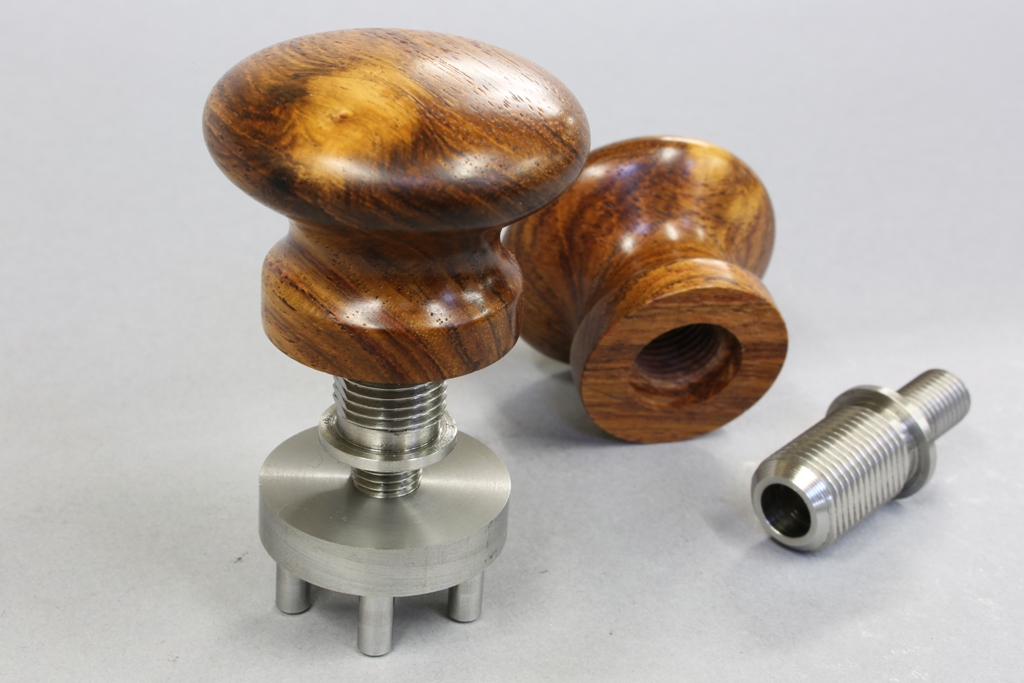
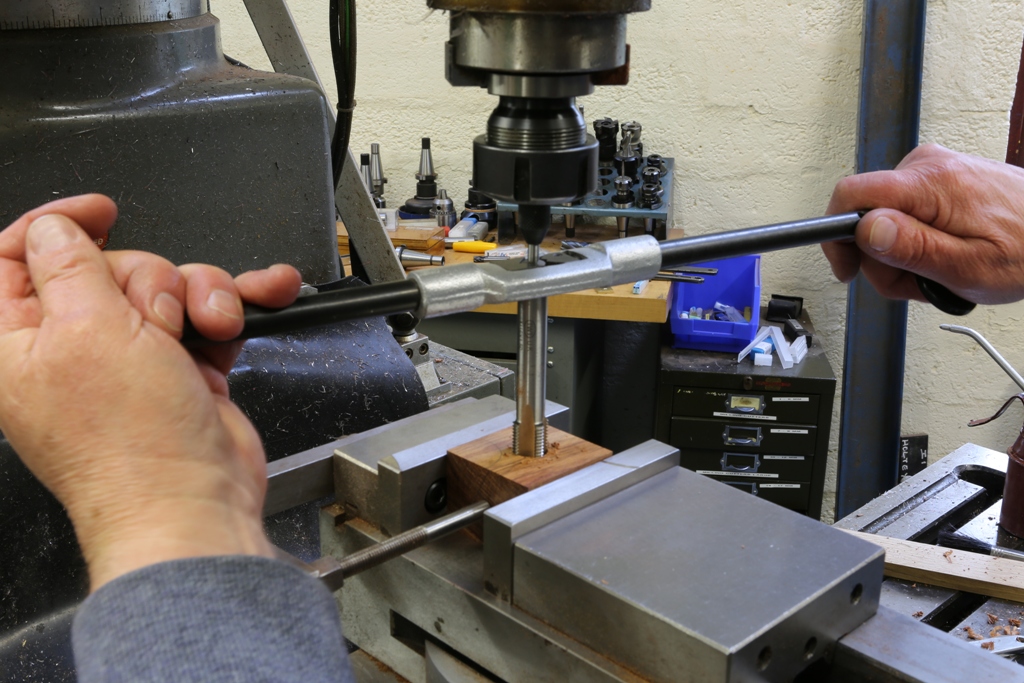
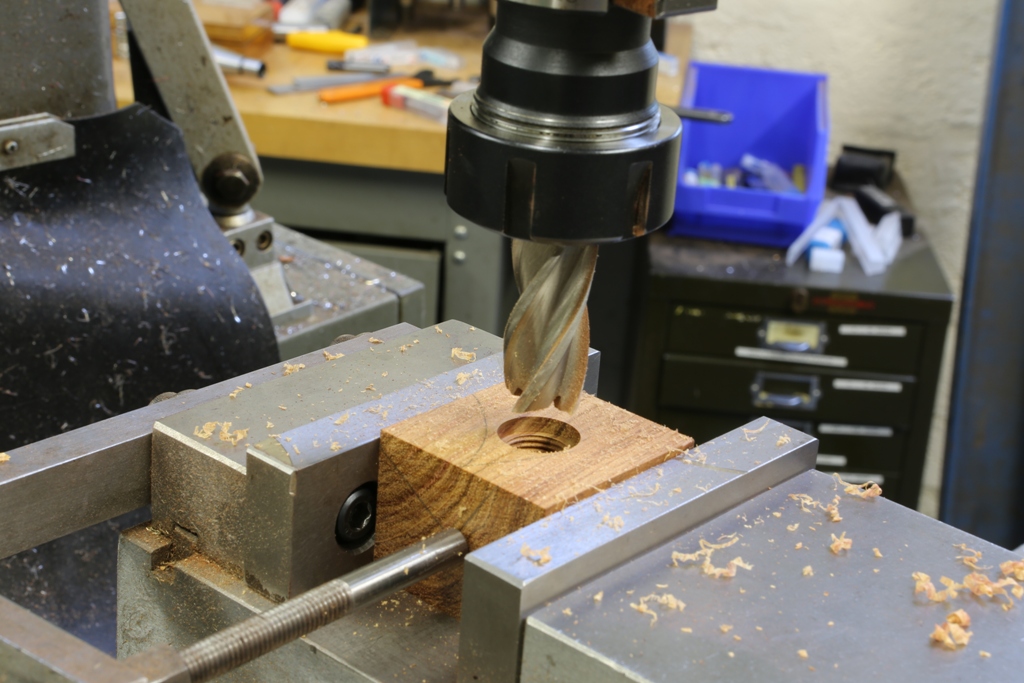
Illustrating the fitting of the bush to the bun and the threaded nose to fit the finished bun to its boss.
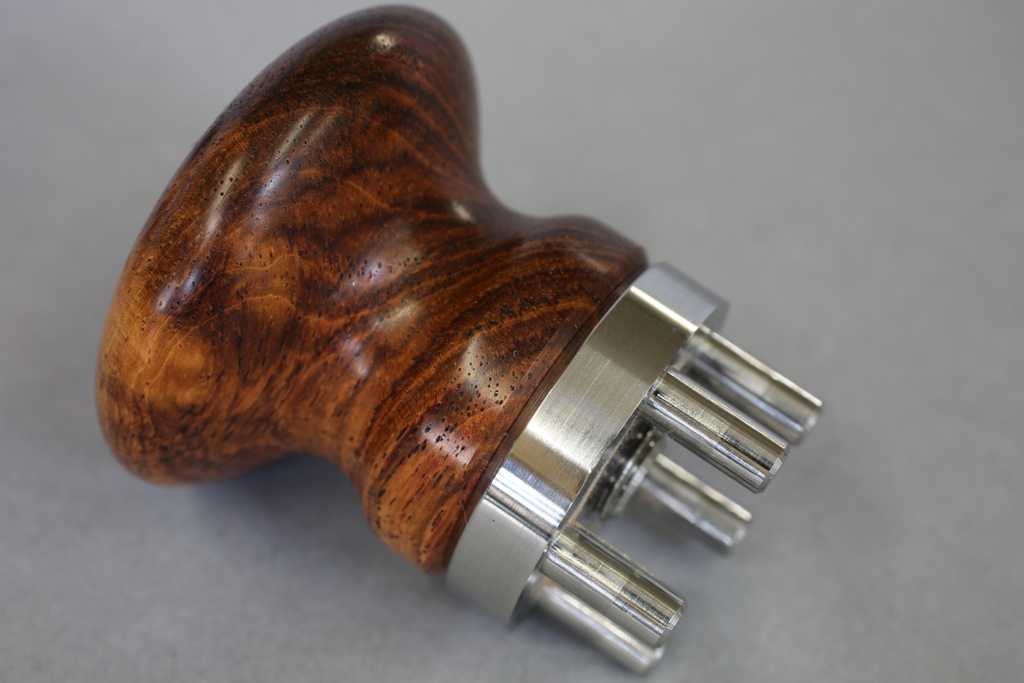
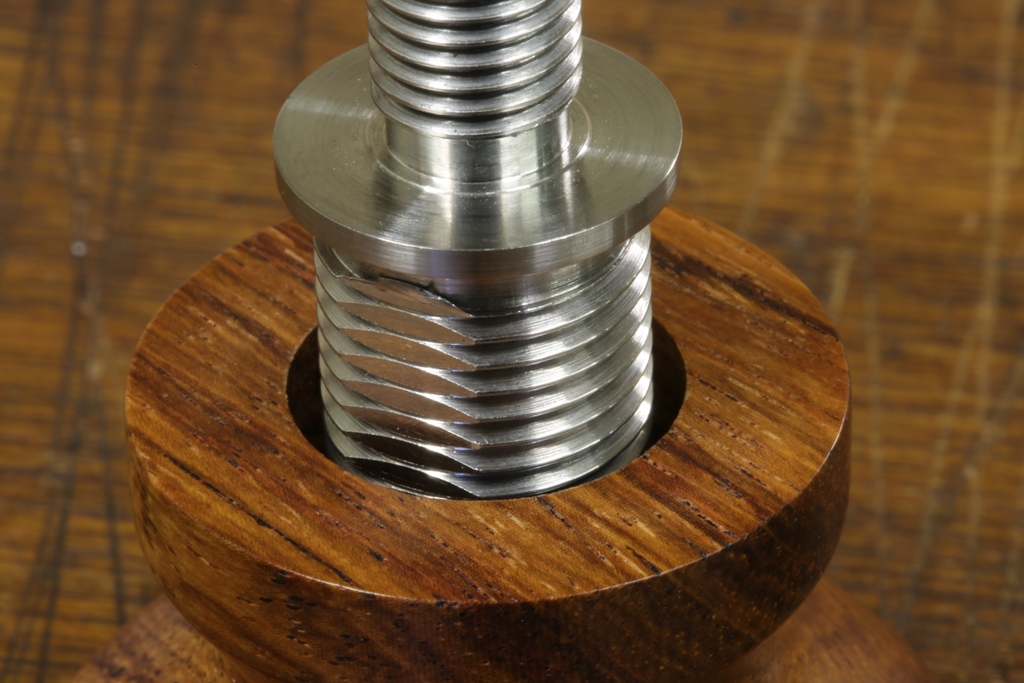
Once this is complete, the bun can be removed and the boss is ready to rivet in place. Note that I used a V joint between the boss and the knob base. The knobs will leave my workshop perfect but the rotary position of the knob can have a tendency to migrate and wood can lose its concentricity over time. Also when the knob is removed and refitted the sharp edges can be bumped, thus losing the desired effect. The V joint will hide any of these unsightly dinks.
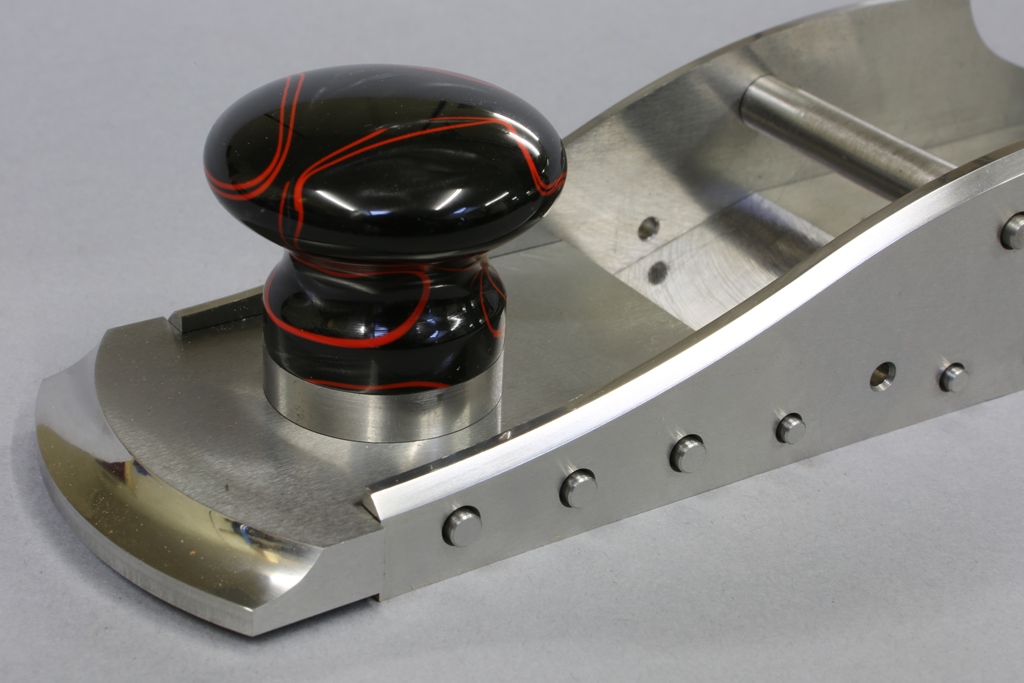
Temporarily assembled plane.
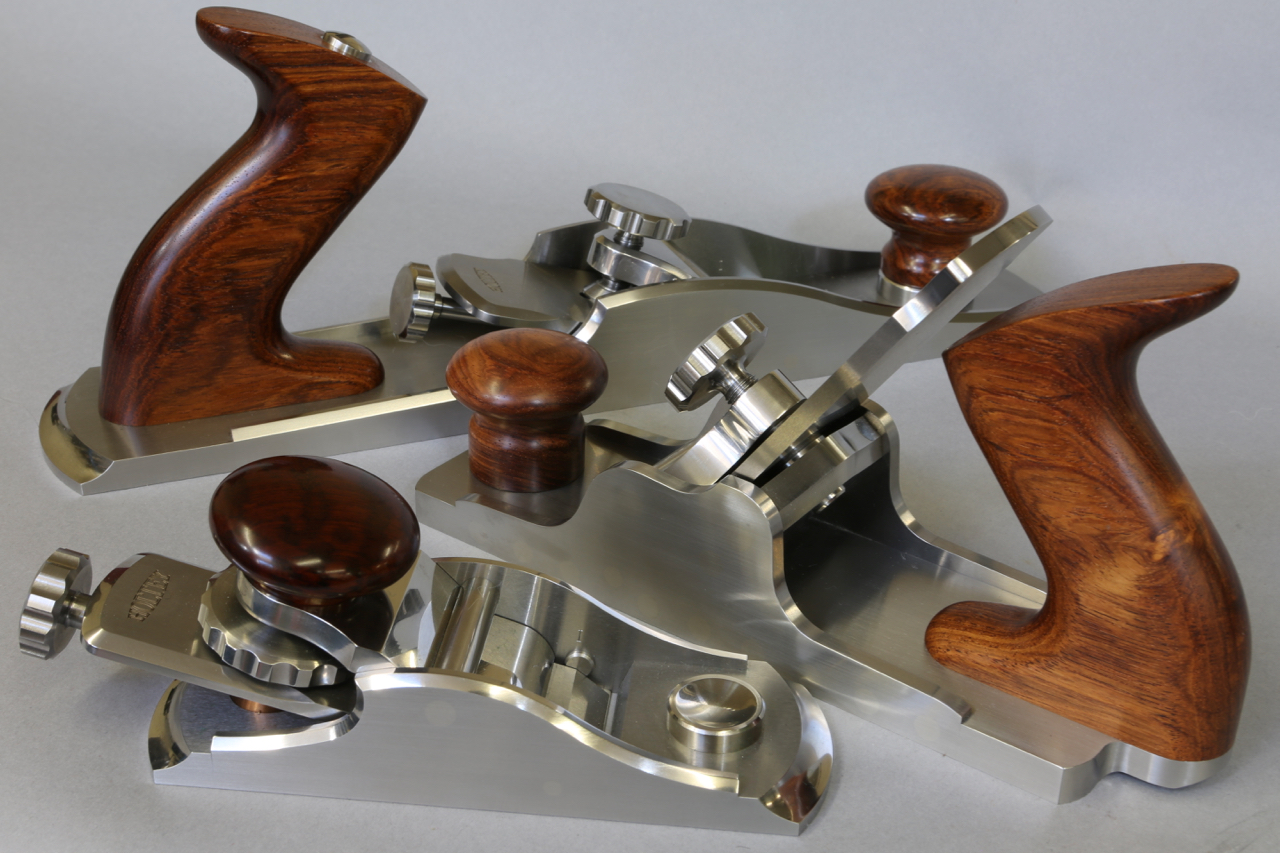
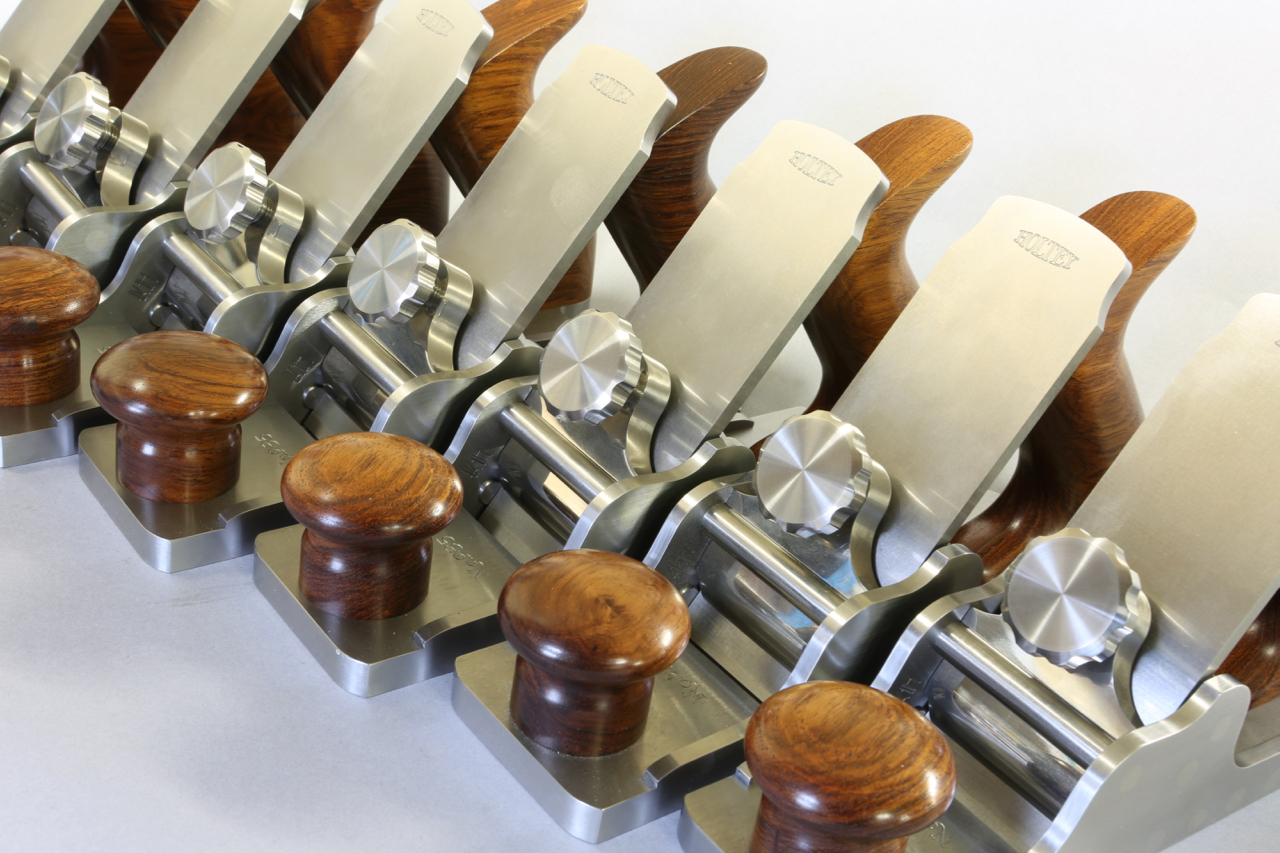
A general selection of knobs and parts.
Still a long way to go, sorry to those who have a plane on order.
Thought this was worth a picture and mention. The bushing here had been cemented with epoxy and I had started it with a few threads and then I was distracted ………
I discovered how strong this system is when I came back the next day. I will keep this as a reminder.
Powered by WordPress