From the Workshop

May 10, 2016

Window to my workshop 103

Filed under: No 984,Window to my workshop — Tags: , — admin @ 3:20 pm

It might seem that things have been quiet here but in actual fact it is the opposite. I have been too busy to post and I have had a number of issues, including a small injury, which seem to compound. Old age seems to be catching up on me and I don’t know if I am getting slower or fussier over the work (obviously I favour the latter :-) ).

It had been my intention not to do any more posts until I had a finished plane, but I just wanted to assure you all that I am alive and well. The project is nearing its end.

 
Holtey No 984 e
 

Holtey No 984 a
 
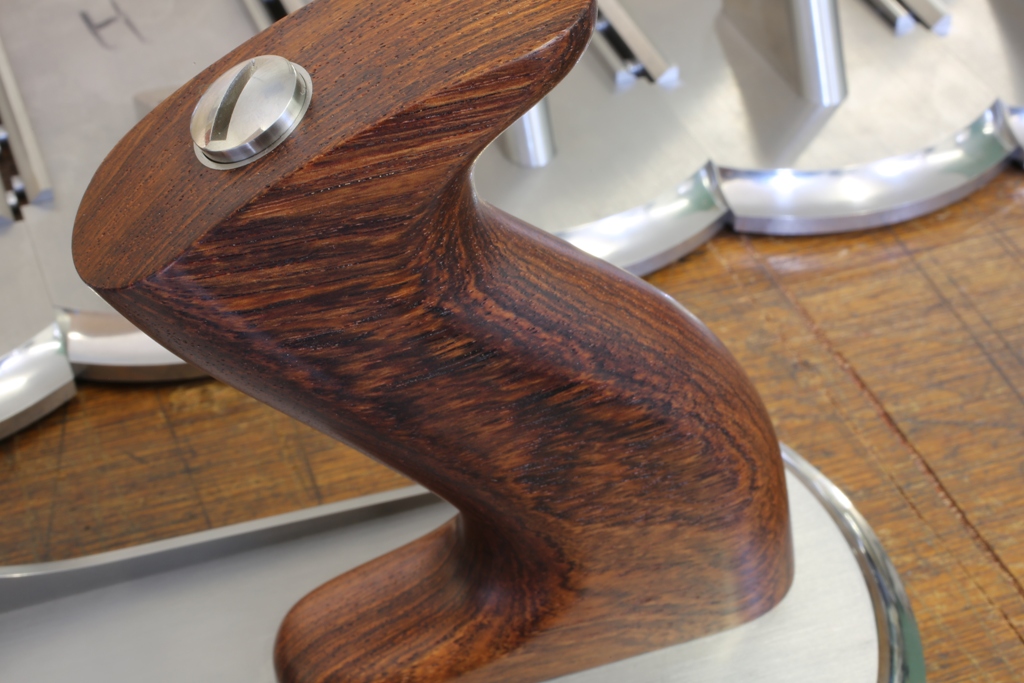
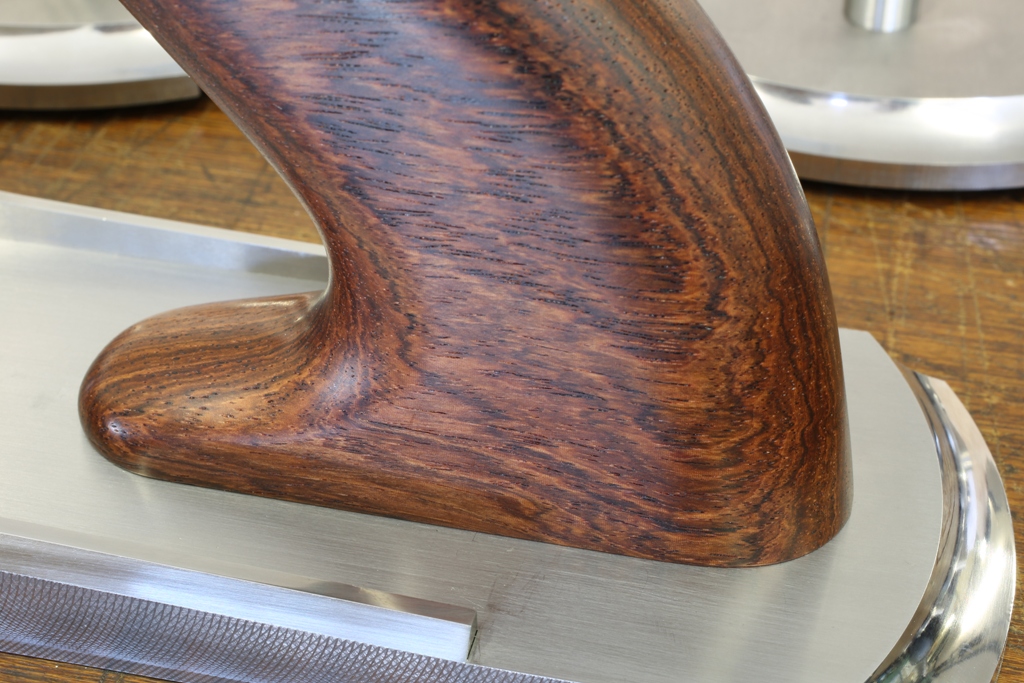
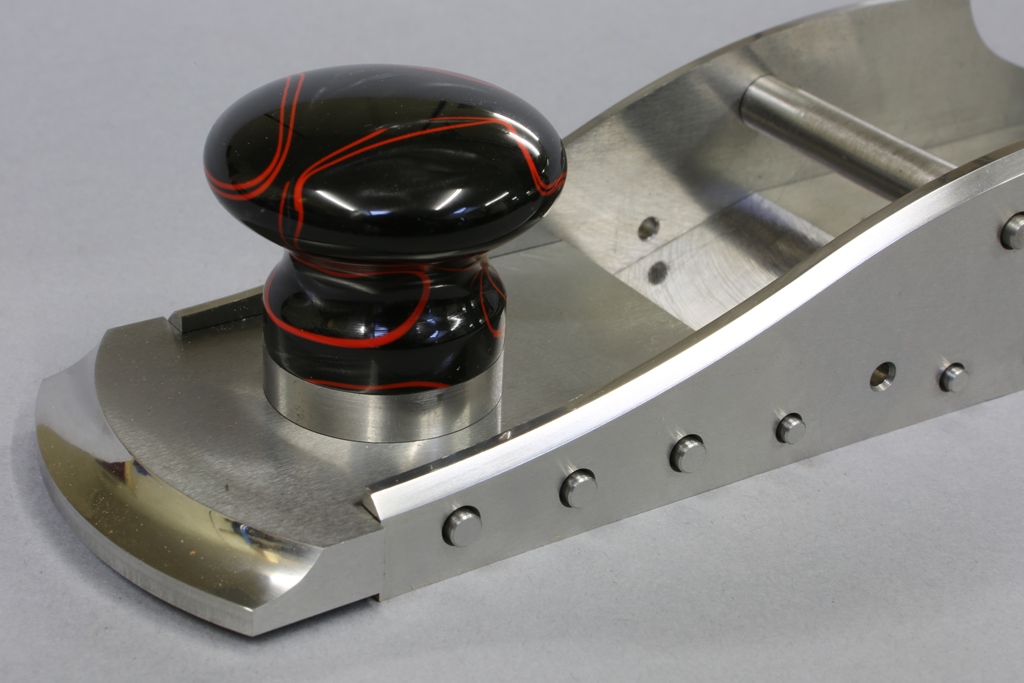
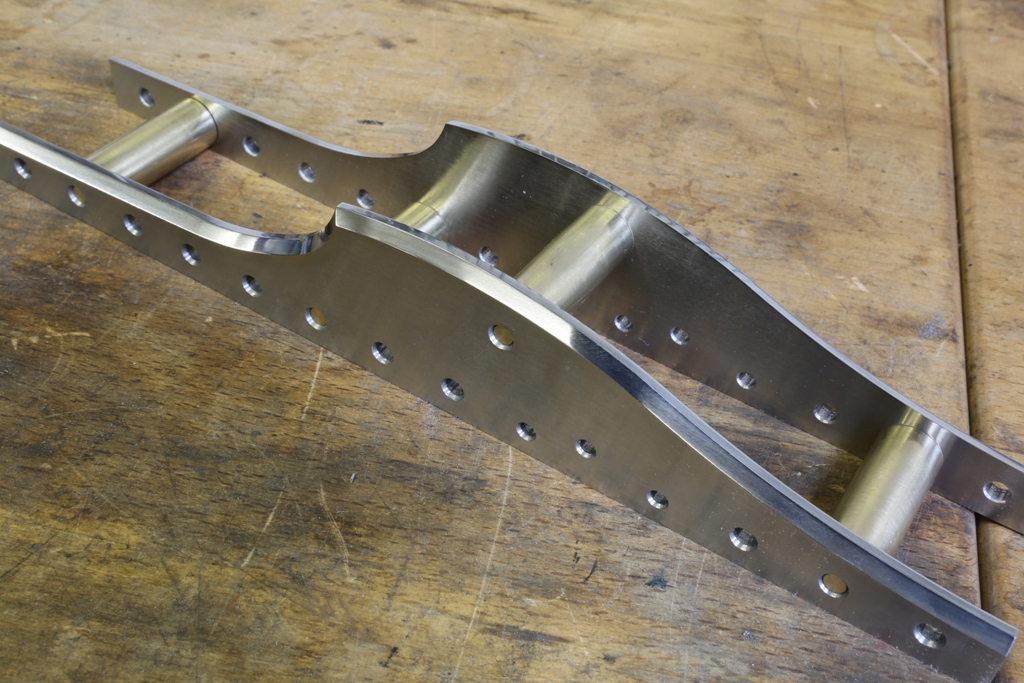
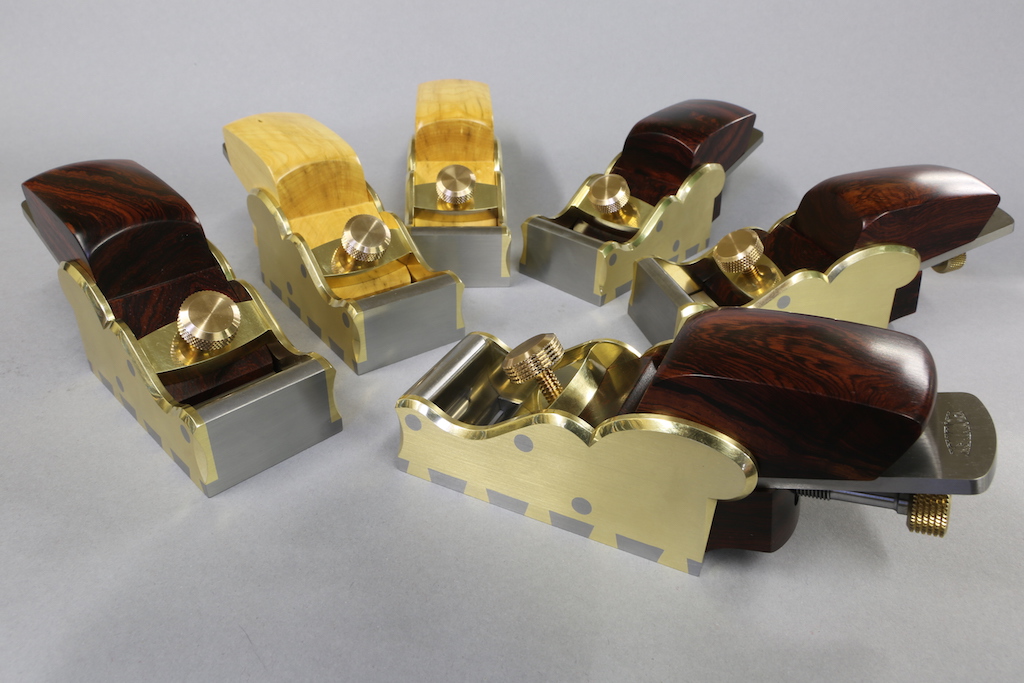
There used to be a time that I believed simple was easy – wrong. I certainly favour the simple lines. After much deliberation this union between the handle and sole works well. I am not going to show the whole plane until everything is finished.

 
Holtey No 984 b
 
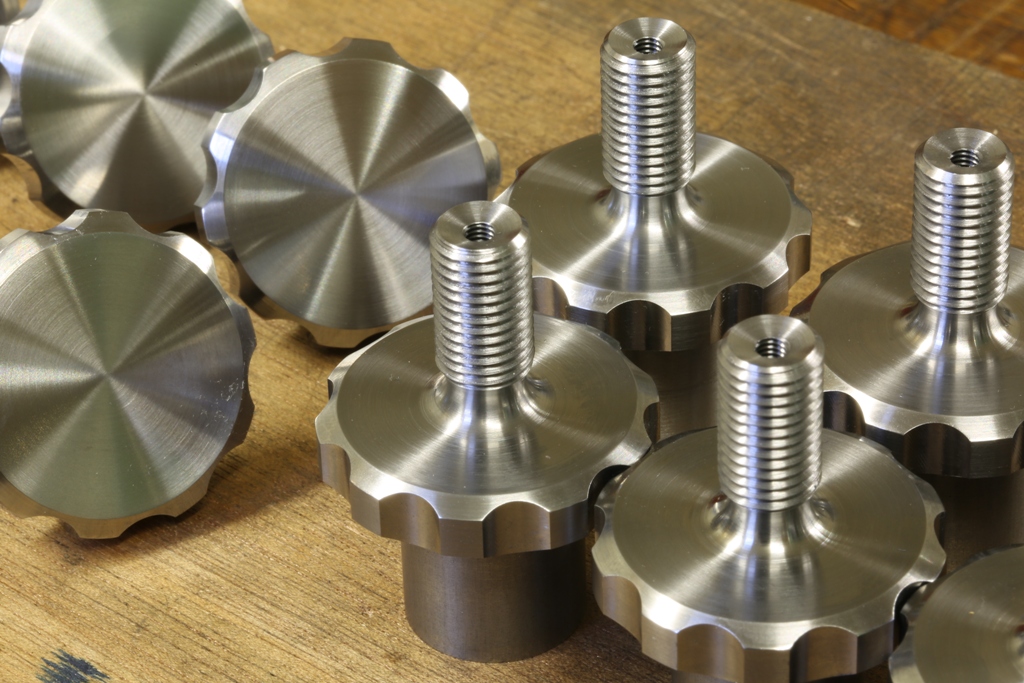
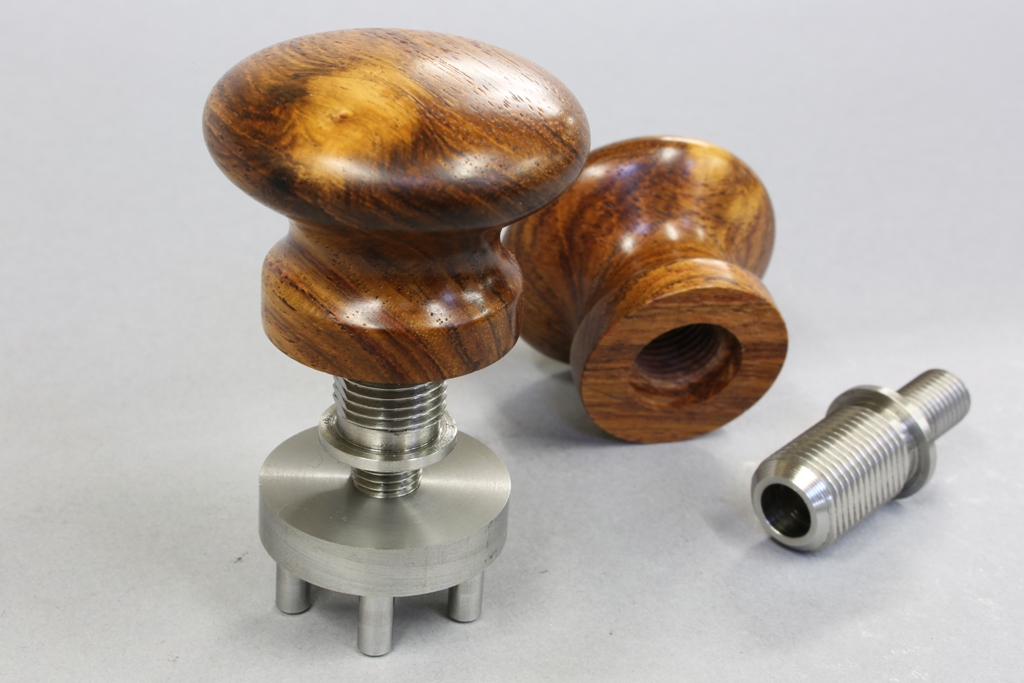
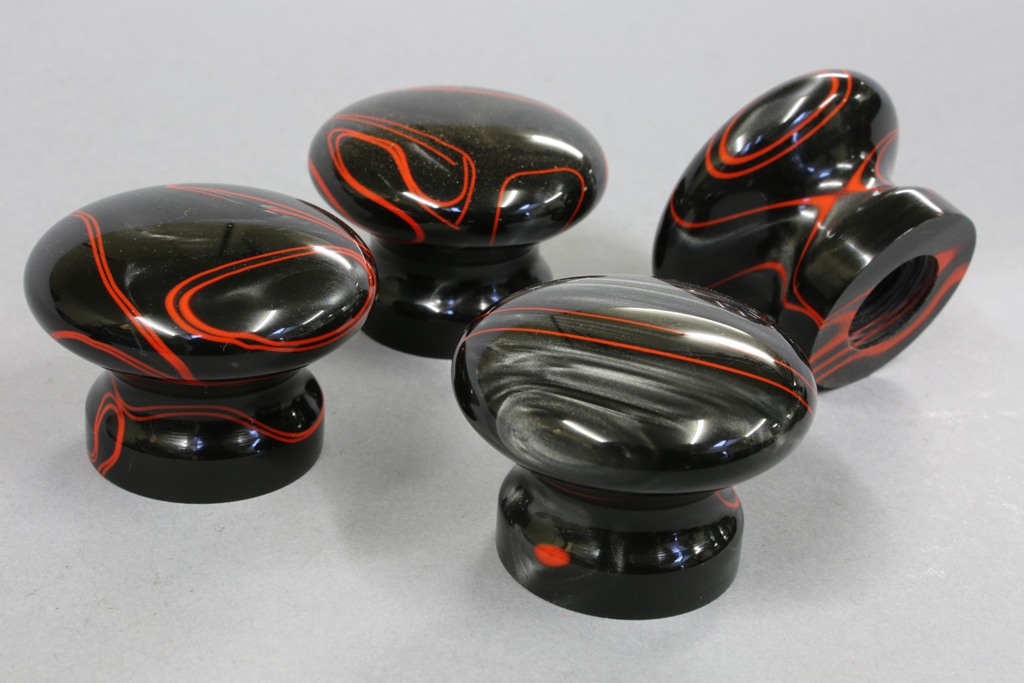
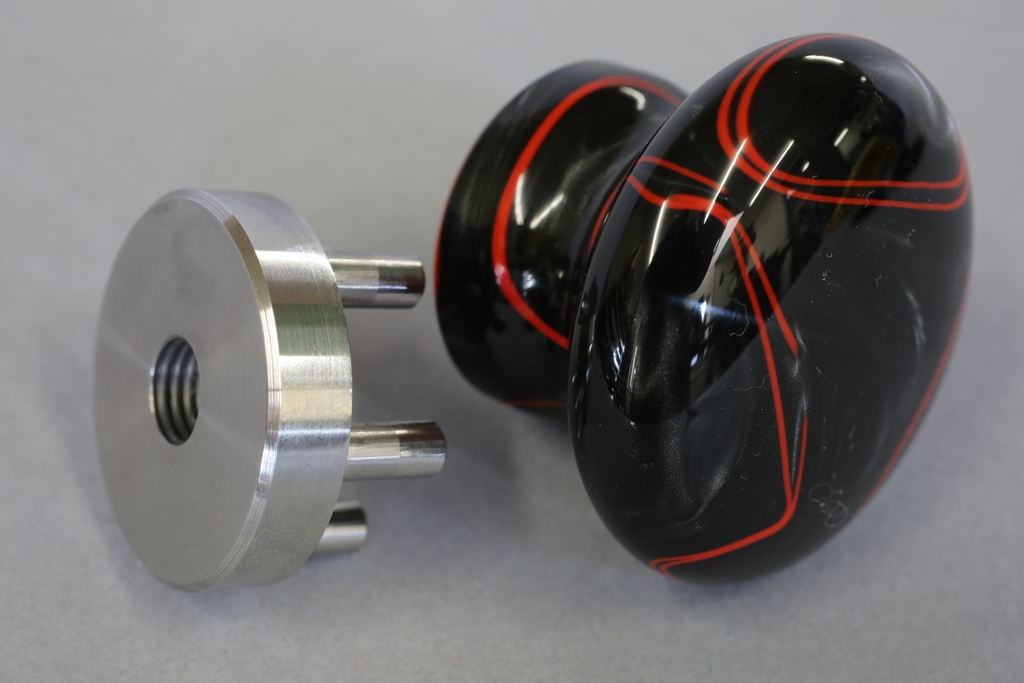
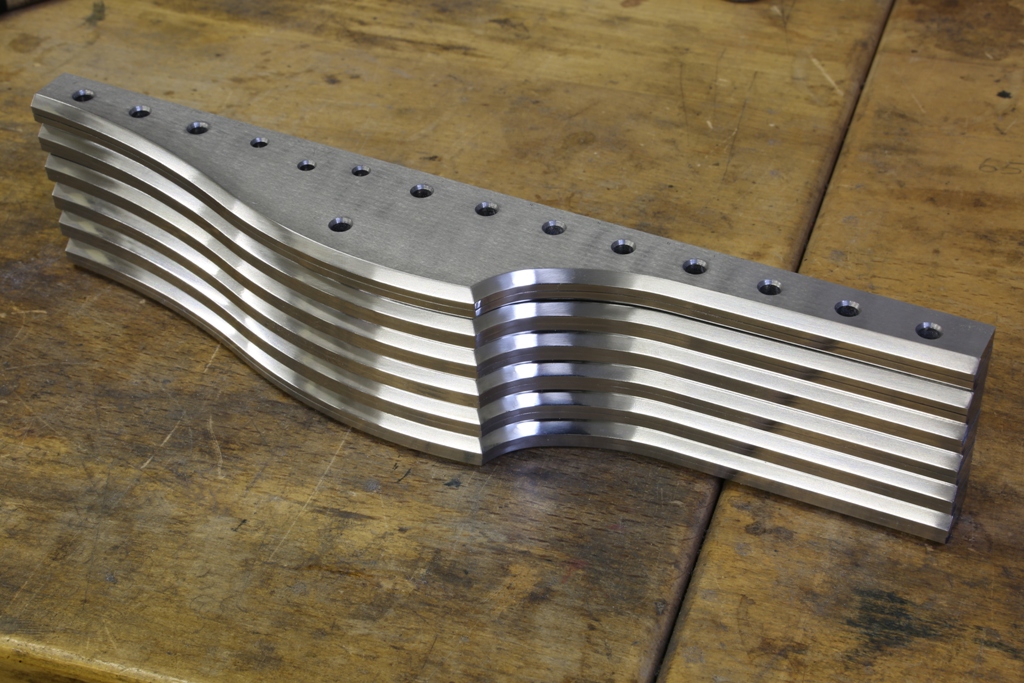
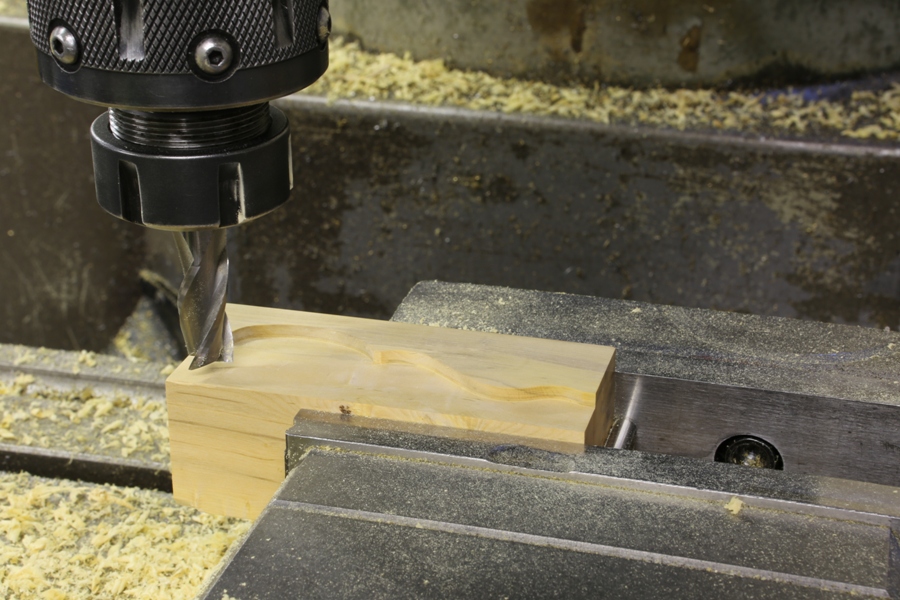
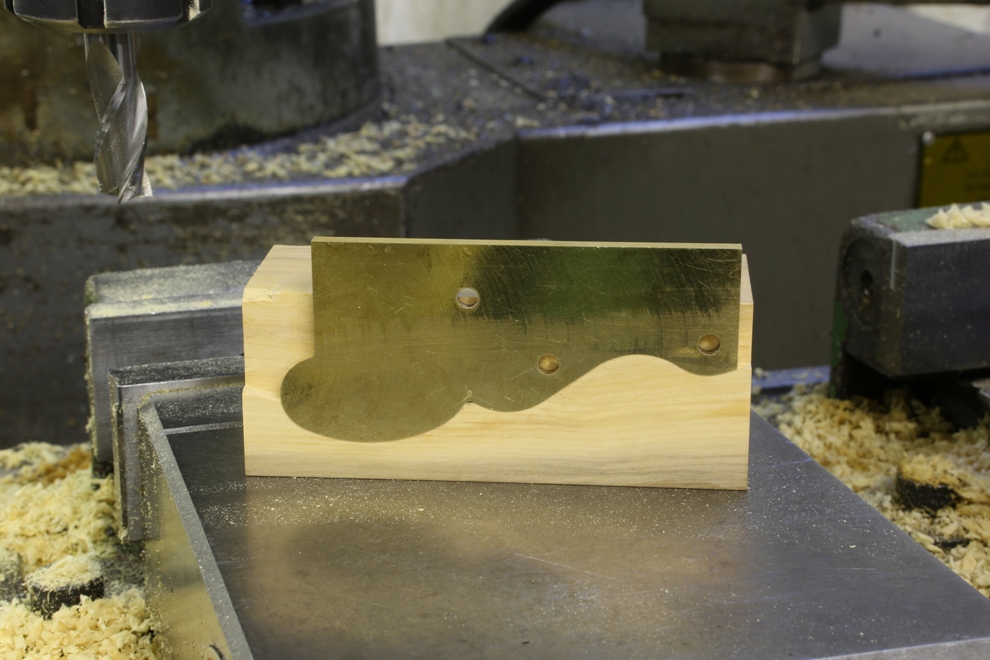
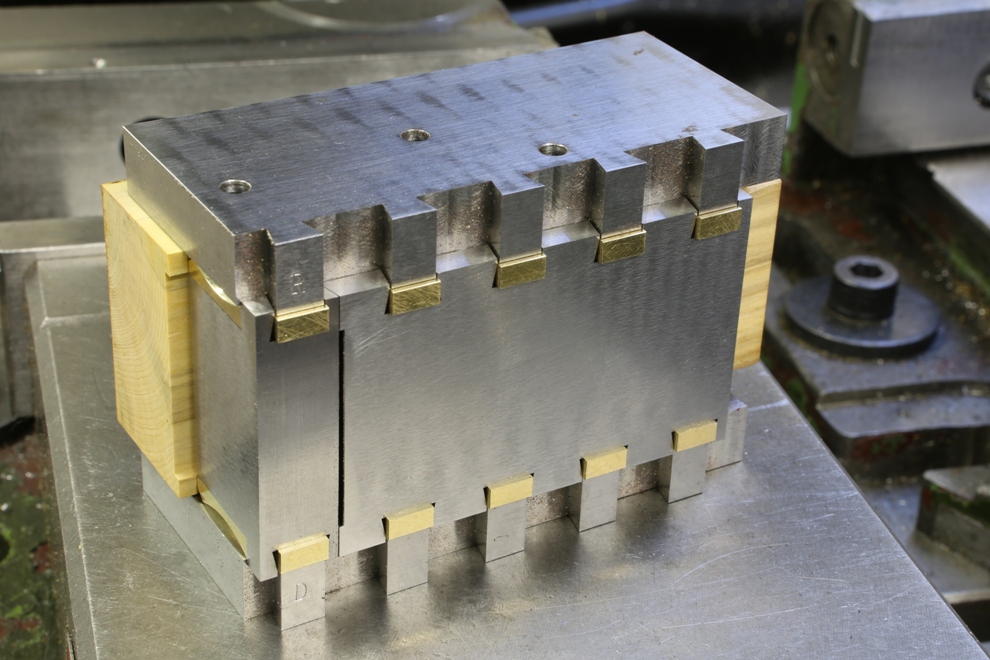
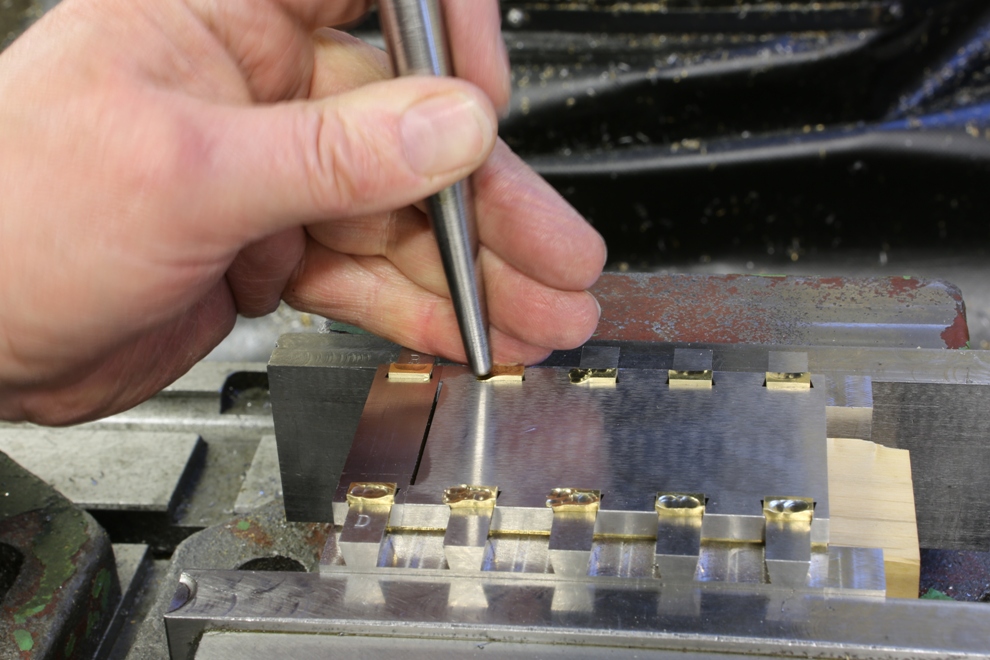
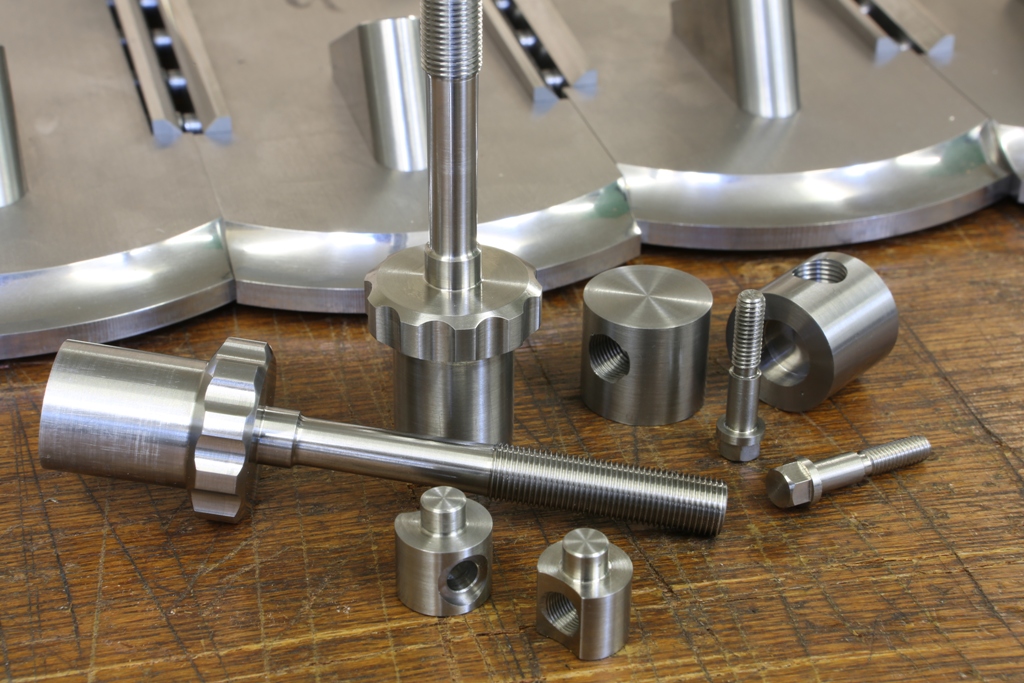
Here is the simple part….. Components are shown in pairs for viewing purposes.

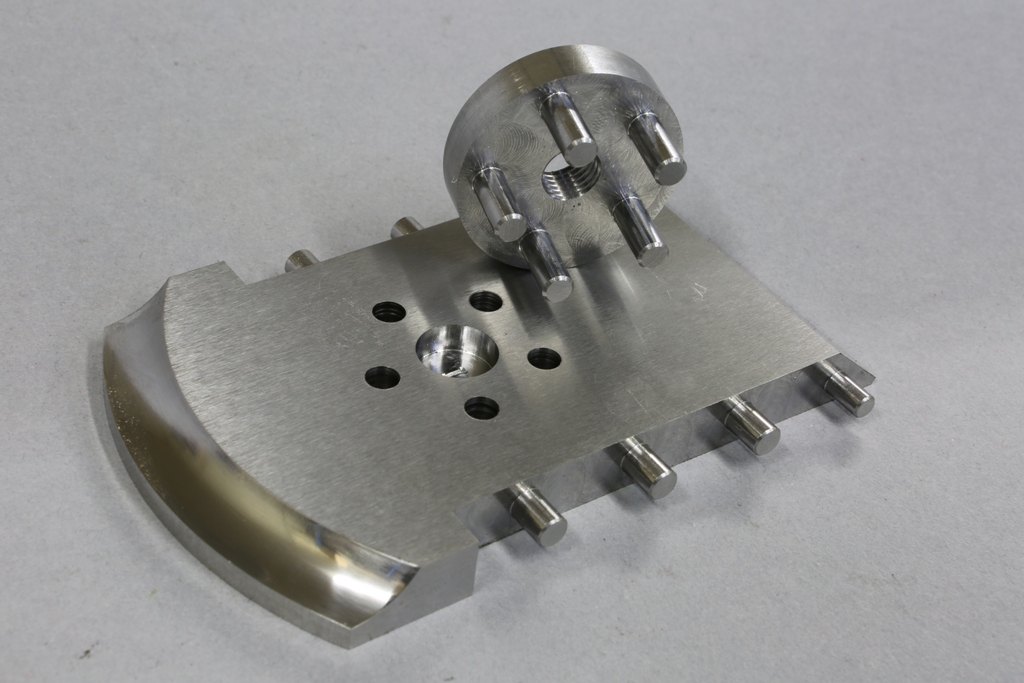
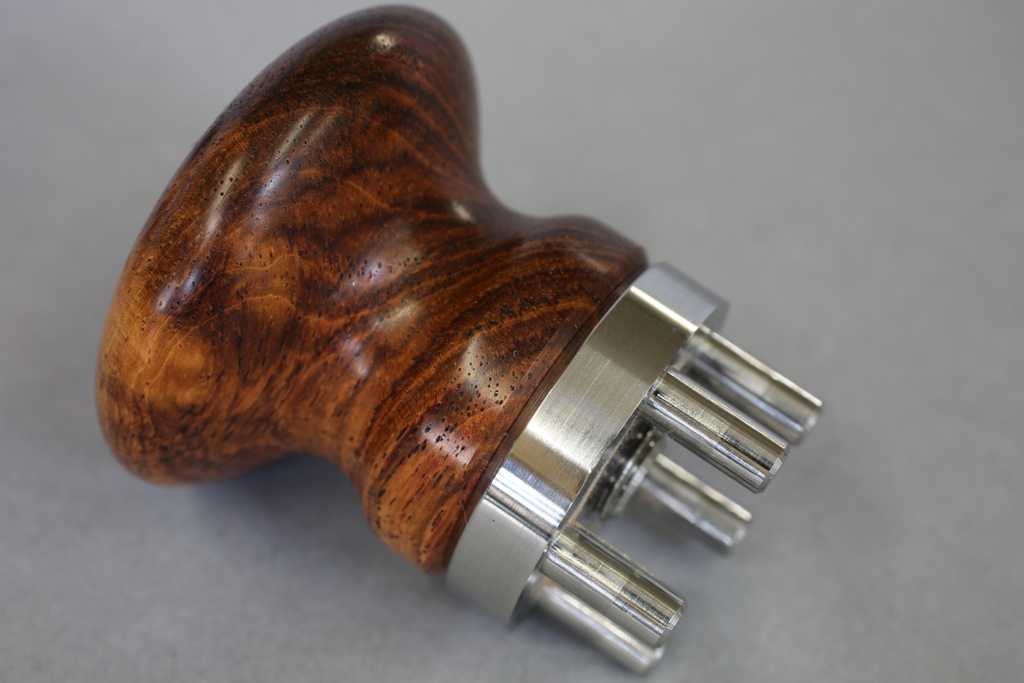
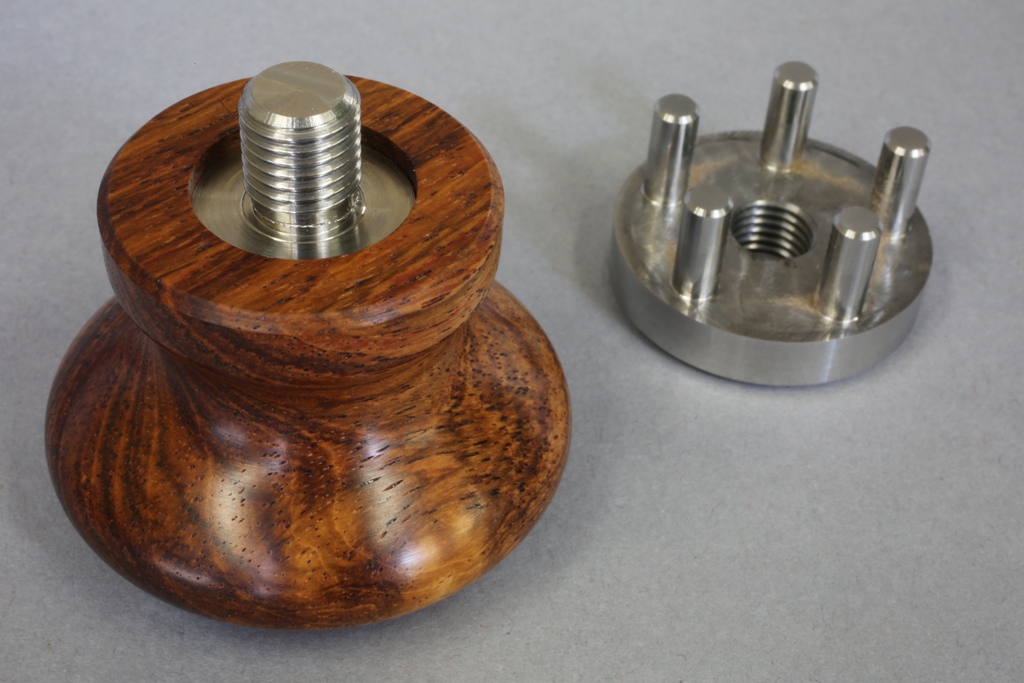
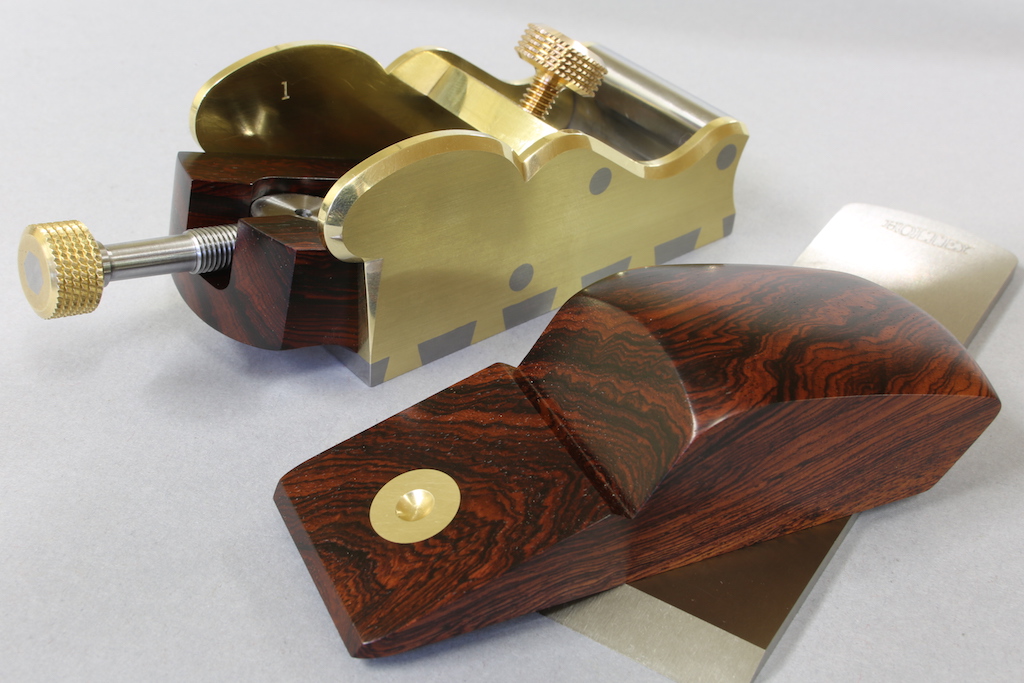
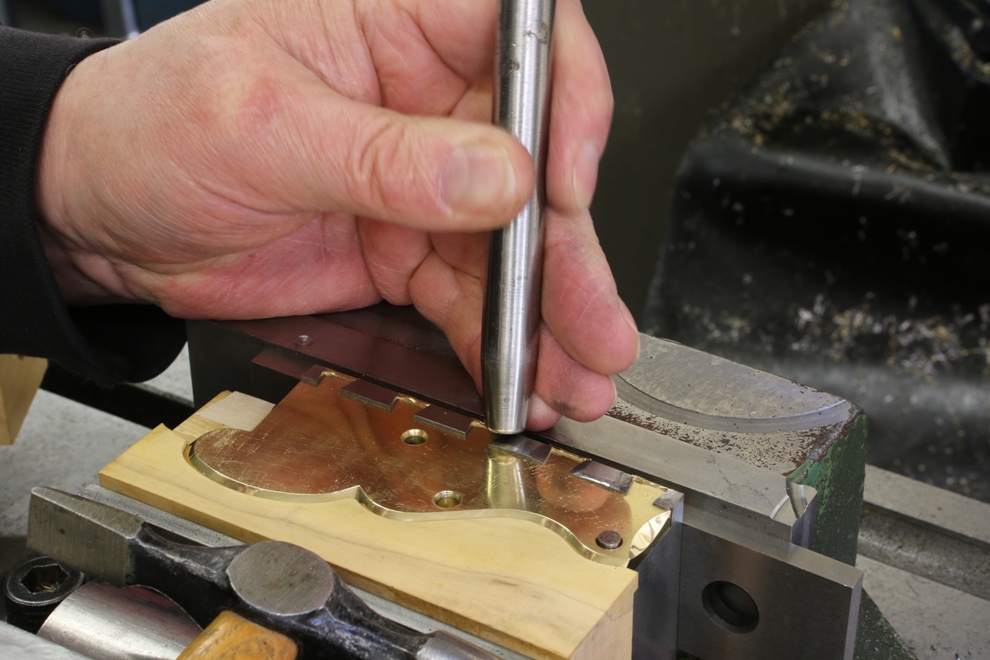
These parts include handle boss, which has two 8 mm integral rivets which are peined into the sole. The boss body is to be recessed into the handle, drilled and tapped for the handle stem.

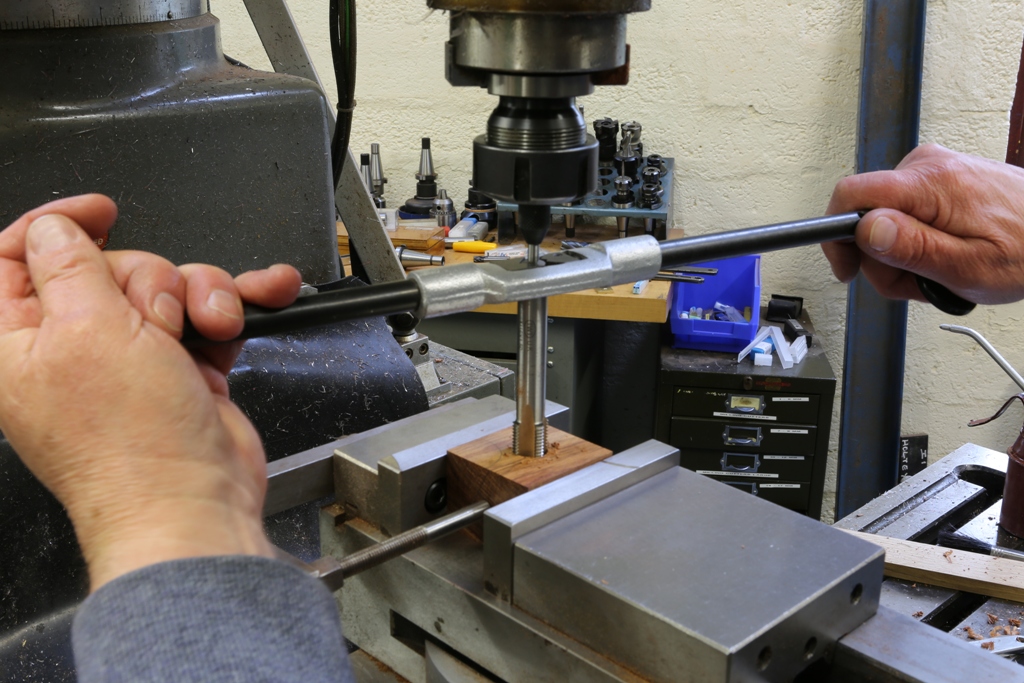
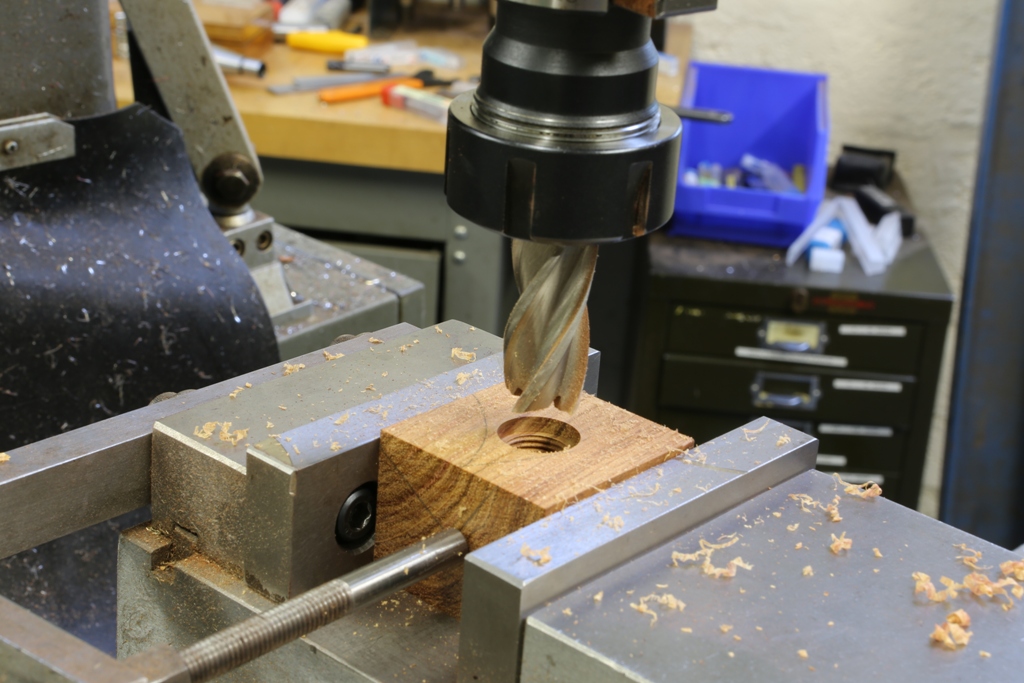
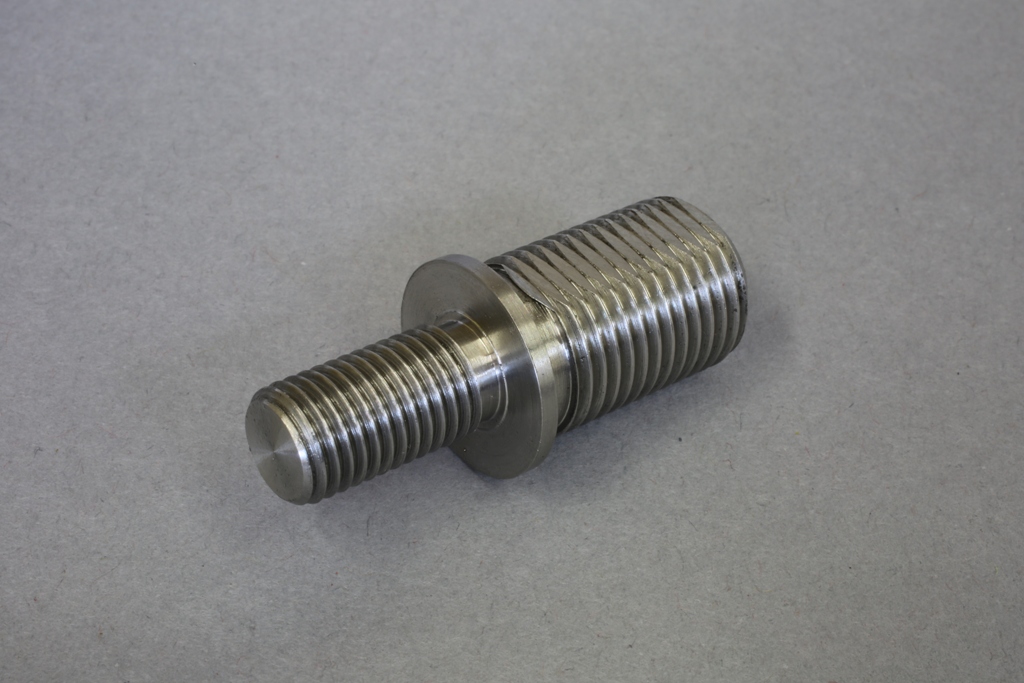
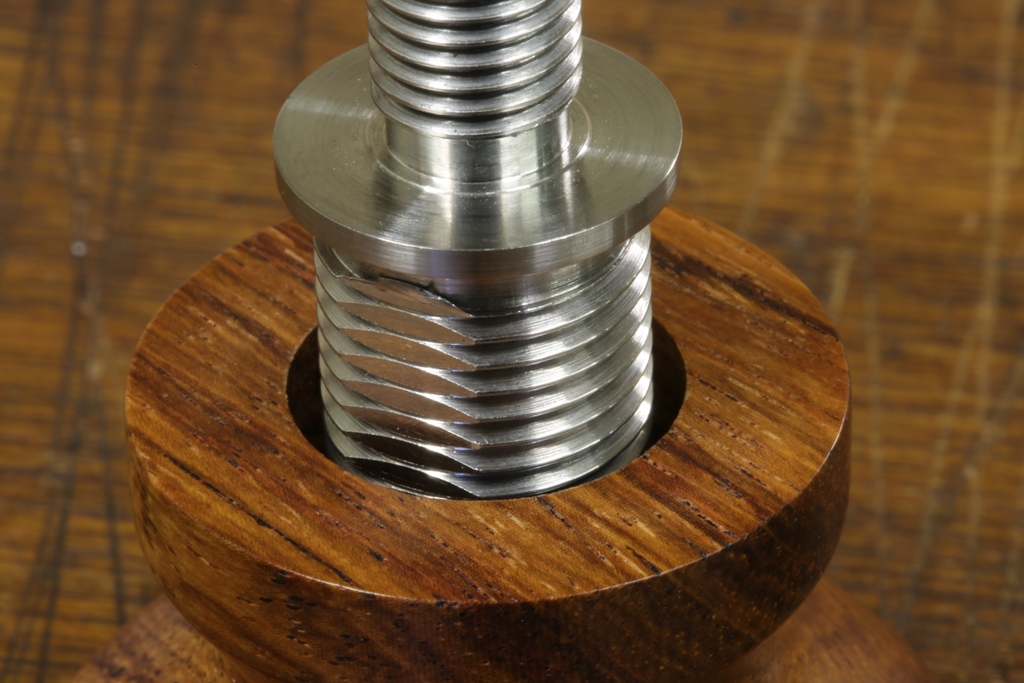
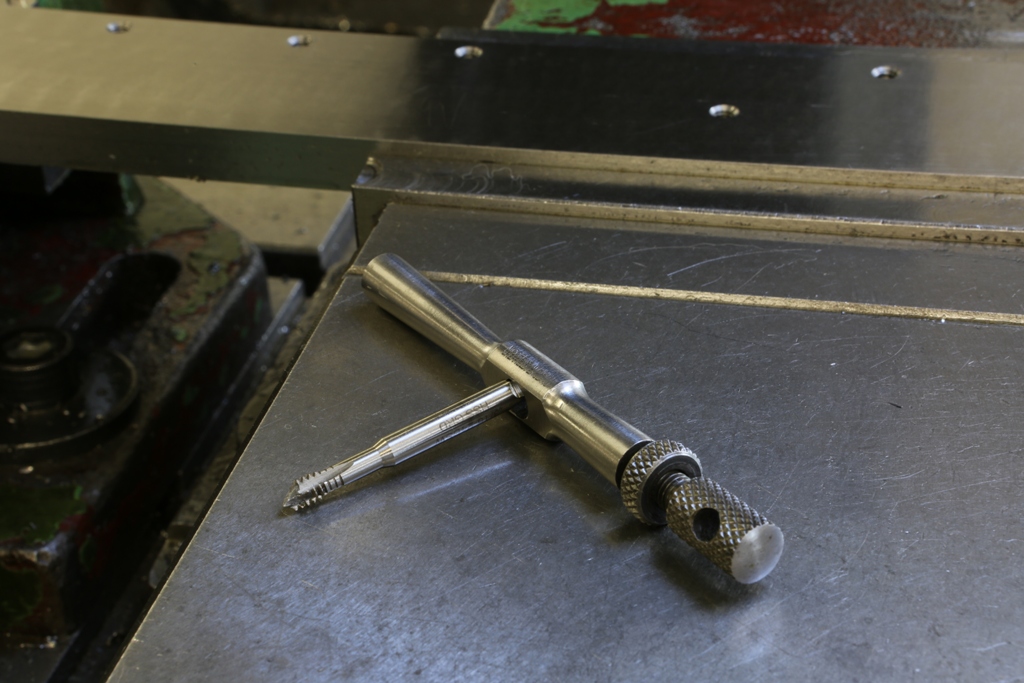
This stem is 10 mm in diameter at its base going down to 8 mm separated by the 8 mm hexagon. This is then secured with a wrench so it will always be tight at the base. This stem alone has a lot of rigidity to it which then compounds when compressing the handle.

The handle has a cup for its fixing nut. This fixing nut has a radiused slot milled into it so that it can be driven with a coin. The cup is faceted at the bottom so that it cannot rotate to avoid mismatching contour or come loose from the handle. This gives a very rigid handle which is compounded when the handle is tighten up.

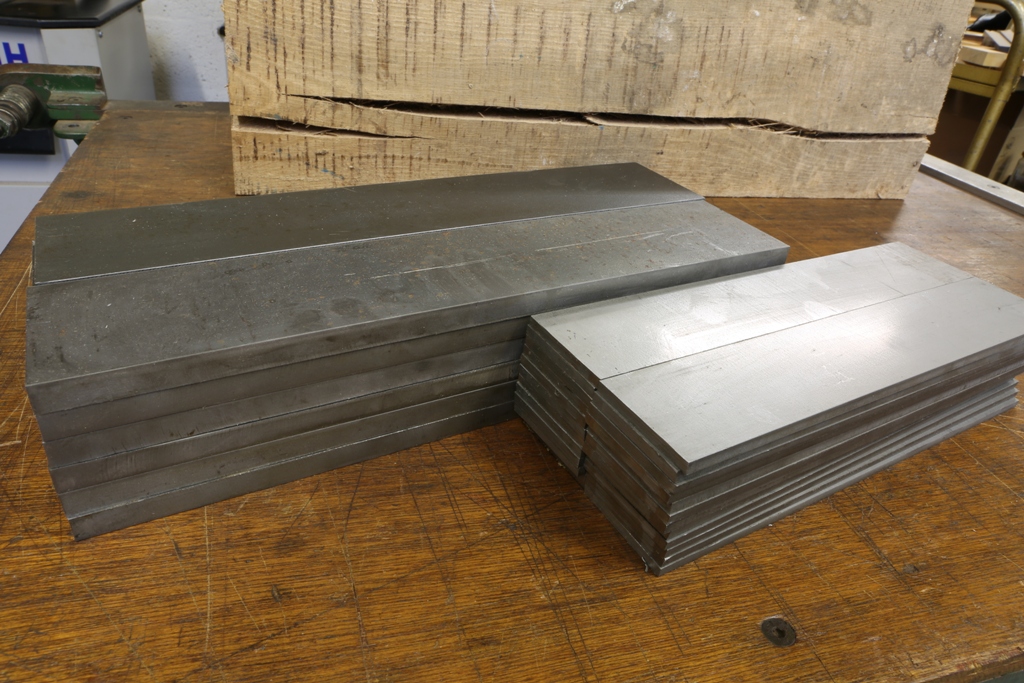
All the components that you can see, including the screw cup, are made from solid stainless steel bar.

 
Holtey No 984 d
 
The boss and stem fixed in position.
 
 
Holtey No 984 c
 
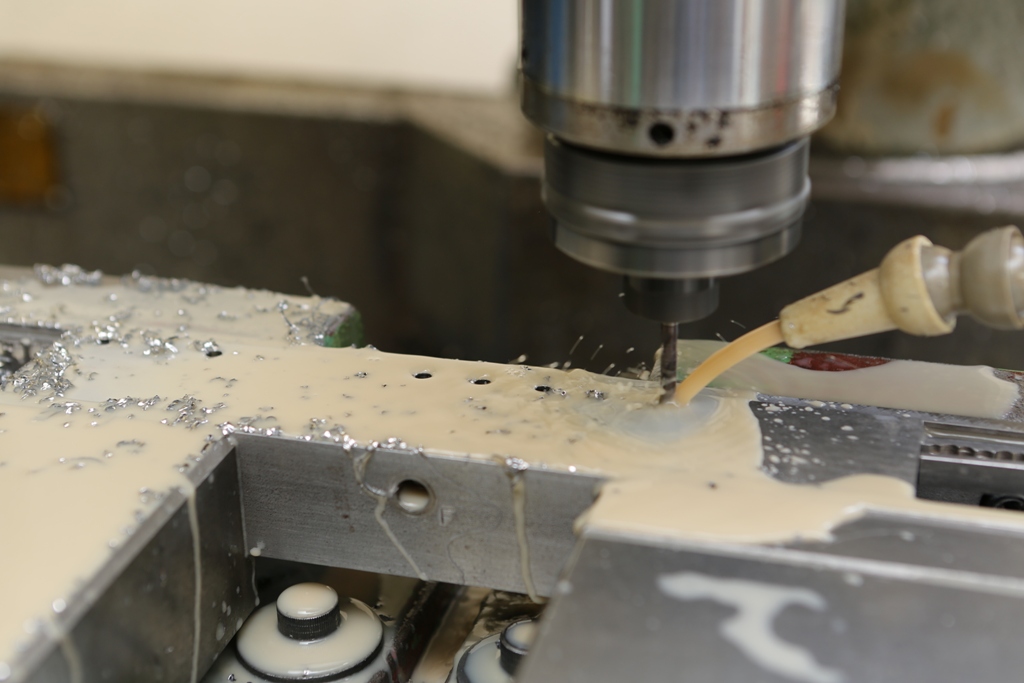
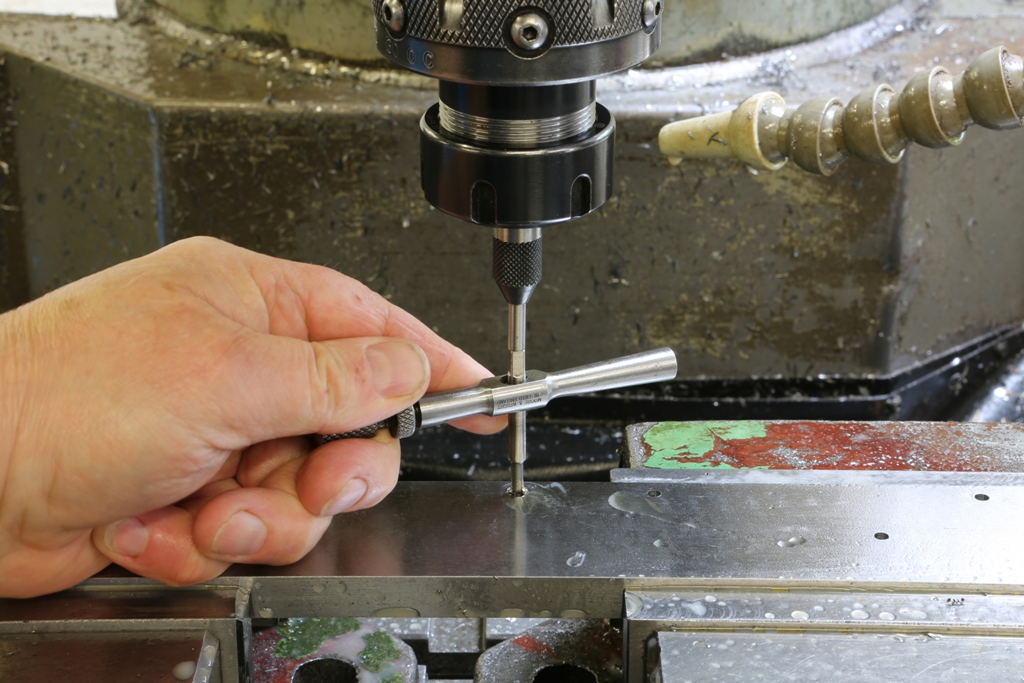
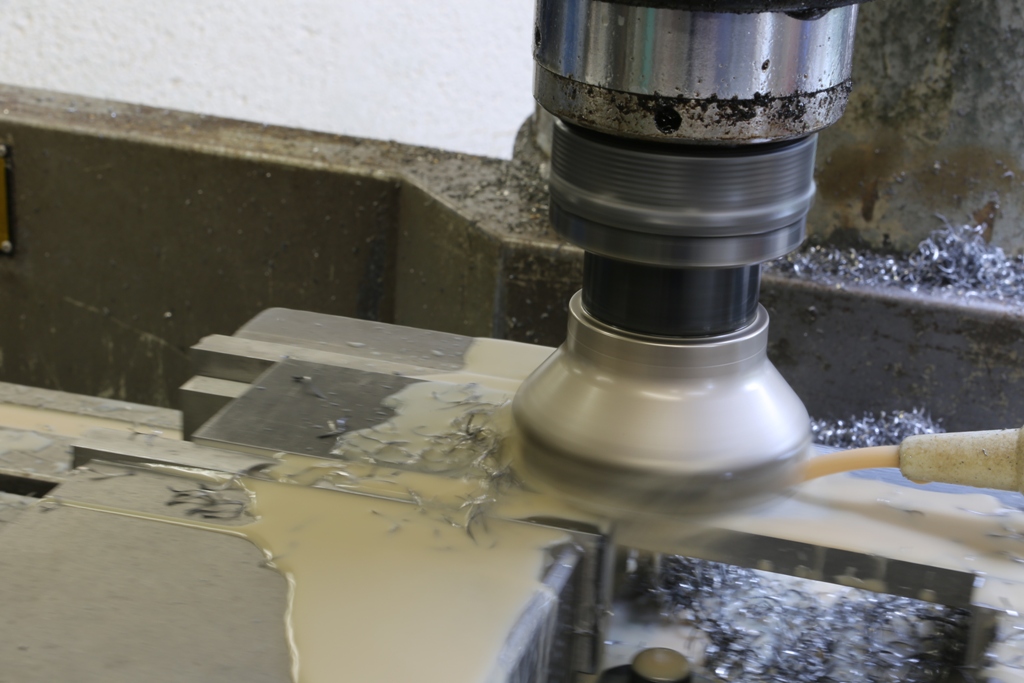
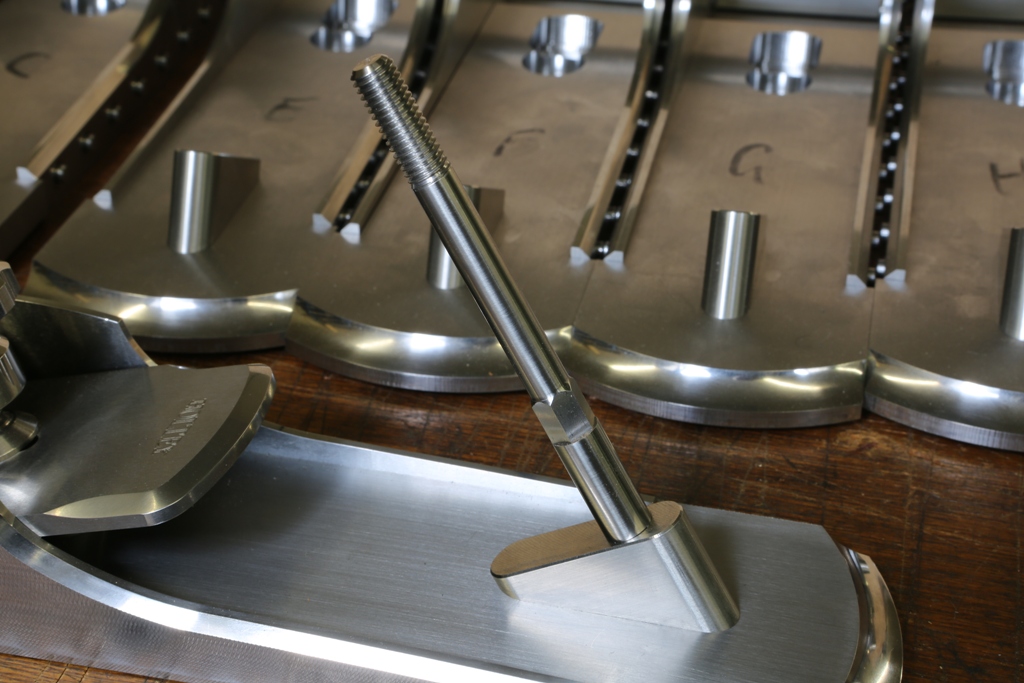
The adjuster – where does one start?

The most visual item is the spindle (still attached to its carrier) and like everything, it comes from a solid bar. It takes a lot of planning in the making. I will let the picture tell the story.

At the very last minute, when I am happy with everything else, the spindle can be parted from the carrier.

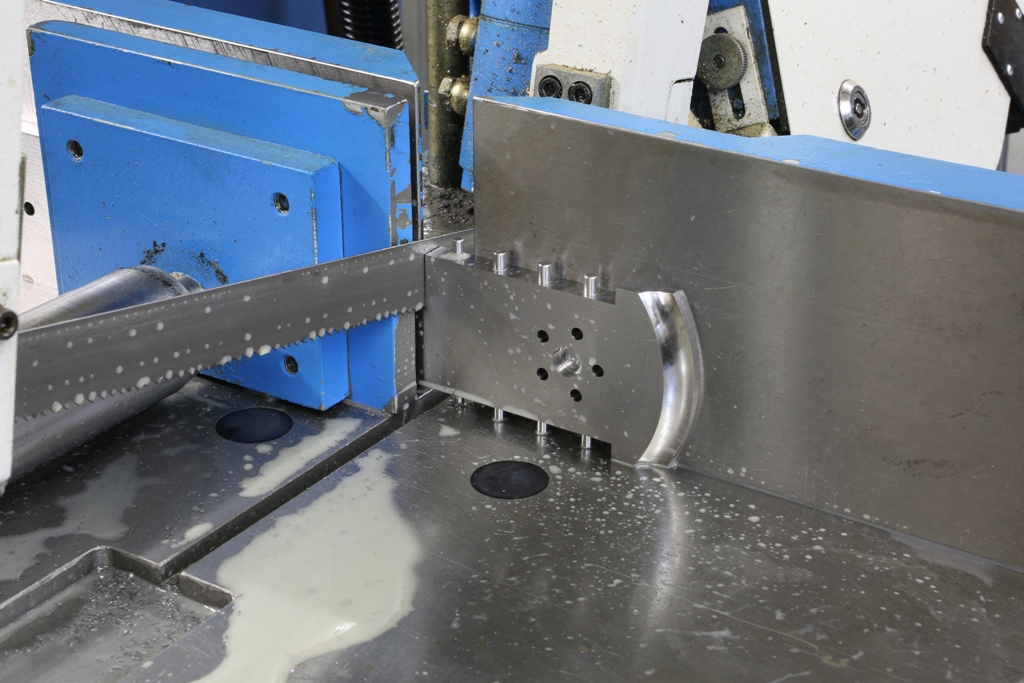
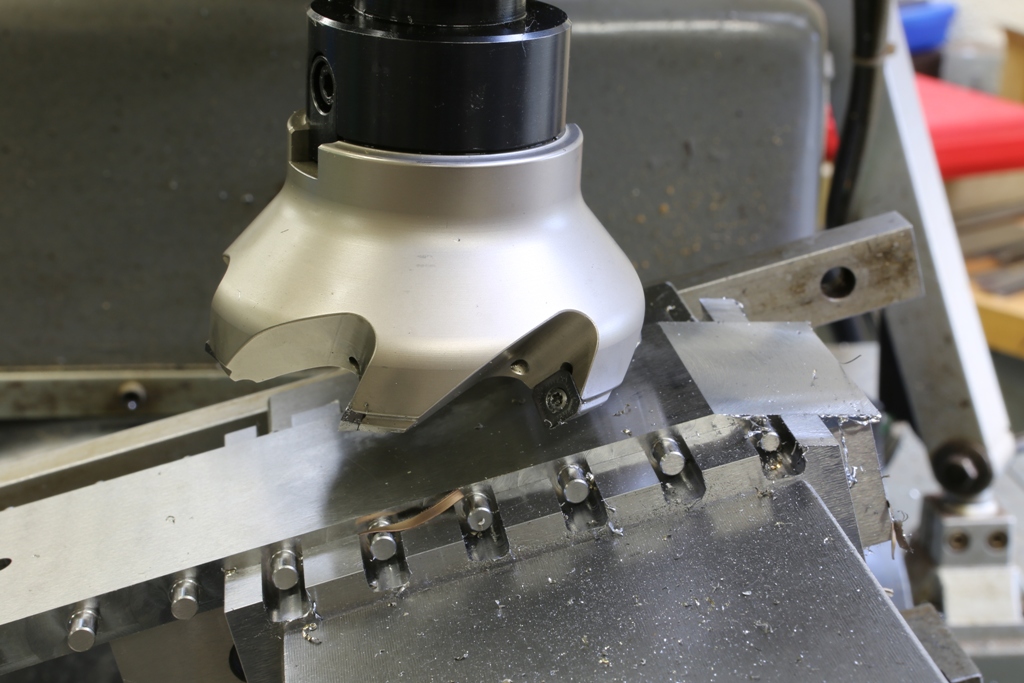
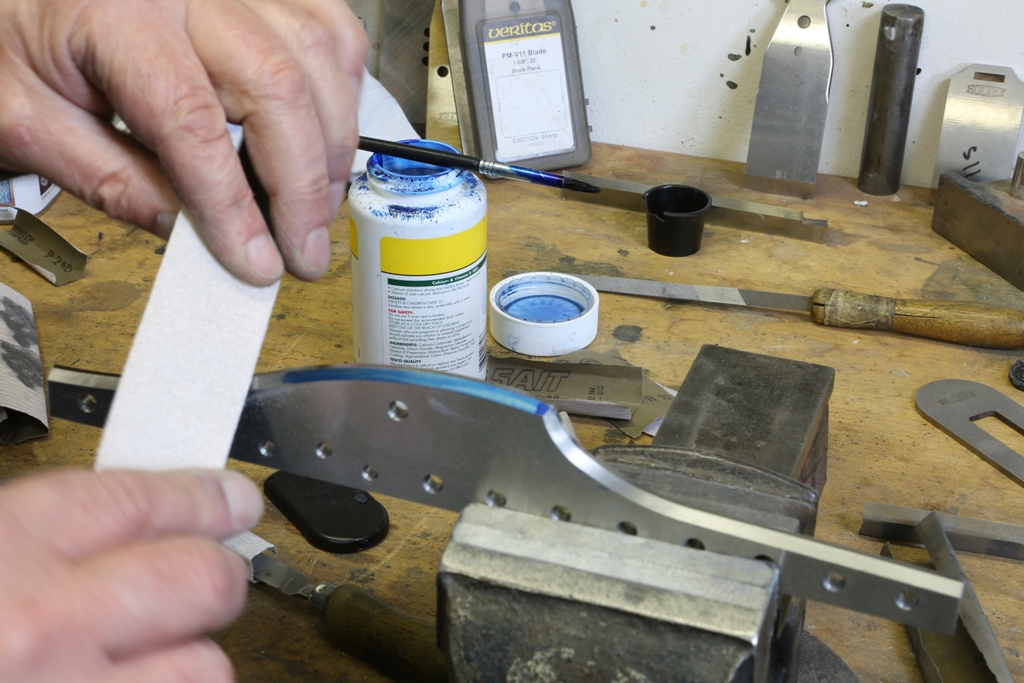
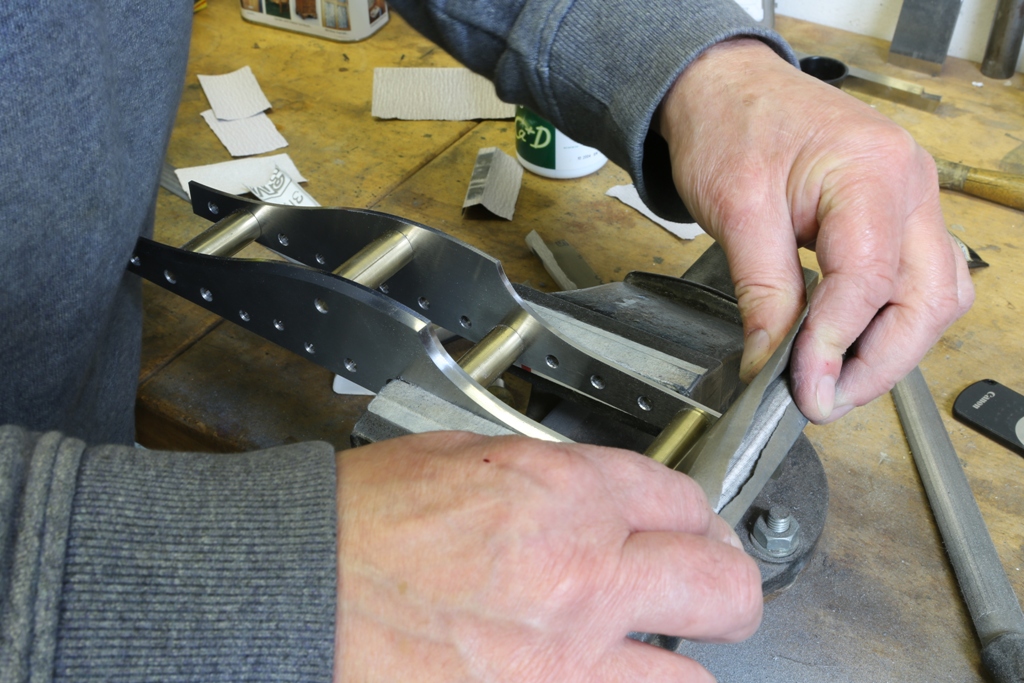
All the components are a project on their own.

A whole book compressed into a few lines :-)

January 11, 2016

Window to my Workshop 101

Filed under: No 984,Window to my workshop — Tags: , — admin @ 9:25 am

More later ….

 
CI3A2584

November 2, 2015

Window to my workshop 98

Filed under: No 984 — Tags: , , , — admin @ 5:41 pm

The pictures don’t do justice to the time spent on every little operation. Although I have taken many photographs along the way I don’t have time to document every little stage. The effort for every detail can seem a bit over the top, and I make little revisions all the time – the overall design will still be as the posted line drawing.

This is a nail biting moment, once I start cutting there is no going back. I can take hours double checking before I separate the toe from the the rest of the sole.


Holtey No 984 pic 7

 
Here I am milling the blade bed. The rest of this operation hasn’t been photographed as I covered this in the No 983 blog and it is almost identical as are the adjuster recesses. You can see that the work holding vice jaws are purpose made just for this plane. This enables me to get a firm grip.
 

Holtey No 984 pic 8


Holtey No 984 pic 9

 
All my buns start off as a true square block. All drilling, tapping and recessing is carried out on the mill


Holtey No 984 pic 10


Holtey No 984 pic 11
 

The bush shown here is to be epoxied into the front bun. You can use some imagination as to how I arrived here. The combined strength of the bush and its bun is considerable. Note there are two flats which make it impossible to remove the bush once the epoxy has cured.
 

Holtey No 984 pic 12

 
This is the milling operation for the five integral pins/rivets to the bun boss.
 
Holtey No 984 pic 13

 
This is the finished boss for the front bun. I have chosen this method of fixing for its strength. I wasn’t happy about tapping blind holes. Who cares, it is not about cost :-) It is going to be the only one of its kind.

 
Holtey No 984 pic 14

 
Illustrating the fitting of the bush to the bun and the threaded nose to fit the finished bun to its boss.
 

Holtey No 984 pic 15

 
Once this is complete, the bun can be removed and the boss is ready to rivet in place. Note that I used a V joint between the boss and the knob base. The knobs will leave my workshop perfect but the rotary position of the knob can have a tendency to migrate and wood can lose its concentricity over time. Also when the knob is removed and refitted the sharp edges can be bumped, thus losing the desired effect. The V joint will hide any of these unsightly dinks.
 

Holtey No 984 pic 16

 
Temporarily assembled plane.


A general selection of knobs and parts.

 
Holtey No 984 pic 17


Holtey No 984 pic 18
 
Holtey No 984 pic 19


Still a long way to go, sorry to those who have a plane on order.


Thought this was worth a picture and mention. The bushing here had been cemented with epoxy and I had started it with a few threads and then I was distracted ………

I discovered how strong this system is when I came back the next day. I will keep this as a reminder.

No 984 cockup

August 14, 2015

Window to my Workshop No 96

Filed under: No 984,Window to my workshop — Tags: , , — admin @ 5:08 pm

It is always tempting to rush off to the next stage, like the bottoms. But once the side profiling is complete there are still quite a number of other operations to be completed and these sides just scream to be finished. The polishing of the sides is a major undertaking and it eats up a lot of my time.

Holtey No 984 w

I use four abrading grades and at each stage everything is continually blued which helps me avoid any form corruption.
 
Holtey No 984 x

With a few purpose made spacers I am able to keep the edge polishing true and sharp without any deformation.
 
Holtey No 984 y

It could be embarrassing to mention how much time this operation takes but if perfection is required …..
 
Holtey No 984 z

These sides are now waiting for stamping and another surface grind on the inside faces, for its final texture.
 

July 24, 2015

Window to my workshop No 94

Filed under: No 984,Window to my workshop — Tags: , , — admin @ 10:47 am

Drilling the holes in the No 984 plane pre-prepared and surface ground sides which will receive the integral riveting from the bottom.

Holtey no 984 o
 
Holtey no 984 p
 
Once the sides have been drilled they are then ready for profiling. This I do by making a holding plate which is drilled and tapped. In the case of this plane I have chosen six of the fifteen holes which were drilled in the plane sides which is sufficient for work holding purposes

The fixings used here have a 3/16 Whitworth thread to work within the existing holes. I hand cut the threads whilst they are in the milling machine so they are a little small to go through 1/2″ steel. A lot of care and patience is needed here. This means I can only take one or two rotations of cut at a time and then remove the taping tool and blow everything clean, then repeat until I am through.
 
Holtey No 984 q

Now and again I push my luck and this is what happens. This is probably about the worse horror because I have a large piece of the tap seized in the tapping hole with a jagged shard of HSS tap sticking up. If this couldn’t be removed then I would have to spend the best part of a day to grind and drill another holding plate. However, whilst it was in situ I was able to write another programme to mill the broken tap away with a very high quality tungsten carbide end mill. This could have only worked in the CNC as it needed a consistent very slow feed rate. It leaves me on a bit of a high when this works. Not only did I remove the broken tap but the original thread and true axis was maintain. This is extremely important or it would have had to be scrapped.

Sometimes I like to mention this sort of trivia as it is a whole part of the whole process, often unseen. As I have said before, it is not just the tools I make but the tools I make to make them with.


Holtey no 984 r
 
This is the end of the building process for the holding tool, showing the jig screws. Also showing the mirrored side on the left. Mirroring or pair handing is necessary where there is chamfering and countersinking involved.

After use this holding tool will go into my cupboard to join all the others, as each tool is dedicated to its type. It is sad that in the case of this one it will not be coming out again. :-(


July 6, 2015

Window to my Workshop 90

Filed under: No 984 — Tags: , , — admin @ 11:11 am

The surface grinder has been the busiest machine in my workshop for the past few years. All my sections, after size adjustments in the milling machine, are precisely ground all round. The same with all the tooling and work holding I make. This is necessary to get a good reference throughout all my work.

Holtey No 984 c

These are the bottoms being ground on their edges insuring that they are square and parallel. It is not often I use a flash but it is nice how everything has been frozen in time.

Holtey No 984 f

I have also been busy during this time with the blades. The blades are being profiled in ‘Siamese pairs’ for easier work holding. These have already been stamped with the HOLTEY logo in the fly press, I do this first as the edges close to the stamping area can become distorted.

Holtey No 984 g

After the blades are separated they need to have a bevel milled on and the chamfers polished before sending them away for heat treatment. The polishing to the chamfers is important as it would be very hard to do after the blades had been hardened. When the blades come back from the heat treatment I will be surface grinding them all round.

June 23, 2015

Window to my workshop 89

As I have said on my web page the No 984 panel plane is to be my last. This is the beginning of the promised blog. I have been a bit slow starting as I have been busy with stock sales and many enquiries. Thank you very much for all your nice comments – I am not actually retiring as most people I knew retired and died, I will keep up the coffin dodging and I have many other things to do. These No 984 planes will keep me going for about 3 months.

Holtey No 984 a

This is the 420 stainless steel that I am using for the bottoms and sides of the plane. The plan is to start knocking some weight off them. I am trying not to let the weight of the finished plane go over 3 kilos. All surfaces will be milled and ground. The steel that I have here is enough to make a limited batch of 12 planes.

Holtey No 984 b

Here begins the slog, there is a lot of material to come away. This picture shows a bottom starting out 12 mm thick and it will end up just over 10 mm in the finished plane.

February 21, 2015

Window to my workshop 87

Filed under: A28 — Tags: , — admin @ 11:46 am

It has been a long time but the Chariot Plane is now finished. I have some No 983 planes to complete and then I am moving on to something new.

CI3A1405

CI3A1425

January 28, 2015

Window to my Workshop 86

Filed under: A28 — Tags: , , — admin @ 3:23 pm

Despite having some part made infills which had been drying for 20 years, I decided that I preferred this piece of rosewood (which has also been in my workshop for a long time, and I have very little left) – Dalbergia Cubiquitzensis – it has more ‘bling’ :-)

I am in the process of making a small batch of these planes, which will include this rosewood, Boxwood and a mystery wood – photos soon.

CI3A1383

January 23, 2015

Window to my Workshop 85

Filed under: A28 — Tags: , , — admin @ 4:21 pm

I am occasionally asked how to dovetail. It is a bit of a cheeky question and it would take me several months or more full time to teach this properly. Sometimes people seem to forget I am running a business.

I have been making dovetailed planes for over 25 years now and I still keep trying to improve my system. Another plane maker described my dovetails as made on the CNC and are very cold and clinical – is this how one would describe a precision job? Then guilty as charged.

Here are some photos of part of the dovetailing process.
 
Holtey A28 b

Holtey A28 c
 
Sometimes it is frustrating that I have to do this much work before closing a plane up. The pictures above show a Boxwood spacer which supports the sides whilst peining the dovetails. Sometimes I use aluminium for this process but as I am only making 6 planes it doesn’t have to do much work. Also the sides of the plane will not be scratched when removing the spacer. A lot of work for a piece of tooling which will be discarded after six uses.
 
 
Holtey A28 d
 
Showing everything in place ready for clamping in the vice. Note that the clamping plates support the dovetails as well. There is no movement and everything stays true to size.
 
 
Holtey A28 f
 
This is the first stage of peining. You will see that the peining looks quite messy and untidy as I am stuffing the extra brass into the voids.


Holtey A28 e
 
The last stage of peining the dovetails is the sides. Again the assembly is clamped in a precision vice with a spacer plate between the uneven peining on the underside so true reference is maintained.
 
The use of bimetals will show up any untidiness.
 
Easy isn’t it :-)

« Newer PostsOlder Posts »

Powered by WordPress